|
|
PBP Commentary |
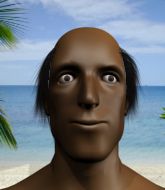
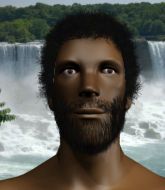
Coming up we have a middleweight MMA rules bout between Mick Ward (ranked 0 p4p, 0 weight class) and Carson Barett (ranked 0 p4p, 0 weight class). Both fighters look fresh as a daisy as they make their way towards the cage.
 |
|
 |
| 178 cm
25
184 lbs
2 - 1 - 0 |
|
185 cm
25
195 lbs
0 - 0 - 0 |
BJJ Blue Belt
Excellent boxer
Prefers standup |
|
BJJ Blue Belt
Brawler
Granite chin |
|
| |
|
Ladies and gentlemen. This fight is 3 rounds, in the middleweight division.
Introducing the fighter to my left, fighting out of the red corner.
With a record of
2 - 1 - 0, fighting out of The Island, Mick Ward!
And introducing the fighter to my right, fighting out of the blue corner.
With a record of
0 - 0 - 0, fighting out of The Island, Carson Barett!
The judges for this bout are Peter Branson, Bart Greer and Dirk Anderson.

The bell rings for round one and we are underway!
Barett ducks down and throws a hook to the body but Ward moves away.
We've been told by Ward's head coaches at Cozad The Island that he's been working on his takedown defense in preparation for this fight.

Barett has Ward up against the cage in a clinch.
Ward stops a takedown attempt from Barett.
Barett is trying to work for a single leg takedown but Ward pulls him back up using the underhooks.
Barett wants to take the fight to the mat but Ward manages to get underhooks and keep the fight in the clinch.
Mick Ward has stuffed three takedown attempts in the round now. That's going to take a lot out of Carson Barett.
Barett tries to score a body lock takedown but Ward shows good agility there to stay on his feet.

Barett has hold of one of Ward's legs. Ward is fighting the takedown attempt but Barett gets the trip and lands the takedown into guard.
We must be close to a standup if these guys don't pick up the pace.

Barett decides he's had enough of playing guard and decides to stand. Come on Ward, up you get!
Ward is looking to clinch but Barett is avoiding it.
Ward throws a series of punches but Barett moves out of range.
Barett clinches up with Ward and pushes him back against the cage.
Barett goes for a takedown in the clinch but Ward prevents it.
Barett goes for a takedown attempt but Ward pushes him away and we're back to fighting at a distance.
This has been an exciting period of action!
Ward tries to clinch but Barett moves out of range.
Jab, cross, leg kick. Nice combination by Ward!
Ward scores with a nice looking left hook and follows it up with an uppercut!
Ward doesn't manage to clinch there - Barett circles away.

That's one minute gone in the round.
Barett dodges the punch combination from Ward.
Barett ducks down and throws a hook to the body but Ward moves away.
Ward's corner calls for a 1-2. Ward obliges with the 1 part as he scores the single shot and moves back out of range.
Ward uses some good footwork to avoid the body shot by Barett.
Ward lands with a good body shot.
Barett doesn't react quick enough there as he takes a shot to the body.
Ward looks to score with a combo but nothing lands.
Barett throws a hook to the body but it doesn't connect.
Ward pushes forward with a 1-2 combination that forces Barett back to the cage. Ward follows up with a solid lead hook to the liver.
Barett misses with a takedown attempt - Ward sprawls well and throws a nice strike on the way out which just misses.
Mick Ward seems to be the more aggressive standup fighter in this bout.
Barett looks winded!
Ward throws a right hand that Barett ducks under and follows up with a left that Barett also avoids with ease.
Barett has Ward up against the cage in a clinch.
Barett has Ward pressed up against the cage and is working for takedown. Ward manages to improve position though and keeps the fight standing.
Barett goes for a takedown attempt but Ward pushes him away and we're back to fighting at a distance.
Ward tries to clinch but Barett moves out of range.

That's two minutes gone in the round.
Ward fails to land with a series of punches.
Ward fakes and then throws a beautiful body shot. Barett looks a bit winded and takes a step backwards to take a breath.
Wooooo! Give it up for these two warriors! They are putting on a show!
Ward lands a jab to the nose.
Barett takes a solid shot to the body. That one hurt him but he's trying not to show it.
Barett doesn't react quick enough there as he takes a shot to the body.
Ward throws a series of punches but Barett moves out of range.
Nice body punch from Ward.
Barett takes a jab right on the nose. That must have hurt but he shrugs his shoulders and looks to return the favor.
Ward shuffles to his left behind two crisp jabs. Barett eats them both and turns towards Ward to reposition himself and eats a stinging right hand-left hook combo.
Ward scores with a jab to the jaw.
Ward lands a jab. Then a cross. Then finally a nice hook to the body. Good work there by Ward.
Ward throws a series of punches but Barett avoids them all with ease.
Ward scores with a three punch combo!
Mick Ward is looking to keep the fight on the feet at all costs.
Ward wants to clinch.

That's three minutes gone in the round.
Ward lands a body shot.
Barett takes a shot to the body in his stride.
Barett takes one on the chin but seems OK.

Ward moves into the clinch successfully.
Ward digs a right hand underneath Barett's ribcage. Barett let out a lung full of air as it connected.
Barett has Ward pressed up against the cage. He's trying to work for a single leg takedown. Barett pulls back from the cage and twists to the side, sending Ward tumbling to the mat - Barett dives into Ward's guard.
Ward trying to strike from the bottom but really, it's not the best position to be doing that from!
Barett postures up.
Barett stands up from Ward's guard - Barett perhaps looking for a knockout.
Nice jab there from Ward.
Ward is working the combinations to good effect here.

That's four minutes gone in the round.
Wooooo! Give it up for these two warriors! They are putting on a show!
Ward throws a nice looking combination but Barett bobs and weaves to avoid any damage.
Barett closes the distance and after a bit of a stuggle, scores a takedown into Ward's guard.
Ward is working an open guard here, looking to improve his position. No doubt that will leave him open to counters but at least he's being more offensive.
Ward is trying to control the position from the bottom.
Ward is working the butterfly guard. He manages to land a nice scissor sweep and is now in half guard on the top. Nice move.
Barett has one foot on Ward's thigh - he pushes off and manages to get back to his feet.
Ward tries to clinch but Barett is having none of it.
Sloppy strikes from Ward. Those never looked like landing.
The crowd are going absolutely nuts as the round comes to an end - what a fantastic round of action!
Barett dives in and scores a takedown into Ward's guard.
Barett stands up from guard. Let's bang!
Ward throws a combination. Barett tries to block but a couple of punches get through.
The fighters are going at a pretty good pace and they're both starting to sweat now.
Ward lands a nice hook to Barett's body. Barett takes it in his stride and looks to land his own strikes.
And thats the end of the round the fighters go back to their corners.
Mick Ward dominated that round.
The corners get their ten second warning. Both fighters stand from their stools and stare eachother down, ready to get back to the action.

Ward lands with a two punch combination before moving back out of range.
Barett moves into the clinch.
Barett wants a takedown but no success here.
Barett is working on a single leg takedown against the cage. Ward can't fight it off and eventually Barett manages to take the fight to the floor. Ward looks annoyed but at least he's managed to land in guard.
Barett preventing the sweep.
Barett stands up and waves to Ward to follow him.
Some wild striking there from Ward.
Barett has closed the distance and engaged Ward in a clinch.
Barett is trying to work for a single leg takedown but Ward pulls him back up using the underhooks.
Barett is breathing heavily.
Barett tries to score a body lock takedown but Ward shows good agility there to stay on his feet.
Mick Ward has stuffed three takedown attempts in the round now. That's going to take a lot out of Carson Barett.

Ward manages to break the clinch.
Barett throws a sloppy body shot
and Ward counters with a nice uppercut.
That's one minute gone in the round.
Ward swings away but doesn't land with a series of punches.
Ward throws a nice looking combination but Barett bobs and weaves to avoid any damage.
Barett fails miserably with a takedown attempt.
Ward lands a straight punch to the body, keeping Barett at a distance.
Ward scores with a punch to the gut of his opponent.
Barett avoids the clinch attempt nicely.
Ward looks to land a combination. Barett sees it coming but can only parry a couple of the shots.
Ward is looking to wear down Barett with body shots, infact he's throwing more body shots than head shots at the moment.
Ward is looking to clinch but Barett is avoiding it.
Ward lands three nice shots there - that looked like it hurt!
Barett takes a punch to the jaw and another one to the bread basket.
Barett clinches.
Barett wants the takedown. Ward is fighting it off but Barett persists and manages to bring the fight to the ground, ending up in Ward's guard against the cage.
The fighters are pressed up against the cage, both looking to find a bit of space to work.
Fantastic stuff here - a very entertaining period of action, which has drawn cheers from the crowd.
Barett postures up.
Barett decides to stand up and beckons his opponent to follow.
That's two minutes gone in the round.
Ward closes the distance but Barett moves to the side
and Barett counters with a left and a right that stings Ward.
Ward is looking to take this fight into the clinch.
Mick Ward is winning the standup battle so far.
Barett on the wrong end of a vicious looking body shot.
Ward tries to clinch but is not successful on this occasion.
Ward looks to land a combination. Barett sees it coming but can only parry a couple of the shots.
Barett goes for a double leg but Ward avoids the attempt and the two fighters end up clinched against the cage as Ward continues to drive forward.
Ward lands a body punch.
Ward makes some space for himself and lands an uppercut.
Barett is working on a leg, looking for a takedown but Ward is defending well.
Ward throws a hook to the body. More of an arm punch but it's all scoring with the judges.
Ward breaks from the clinch.
Ward lands a jab. Then a cross. Then finally a nice hook to the body. Good work there by Ward.
Jab, cross, leg kick. Nice combination by Ward!
That's three minutes gone in the round.
Barett fails with a takedown attempt.
Ward misses with a jab, cross combination.
Ward doesn't manage to clinch there - Barett circles away.
Ward scores with a nice looking left hook and follows it up with an uppercut!
Barett closes this distance looking for a takedown but Ward circles away.
Ward lands with a nice body punch.
Barett takes a big uppercut there. He seems a bit wobbly but no, he's OK.
Ward throws a one two combo.
Ward scores to the head and body with a nice combination!
Barett closes the distance and presses his opponent up against the cage.
Barett goes for a takedown in the clinch but Ward prevents it.
Ward tries to work over Barett's body with a swooping hook but it only glances the target.
That's four minutes gone in the round.
Ward breaks from the clinch.
Ward tries to clinch up against the cage, rushing in to close the distance. Barett manages to break the clinch and circles back to the middle of the mat.
Ward tries to clinch but Barett is having none of it.
Barett changes levels and looks for a double leg takedown. Ward tries to avoid it but Barett manages to keep hold of a leg and drag Ward to the ground. Ward escapes though and pops straight back up to his feet.
Ward lands a jab, followed by a cross and another cross, as Barett backs up against the cage.
Barett swings and misses with a shot to the body
letting Ward counter with a right hand.
The crowd are loving this. Great action here.
Ward moves into range and throws a lovely three punch combination.
Ward moves into range and throws a lovely three punch combination.
Ward tries to clinch but Barett is having none of it.
The crowd are going absolutely nuts as the round comes to an end - what a fantastic round of action!
Ward pushes forward with a 1-2 combination that forces Barett back to the cage. Ward follows up with a solid lead hook to the liver.
Mick Ward is looking to throw some combinations by the looks of things.
Ward tries to clinch up against the cage, rushing in to close the distance. Barett manages to break the clinch and circles back to the middle of the mat.
Ward fakes and then throws a beautiful body shot. Barett looks a bit winded and takes a step backwards to take a breath.
A nice combination there by Ward.
And thats the end of the round the fighters go back to their corners.
Mick Ward dominated that second round.
OK. That's time! The bell goes and we're back to the action. This is the final round!

Ward fails in his attempt to clinch.
The fight moves into the clinch position.
Barett drops down looking for an ankle pick but Ward pulls his leg out and moves away.
Ward fails in his attempt to clinch.
Barett clinches with his opponent.
Barett changes levels and goes for a takedown here. Ward fights it off and pushes away nicely.
Barett showing good head movement there, avoiding the strikes from Ward.
Barett shoots in for a double leg but Ward sprawls well. That's going to sap some energy.
Mick Ward has stuffed three takedown attempts in the round now. That's going to take a lot out of Carson Barett.
Barett takes a big intake of breath there - he's definitely tired.
Ward fakes and then throws a beautiful body shot. Barett looks a bit winded and takes a step backwards to take a breath.
Ward moves into the clinch successfully.
That's one minute gone in the round.
Ward escapes the clinch and we're back to striking.
Barett gets tackled into the cage by Ward. Ward maintains the clinch.
Ward stops a takedown attempt from Barett.
Ward breaks the clinch and we're back to striking at distance.
Ward cracks a nice hook into Barett's ribs.
Ward tries to clinch but is not successful on this occasion.
Barett tries to drive through with a takedown attempt but Ward defends well and Barett ends up having to push Ward into the cage where they will battle it out in the clinch.
Ward lands with a light punch inside.
Ward breaks from the clinch.
Ward moves into range and throws a combination. A nice jab followed by a hook to the body.
A combination from Ward does no damage.
Ward swinging wildly here.
Ward throws a right and a left that both miss.
Ward lands a jab-cross combination.
Horrible takedown by Barett or perhaps it was just good defense by Ward which made him look bad.
That's two minutes gone in the round.
A punch combination from Ward misses.
Barett takes a shot right to the liver - Bas would have been proud of that punch.
Ward tries to clinch but is not successful on this occasion.
Ward throws a right and a left that both miss.
We've seen a great period of action over the last minute or so - credit to both fighters for going all out!
Jab, cross, leg kick. Nice combination by Ward!
Ward shuffles to his left behind two crisp jabs. Barett eats them both and turns towards Ward to reposition himself and eats a stinging right hand-left hook combo.
Ward misses with a double jab.
Barett closes the distance and clinches.
Ward goes for a body shot but it's blocked.
Barett has clasped his hands together around Ward's back... aaand, he's got a takedown into side control. Nicely done.
Barett stands up and beckons Ward to his feet.
Ward lands a straight punch to the body, keeping Barett at a distance.
Ward works over Barett's head and body with a nice combination.
That's three minutes gone in the round.
Ward looks to score with a combo but nothing lands.
Barett misses with a takedown attempt. He shot from a bit too far out.
Ward wants to clinch
and Barett counters with a left and a right that stings Ward.
Barett is on the wrong end of a nice combination from Ward.
Ward throws a nice hook to the body that draws an oooh from the crowd.
A combination from Ward does no damage.
A looping hook to the body misses from Barett. Ward does a little dance to reset his feet.
Barett tries to bum rush Ward with a series of wild strikes but Ward uses good footwork to avoid the assault.
Ward lands a body shot.
Barett gets cracked with a nice right hand there by Ward.
Ward throws a jab to the body, straight down the pipe. Boom. That sent Barett stumbling backwards but he manages to regain his composure quickly.
Barett takes the fight into the clinch.
That's four minutes gone in the round.
Ward scores with an uppercut up the middle.
Ward lands punches inside but they're not really causing much damage.
Ward is pressed up against the cage. Barett has hold of a leg and is looking to drag Ward down to the mat. Ward avoids the attempt though and has circled away. We're back to striking at a distance.
Ward throws a wild combination but nothing lands.
Ward misses with a series of wild punches.
Ward tries to keep at a distance but Barett has taken the fight into the clinch.
Ward breaks the clinch and we return to the middle of the mat.
Ward throws a combination but comes up with nothing but fresh air.
Barett tries to bum rush Ward with a series of wild strikes but Ward uses good footwork to avoid the assault.
This has been an exciting period of action!
As the round comes to an end the crowd are showing their appreciation for a great round of action.
Ward lands with an uppercut that bounces Barett off the cage and back into range.
Barett takes a body punch but keeps moving.
Carson Barett has stepped it up - he knows he needs a finish here!
Mick Ward is fighting for a decision here - he's started to take the cautious approach.
Ward misses with a few strikes there.
And that's the end of the fight!
Mick Ward showed his dominance in that final round.
Well I reckon that's a shut out for Ward, winning every round. Will the judges agree? They are the ones who matter, even if they are often depressingly incompetent. Over to the ring announcer for the scorecards.
Ladies and gentlemen, after 3 rounds of action, we go to the scorecards for a decision.
Judge Peter Branson scores the fight 30:27
Judge Bart Greer scores the fight 30:27
Judge Dirk Anderson scores the fight 30:27
In favor of your winner, by unanimous decision... Mick Ward!
In his post fight interview, Mick Ward started talking himself up. Luckily his charisma kept the crowd on side and gave him a good reception.
|
|
|
|
|
|
|
|
|
|
|
|
|
|
|
|
|
|
|
|
|
|
|
| S |
C
A |
G |
S |
C
B |
G |
|
S |
C |
G |
|
energy
A | B |
|
hype
A | B |
|
pop
A | B |
|
mgr
A | B |
|
FIGHT
RATING
100% |
|
|
|
|
|
|

