|
|
PBP Commentary |
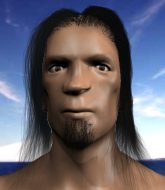
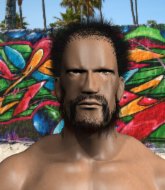
Coming up we have a welterweight MMA rules bout between Fred Star (ranked 0 p4p, 0 weight class) and Jay Jones (ranked 0 p4p, 0 weight class). We have two fighters making their debuts here, so let's see who comes out of this one with their first professional victory.
 |
|
 |
| 210 cm
25
170 lbs
0 - 0 - 0 |
|
200 cm
25
170 lbs
0 - 0 - 0 |
BJJ Blue Belt
Solid Muay Thai
Good chin |
|
Decent wrestler
Brawler
Determined |
|
| |
|
Ladies and gentlemen. This fight is 3 rounds, in the welterweight division.
Introducing the fighter to my left, fighting out of the red corner.
With a record of
0 - 0 - 0, fighting out of Hilo, Fred Star!
And introducing the fighter to my right, fighting out of the blue corner.
With a record of
0 - 0 - 0, fighting out of Hilo, Jay Jones!
The judges for this bout are Josh West, Ryoma Takatsuka and Colin Fray.

The bell rings for round one and we are underway!

Star closes the distance and pushes Jones back into the cage.

Star escapes the clinch and we're back to striking.
Star looks to score with a jab to the body but Jones is just out of range.

The fight moves into the clinch position.

Jones pulls guard effortlessly.
If this pace continues, the referee will definitely step in and force a standup.
Star is fighting to break Jones's control of his arms but Jones is doing a good job of controlling the position at the moment.
Jones wants to stand but Star is controlling the position.
Star wants to control from the top but Jones keeps moving.
Jones has a closed guard, preventing Star from standing up.
We get told so often about how wrestlers don't like to be on their backs. Let's see if Jones can do anything to dispel that myth.
Jones keeping moving, preventing Star from controlling successfully.

That's one minute gone in the round.

We're going to have a standup here because Fred Star wasn't active enough for the referee's liking.
Star shoots in for a takedown but Jones shows good takedown defense.
Left hook, right uppercut from Star.
Jones throws a leg kick but Star checks it.
Star closes the distance but Jones moves to the side
and Jones moves into the clinch.
Star drops to a knee looking for a takedown but Jones gets the underhooks and prevents it.
Star stalling.
Jones taking a breather.
Star wants a takedown but no success here.
That's three failed takedown attempts in the round for Fred Star. That's going to take a lot out of him.

That's two minutes gone in the round.
Jones wants to get back to striking at distance but Star won't allow it.
Star tries to jump guard but he falls flat on his backside. Jones smiles and moves away.
Star gets tackled into the cage by Jones. Jones maintains the clinch.
A frustrated look appears on Jones's face as he tries to break the clinch.
Jones stays in close to his opponent and throws a right hand to the body.
Star tries for a takedown. No joy.
Wooooo! Give it up for these two warriors! They are putting on a show!
Star lands a left hand.
Jones gets a nice trip takedown into half guard.
Star moves into full guard.
Jones slows down the pace of the fight for a moment. He'll need to remain active if he doesn't want to see the fight stood back up.

That's three minutes gone in the round.
It looks like Jones might be adopting somewhat of a lay and pray gameplan here, which I'm sure won't go down too well with the paying fans in attendance... Or the ring announcers come to think of it.
Star trying to keep a closed guard but Jones is proving a slippery customer.
Jones engaging in some classic timewasting tactics.

The ref calls for a clean break and stands the fighters back up. Jay Jones wasn't active enough on the ground.
Star fakes high and swings low for a body shot but Jones manages to avoid it.
Star throws a head kick that looked like it stung.
Jones fakes a strike and closes the distance, dragging Star to the ground. Jones is now in Star's guard.

That's four minutes gone in the round.
Jones slows down the pace of the fight for a moment. He'll need to remain active if he doesn't want to see the fight stood back up.
Star keeping moving, preventing Jones from controlling successfully.
The fighters are pressed up against the cage, both looking to find a bit of space to work.
Star looking to sweep using the butterfly guard but Jones puts pay to that idea as he passes nicely into half guard.
The two fighters exchange a few words. I couldn't hear what they were saying but maybe it's more fun if you make it up yourself. Jones connects with a nice short shot to Star's temple.
Star on the receiving end of some nice ground and pound.
Star really does look like a pencil wearing a pair of gloves. Let's hope he has a gameplan to suit that ridiculous body shape.
Fantastic stuff here - a very entertaining period of action, which has drawn cheers from the crowd.
Jones tries to pass to full mount but Star defends it.
As the round comes to an end the crowd are showing their appreciation for a great round of action.
Jones lands strikes from half guard.
Star is controlling Jones's trapped leg to prevent Jones from advancing to side control.
And thats the end of the round the fighters go back to their corners.
Jay Jones dominated that round.
The fighters get back to their feet, the hooter sounds and we're back to the action!

Jones goes for a double leg but Star avoids the attempt and the two fighters end up clinched against the cage as Star continues to drive forward.
Jones wants to break the clinch but can't.
Jones gets double underhooks to prevent a takedown attempt from Star.
Jones has picked Star up - he's going for a ride! Jones dumps his opponent to the mat with a thud and settles into half guard.
Still in half guard, Jones seems content to control.
Jones's corner are shouting for him to control the position and he seems happy to oblige.
Star moves his hips nicely and gets into full guard.
Jones showing good wrestling skills to control the position.
That's one minute gone in the round.
Jones works a leg free and moves into half guard.

Jones wants to work for an arm triangle but Star is really keeping half guard well and defending the submission attempt.
Jones wants to lay and pray for a moment but Star keeps working.
Jones trying to control the pace.
Jones stops Star from getting back to his feet.
That's two minutes gone in the round.
Neither fighter is being very active at the moment, with Jones in particular looking to stall.
Star trying to control here.
Jones lands strikes from half guard.
Jay Jones has got the better of the ground game so far.
Jones not doing much here.
Star is staying active underneath Jones, who seems content to just control the action from this position.
That's three minutes gone in the round.
Star is looking to control Jones's leg but it's slowly edging free. Can Star avoid being mounted?
The ref stands the fighters back up, due to lack of action by Jay Jones.
Jones takes one to the side of the head.
Star moves out of range as Jones throws a body kick.
Star throws a looping left and ducks down for a takedown. He's got his arms around Jones's waist but Jones gets an underhook and avoids the takedown by throwing Star off to one side.
Star fails with the takedown.
That's three failed takedown attempts in the round for Fred Star. That's going to take a lot out of him.
Jones tries to clinch up.
Jones has closed the distance and engaged Star in a clinch.
Star is trying to pull guard but Jones has him pressed against the cage.
Jones can't find room to land a body shot as Star controls the action.
Jones pulls Star into guard.
Jones striking from his own guard.
That's four minutes gone in the round.
Jones is working from a closed guard but he's struggling to control his opponent.
Star being controlled here momentarily.
Jones working from the bottom, still in full guard. He's managed to get a loose triangle. Star doesn't seem to be doing much to defend here, obviously he feels comfortable in the position. Star manages to throw the legs off his shoulder and he's back into guard - no problem.
Jones is working from a closed guard but he's struggling to control his opponent.
The crowd applaud the fighters efforts here as the round comes to an end.
Jones keeping moving, preventing Star from controlling successfully.
And thats the end of the round the fighters go back to their corners.
Jay Jones showed his class in that round. I'd imagine he'll take it on all the scorecards.
The minute break is over - no more time for sponges and pep talks - back to the action! This is the final round!

Jones misses with a hook to the body
and Star counters with a nice kick to the body.
Star will have to do better than that with his takedown attempts.
Star misses with a takedown attempt - Jones sprawls well and throws a nice strike on the way out which just misses.
Jones gets in close and instigates a clinch.
Star wants a takedown.
That's three failed takedown attempts in the round for Fred Star. That's going to take a lot out of him.
Jones pulls guard effortlessly.
Star has a momentary lapse of concentration, allowing Jones to throw up a leg and lock on what appears to be a pretty tight triangle! Star is fighting it off but it's all too little too late - Jones pulls down on the head and he's put Star to sleep! This one is all over!
Ladies and gentlemen, after 0:52 of round 3, we have a winner by way of Submission (Triangle). Jay Jones!
An out of breath and clearly excited Jay Jones thanked Cage Star for their help and support (and free stuff they sent him).
|
|
|
|
|
|
|
|
|
|
|
|
|
|
|
|
|
|
|
|
|
|
|
| S |
C
A |
G |
S |
C
B |
G |
|
S |
C |
G |
|
energy
A | B |
|
hype
A | B |
|
pop
A | B |
|
mgr
A | B |
|
FIGHT
RATING
100% |
|
|
|
|
|
|
