|
|
PBP Commentary |
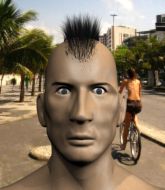
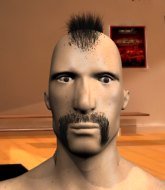
Coming up we have a lightweight MMA rules bout between Glen Dale Arizona (ranked 0 p4p, 0 weight class) and Akira Hayabusa (ranked 0 p4p, 0 weight class). The crowd seem to be enjoying Hayabusa's choice of entrance music: Bombs Away by Bob. Both fighters really staring each other down here, as Akira Hayabusa enters the cage!
 |
|
 |
| 180 cm
33
163 lbs
16 - 24 - 0 |
|
167 cm
28
166 lbs
9 - 7 - 0 |
BJJ Purple Belt
Lethal high kicks
Very strong |
|
Excellent grappler
Excellent boxer
Good gas tank |
|
| |
|
Ladies and gentlemen. This fight is 3 rounds, in the lightweight division.
Introducing the fighter to my left, fighting out of the red corner.
With a record of
16 - 24 - 0, fighting out of Tokyo, Glen Dale Arizona!
And introducing the fighter to my right, fighting out of the blue corner.
With a record of
9 - 7 - 0, fighting out of Tokyo, Akira Hayabusa!
The judges for this bout are Yukihiro Shimada, Shigeki Fujiwara and Kenichi Hosakawa.

The bell rings for round one and we are underway!
Hayabusa slips in close and lands a nice hook before moving back out of range.
Arizona throws a leg kick but Hayabusa moved away.
Hayabusa fakes a head shot and lands one to the body.
Arizona fails with an attempt to clinch.
Arizona closes the distance but Hayabusa moves to the side
and Hayabusa makes him pay by landing a nice hook to the body before moving out of range.
Arizona uses some good footwork to avoid the body shot by Hayabusa.
Arizona has been working on his boxing with his coaches at Ultimate MMA Training Center - Evil Evolution in the buildup to the fight.
Hayabusa misses with a wild body shot.
Arizona tries to clinch but fails miserably
letting Hayabusa counter with a right hand.
Arizona misses with a head kick.

That's one minute gone in the round.
Hayabusa shoots in for a takedown but Arizona shows good takedown defense.
Hayabusa scores with a shot to the body.
Arizona fails in his attempt to clinch.
Hayabusa circles away from the clinch attempt.
Hayabusa throws a body kick but he was well out of range there.
Arizona throws the left hand but Hayabusa avoids the punch easily.

Arizona gets caught on his heels momentarily as he allows Hayabusa to score an easy takedown into full guard.
Hayabusa is stalling in the full guard.
Hayabusa told us pre-fight that he has been working on his escapes in training. Let's see if he can call on some of his new skills to get back to his feet.

That's two minutes gone in the round.
Hayabusa trying to pass the guard but can't manage it just yet.
Hayabusa wants to control from the top but Arizona keeps moving.
Hayabusa slips nicely into half guard.
Hayabusa is trying to control. Arizona wants to improve his position but can't escape this time.
Hayabusa trying to control from Arizona's half guard. Arizona has other ideas though and has regained full guard.
The crowd cheering loudly, showing their appreciation for the quality fight we're seeing here.
Hayabusa works a leg free and moves into half guard.
Hayabusa wants to take a breather but Arizona is having none of it.
Arizona throws a strike from the bottom that misses.

Hayabusa is trying to work for a kimura but Arizona is defending well.
Hayabusa wants to free his trapped foot but Arizona is holding on for dear life with his legs.

That's three minutes gone in the round.
Arizona looks like he's trying to stand up.
Arizona flails away from the bottom but he's not doing any damage.

Arizona looking to work for a kimura from the bottom.
Arizona is breathing heavily.
Hayabusa passes to full mount!
Hayabusa is thinking about an arm triangle here, looking to tighten it up before moving to side control. Arizona can see it coming though and defends well with a couple of strikes to the head and some good arm positioning.
Arizona is writhing around trying to get back to his feet.
Hayabusa breaks from Arizona's wrist control and lands an elbow.
Arizona is trying to get back to his feet but can't.
Hayabusa can't quite control the action as he would like just now, as Arizona is looking to escape.
Hayabusa dominating with strikes here.
Both fighters really going for it on the ground here!

That's four minutes gone in the round.
The crowd cheering loudly, showing their appreciation for the quality fight we're seeing here.
Hayabusa trying to control but Arizona is having none of it.
Hayabusa controlling the position easily from mount.
Arizona in a bad spot here, taking shots to the head.
The fighters are pressed up against the cage, both looking to find a bit of space to work.
Arizona tries to lock up and control but Hayabusa gives him a forearm to the face and pushes him away.
Hayabusa lands a couple of nice shots there from mount.

Arizona is rocked!
Hayabusa wants to control the pace but Arizona is squirming around nicely.
Oh Arizona is still in real trouble! Will he be able to recover?!!
Hayabusa looking to finish here with some ground and pound. He lands one big shot that has Arizona covering up... and two more big strikes land, forcing the referee to step in and put and end to proceedings! This fight is all over!
Ladies and gentlemen, after 4:55 of round 1, we have a winner by way of TKO (Strikes). Akira Hayabusa!
Akira Hayabusa decided to thank the fans in attendance for making a great atmosphere. It seemed to go down pretty well.
|
|
|
|
|
|
|
|
|
|
|
|
|
|
|
|
|
|
|
|
|
|
|
| S |
C
A |
G |
S |
C
B |
G |
|
S |
C |
G |
|
energy
A | B |
|
hype
A | B |
|
pop
A | B |
|
mgr
A | B |
|
FIGHT
RATING
51% |
|
|
|
|
|
|

