|
|
PBP Commentary |
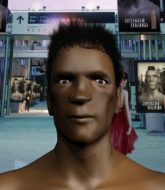
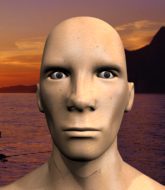
Coming up we have a light heavyweight MMA rules bout between Taishi Mori (ranked 0 p4p, 0 weight class) and Steel Penns Warrior (ranked 0 p4p, 0 weight class). Mori comes to the cage accompanied by The House That Snow Built. Taishi Mori has a significant reach advantage - let's see if he can make it count.
 |
|
 |
| 183 cm
20
210 lbs
5 - 1 - 0 |
|
170 cm
20
205 lbs
4 - 1 - 0 |
BJJ Purple Belt
Solid Muay Thai
Cardio machine |
|
BJJ Brown Belt
Brawler
Powerful |
|
| |
|
Ladies and gentlemen. This fight is 3 rounds, in the light heavyweight division.
Introducing the fighter to my left, fighting out of the red corner.
With a record of
5 - 1 - 0, fighting out of Montreal, Taishi Mori!
And introducing the fighter to my right, fighting out of the blue corner.
With a record of
4 - 1 - 0, fighting out of London, Steel Penns Warrior!
The judges for this bout are Elvis Blanc, Ian Loll and Steve Smith.

The bell rings for round one and we are underway!
Mori thuds his shin into the meat of Warrior's side.
Warrior shoots in but Mori avoids the takedown attempt easily.
A telegraphed takedown attempt from Warrior is defended easily by Mori.

Mori darts in and lands a nice takedown into half guard.

Mori is looking for a kimura here.
Warrior tries to get to full guard but Mori has control of the leg.
Warrior trying to control but Mori postures up.

That's one minute gone in the round.
Mori is sneakily working for an arm triangle but Warrior sees it coming and defends easily.
Mori tries to stand but his arm is trapped.
Warrior is trying to maintain the position but Mori is very close to passing his half guard.
Warrior blocking the ground and pound attempt from Mori.
Warrior trying to hold on to Mori's head to control him but Mori postures up.
Warrior is in trouble now - Mori has advanced to mount!

That's two minutes gone in the round.
Warrior is desperately trying to get back to half guard.
Mori trying to control but Warrior is having none of it.
Warrior is in a horrible position here. Mori smacks him with another shot as he tries to escape the position.
Mori landing strikes, looking to finish!
Mori will need to keep those long limbs tucked in whilst he's on the ground, to prevent any submissions.
Warrior really trying hard to get back to half guard here.
The fighters are starting to perspire pretty heavily.
Mori content just to control the position here.

That's three minutes gone in the round.
Mori is looking to secure an arm. He's managed it! He's pivoting for an armbar - that looks tight! But Warrior has managed to get out of it and now he's in a dominant position. Nice work from Warrior!
Warrior postures up in Mori's guard and throws a big left but Mori blocks it.
Mori working a defensive guard but Warrior manages to pass into side control anyway.

Warrior tries for a kimura. Not really close to a finish though.
Mori is trying to control Warrior's posture but Warrior avoids it.

That's four minutes gone in the round.
Warrior is looking for a kimura. He might have it! No, Mori has escaped the position, nice work there.
Mori is sneaking out the side here. He's bucked Warrior off and has taken his back!
Mori is looking to finish the fight by rear naked choke. Warrior knows exactly what he's got planned though, so he's defending well. Maybe a few strikes would soften Warrior for a finish.
The fighters are pressed up against the cage, both looking to find a bit of space to work.
Mori lands with a couple of good shots - one to the side of the head and one questionable shot that could be viewed as to the back of the head but the referee lets it go.
Mori has improved his flexibility recently so we will have to see if he can use that to his advantage.
The fans in attendance giving it up for the two fighters, who have really let it all hang out in the last minute or so!
As the round comes to an end the crowd are showing their appreciation for a great round of action.
Warrior defends a prolonged rear naked choke attempt and turns nicely into his opponent's guard.
Mori looking for submissions from the bottom here. Moving his hips around, possibly looking for an armbar.
And thats the end of the round the fighters go back to their corners.
Taishi Mori dominated that round.
That's time! Back to the action!

Excellent takedown into side control there by Mori.
Mori in side control, just content to control the action for now.
Mori seems to have a rather negative gameplan on the ground. He seems keen to just score the takedown and hold down Warrior for as long as he can get away with.
Warrior can't do much from the bottom here.
Mori working the ground and pound from side control.
That's one minute gone in the round.
Mori controls the position from side control.
Mori goes for an armbar! This could be all over! Wait, no, Warrior rolls with the submission and now he's on top in Mori's guard! Nice work there by Warrior!
Mori has his foot on Warrior's thigh. He's trying to push off and get in position for a triangle, I think. Warrior works his way back into a safe position though.
Mori looking for submissions off his back, moving his hips, looking for an opening.
Warrior is trying to work a guillotine from the top, or something like that? Don't know how he thinks he's going to get a finish from there.
Warrior tries to free his leg and advance position but Mori is retaining full guard.
That's two minutes gone in the round.
Mori looking to control.
Warrior trying to move into half guard but instead Mori has managed to sweep!
Taishi Mori overall seems to be getting the better of the ground position in the fight so far.
Warrior is looking for a triangle but Mori pushes his legs off easily.
Mori looking to control the position here, rather than advance.
Mori has decided he wants to stand but the closed guard of Warrior is proving hard to escape from.
Mori working some ground and pound from guard but it's not doing any damage.
That's three minutes gone in the round.
Warrior trying to keep a closed guard but Mori is proving a slippery customer.
Mori wants to control from the top but Warrior keeps moving.
Mori scoring with some ground and pound.
Warrior working the defensive guard well to avoid strikes from Mori.
Warrior tries to land a sweep but no joy.
Mori seems content to control from guard here. He's going to have to remain active though if he doesn't want to get stood back up.
Mori trying to control but Warrior is working from the bottom.
That's four minutes gone in the round.

The referee decides to stand the fighters back up, due to lack of activity on the part of Taishi Mori.
Warrior fails with a takedown attempt from distance.
A slapping leg kick lands for Mori.
Warrior walks forward, straight into a front kick from Mori.
Warrior with a lazy takedown attempt
and Mori counters with a nice leg kick.
Mori scores with a head kick. Warrior tried to block it but didn't get his arm up in time.
Warrior misses with a takedown
and Mori counters with a leg kick that reverborates around the arena.
Taishi Mori has stuffed three takedown attempts in the round now. That's going to take a lot out of Steel Penns Warrior.
This is a great period of action - very entertaining stuff!
Nice sprawl there from Mori as Warrior shoots in.
Warrior is breathing heavily.
Nice takedown defense from Mori. No joy for Warrior on that attempt.
Warrior looks for a takedown but Mori sprawls well.
Mori throws a leg kick which misses Warrior's front leg but catches the back leg as Warrior tries to avoid it.
Mori lands with a head kick! That's gotta hurt.
As the round comes to an end the crowd are showing their appreciation for a great round of action.
The crowd cheers as Mori lands an impressive looking overhand right. Warrior doesn't seem phased though.
Warrior takes a head kick and shrugs it off.
Mori gets the takedown into side control.
Mori throws a knee to the body but it doesn't do much damage.
And thats the end of the round the fighters go back to their corners.
Taishi Mori dominated that second round.
That's the end of the interval. I'm sure that seemed a lot quicker than a minute for our two fighters! Back to the action. This is the final round!

Mori turns his hip over beautifully as he lands a nice leg kick.
Warrior showing good head movement there, avoiding the strikes from Mori.
Mori plants his feet and lands a nice head kick!
Mori shoots in for a takedown from distance. He catches Warrior napping and manages to drive through into side control!
Warrior on the wrong end of some ground and pound.
Warrior struggling a bit here.
Mori is looking to take a break and control but Warrior is keeping him honest, looking to work from the bottom.
Mori working away.
Warrior tries to work a leg under to get back to half guard but Mori wriggles his own leg back out and remains in side control.
The ref warns both fighters not to hold the cage as they work up against the meshing.
That's one minute gone in the round.
Warrior avoids any damage from the ground and pound of Mori.
Mori goes for an armbar here - this could be all over! But no, Warrior has escaped beautifully and is now on top in side control! Oh, that's unlucky for Mori but great work by Warrior.
Mori taking a bit of punishment here - Warrior scoring with strikes.
Mori is looking to reverse the position.
Mori managing to avoid any damage from the strikes thrown by Warrior.
Warrior is trying to get an arm triangle but Mori is defending well.
Mori can't do much from the bottom here.
Warrior misses with a strike but at least he's keeping busy, looking to cause some damage - that will still help him when it comes to the judges scorecards.
Warrior advances nicely into full mount.
My spies in CB Gym inform me that Warrior has been getting involved in the gym's BJJ sparring sessions. Let's see whether that pays dividends!
Mori is writhing around trying to get back to his feet.
That's two minutes gone in the round.
Mori really trying hard to get back to half guard here.
Warrior goes for an armbar but he's fallen flat on his backside there and now Mori is on top in guard.
Wooooo! Give it up for these two warriors! They are putting on a show!
Mori is in close to Warrior's body, working some short punches and elbows.
Mori stands up and looks to throw the legs aside to pass to side control. Warrior swivels though and keeps the full guard.
Mori trying to control but Warrior is working from the bottom.
Mori looking to sit in guard and control but Warrior gets the butterfly guard and sweeps. He's now in the guard on the top.
Mori is active off his back here, looking for submissions.
That's three minutes gone in the round.
Warrior wants to control from the top but Mori keeps moving.
Mori wants to sweep but no luck.
Mori is working hard here to advance position.
Warrior stands and throws Mori's legs to the side, diving into side control.
Mori is trying to control Warrior's posture but Warrior avoids it.
Warrior tries to move to mount but Mori blocks the move with his legs.
Warrior is looking for a kimura. He might have it! No, Mori has escaped the position, nice work there.
You can see the frustration on Mori's face, being in this tough position on the bottom.
That's four minutes gone in the round.
Mori is trying to get back to half guard. He's pushing on Warrior's leg. He's managed it. Nice work.
Mori has no desire to be mounted, so is trying to control. Warrior is working away from the top position though.
Warrior is trying for a guillotine from the top but the pressure isn't in the right place so Mori is just riding it out for now. Warrior eventually gives up the hold.
Warrior trying to pass the guard but Mori defending well.
As the round comes to an end the crowd are showing their appreciation for a great round of action.
Warrior is looking for a kimura but Mori is holding onto that half guard position, so it's hard for Warrior to get the leverage.
Mori tries to get to full guard but Warrior has control of the leg.
Steel Penns Warrior has stepped it up - he knows he needs a finish here!
Taishi Mori is fighting for a decision here - he's started to take the cautious approach.
Warrior is working for a submission of some sort.
And that's the end of the fight!
That was a close round. You could make an argument for either fighter but I would give it to Taishi Mori.
Well Mori has outscored his opponent in every aspect of the fight today. Only a scarily incompetent judge or two will keep him from a well deserved win... Over to the ring announcer for the scorecards.
Ladies and gentlemen, after 3 rounds of action, we go to the scorecards for a decision.
Judge Elvis Blanc scores the fight 30:27
Judge Ian Loll scores the fight 30:27
Judge Steve Smith scores the fight 30:27
In favor of your winner, by unanimous decision... Taishi Mori!
Taishi Mori took to the microphone after his victory and thanked his sponsors, Kore Fight Nutrition [TG] for their support in the buildup to the fight.
|
|
|
|
|
|
|
|
|
|
|
|
|
|
|
|
|
|
|
|
|
|
|
| S |
C
A |
G |
S |
C
B |
G |
|
S |
C |
G |
|
energy
A | B |
|
hype
A | B |
|
pop
A | B |
|
mgr
A | B |
|
FIGHT
RATING
70% |
|
|
|
|
|
|

