|
|
PBP Commentary |
Coming up we have a middleweight MMA rules bout between Csk Hayabusa (ranked 0 p4p, 0 weight class) and Rake Moriom (ranked 0 p4p, 0 weight class). Rake Moriom has the better chin. Will he look to stand and bang today?
 |
|
 |
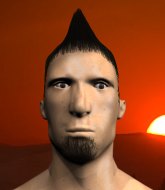
| 185 cm
24
185 lbs
0 - 0 - 0 |
|
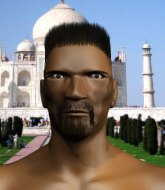
176 cm
18
185 lbs
0 - 2 - 0 |
BJJ Brown Belt
Brawler
Big heart |
|
BJJ Blue Belt
Brawler
Granite chin |
|
| |
|
Ladies and gentlemen. This fight is 3 rounds, in the middleweight division.
Introducing the fighter to my left, fighting out of the red corner.
With a record of
0 - 0 - 0, fighting out of Tokyo, Csk Hayabusa!
And introducing the fighter to my right, fighting out of the blue corner.
With a record of
0 - 2 - 0, fighting out of Tokyo, Rake Moriom!
The judges for this bout are Yuuki Gou, Kenichi Hosakawa and Ren Mimura.

The bell rings for round one and we are underway!

Moriom changes levels and drives through with a really nice takedown into side control. Hayabusa looks really pissed at himself for not defending that better.
Moriom postures up a little and throws a couple of hammerfists but they don't connect properly.
The fighters are pressed up against the cage, both looking to find a bit of space to work.

Moriom swings around for an armbar but Hayabusa sees it coming a mile off and turns beautifully into Moriom's guard.
Hayabusa postures up in Moriom's guard and throws a big left but Moriom blocks it.
Moriom has Hayabusa pulled in close to control his posture.

Hayabusa thinks about going for a leg but decides against it, in order to maintain the position.
Hayabusa won't allow Moriom to sweep him here.
Moriom is pulling down on Hayabusa's head. It's preventing any offense from Hayabusa, at least for the moment.
Hayabusa missing there with some ground and pound from the guard.
Hayabusa wants to pass the guard but Moriom is keeping the position.
Moriom really doesn't want to stay on the ground with Hayabusa. If he can't get it back to his feet, it's only a matter of time before he'll be tapping out.
Moriom utilising some decent striking defenses from the guard, preventing the ground and pound.
The ref warns both fighters not to hold the cage as they work up against the meshing.

That's one minute gone in the round.
Moriom is working the butterfly guard. He manages to land a nice scissor sweep and is now in half guard on the top. Nice move.
Hayabusa has hold of Moriom's hands but Moriom slips his arm to the side and lands an elbow.
Moriom throws a big elbow that misses, also allowing Hayabusa to regain full guard.
Moriom passes into half guard.
Moriom working Hayabusa over with strikes.
Moriom working to pass to mount. He's got his hand pressing down on Hayabusa's thigh. Hayabusa counters though and makes it back to full guard.
Moriom trying to pass the guard but can't manage it just yet.
Hayabusa has been looking to land a fair amount of strikes on the ground. He might be looking to soften his opponent up in order to work for a submission.

That's two minutes gone in the round.
Moriom missing there with some ground and pound from the guard.
Moriom looking to sit in guard and control but Hayabusa gets the butterfly guard and sweeps. He's now in the guard on the top.
The fighters are going at a pretty good pace and they're both starting to sweat now.
Moriom wants to sweep here but Hayabusa controlling him for the moment.
Hayabusa has gone for a leg lock! Moriom slips out almost immediately though and dives into Hayabusa's guard.
Moriom looking to sit in guard and control but Hayabusa gets the butterfly guard and sweeps. He's now in the guard on the top.
The crowd are loving this. Great action here.
Moriom is pulling down on Hayabusa's head. It's preventing any offense from Hayabusa, at least for the moment.

That's three minutes gone in the round.
Hayabusa won't allow Moriom to sweep him here.
Hayabusa is looking to pass into half guard but Moriom pushes him away with his feet and jumps on top - now Moriom is in guard.
Moriom trying to control the position from guard on top but Hayabusa is wriggling around, looking for whatever he can.
Moriom not doing a lot at the moment. He'll have to show some more aggression or the fight will get stood up.
Moriom drops back for a leg but he's not going to get it - he lets go and Hayabusa dives on top into guard.
Moriom looks winded!

That's four minutes gone in the round.
Hayabusa wants to get up but he can't break Moriom's closed guard. He needs to be careful trying to break the legs open, as he's open to submissions here.
Hayabusa passes easily into side control. Nice work.
Hayabusa tries for an arm triangle. That looks pretty tight to me. Is this one over!?! Possibly, maybe, no Hayabusa has let go of the choke. Obviously it wasn't as tight as we thought!
Moriom is looking for a sweep.
As the round comes to an end the crowd are showing their appreciation for a great round of action.
Moriom is sneaking out the side here. He's bucked Hayabusa off and has taken his back!
Wooooo! Give it up for these two warriors! They are putting on a show!
Moriom patiently working for the choke. Which fighter will keep their nerve here?
Moriom is trying to stick to Hayabusa's back but Hayabusa is turning into Moriom. He's managed to reverse the position - now he's in Moriom's guard. Polite applause from the crowd in appreciation of some nice Jiu Jitsu by Hayabusa.
And thats the end of the round the fighters go back to their corners.
Rake Moriom dominated that round.
Well, the break between rounds is over. Let's get back to the scrappin!

Hayabusa has a takedown stuffed.
Hayabusa tries to score a power double leg takedown but Moriom sees that one coming and sprawls well. That will dishearten Hayabusa somewhat.

Hayabusa feints and as Moriom raises his hands in defense, Hayabusa changes levels and drives through with a takedown into guard.
Moriom lands a beautiful switch and he's in full mount! That could spell trouble for Hayabusa!
Moriom punishing his opponent with strikes.
Moriom breaks from Hayabusa's wrist control and lands an elbow.
Moriom landing strikes from the mount.
Moriom lands with some vicious ground and pound - can Hayabusa hang on?
Both fighters are absolutely exhausted here.
Moriom landing punches.
That's one minute gone in the round.
Moriom punishing his opponent with strikes.
Moriom is still in mount, landing shots to his trapped opponent. Hayabusa can't stay in a position like this for much longer.
Moriom scores with a couple of good head shots there.
Moriom lands with some strikes.
Moriom unloading with bombs!
Hayabusa is squirming around, avoiding Moriom's attempts to control the action.
Moriom goes for an armbar but he's fallen flat on his backside there and now Hayabusa is on top in guard.
Moriom has a closed guard, preventing anything of note from happening. Perhaps he's looking to stall.
That's two minutes gone in the round.
Hayabusa is looking to stand up but Moriom won't let him.
Hayabusa keeps in close for a moment and lands a decent shot to the side of Moriom's head.
Hayabusa works a leg free and moves into half guard.
Moriom regains full guard. Nicely done.
This is a great period of action - very entertaining stuff!
Hayabusa in full guard, throwing the ground and pound. No damage this time.
Moriom wants to sweep here but Hayabusa controlling him for the moment.
Hayabusa postures up as if he's going to throw some strikes but drops back for an ankle! Moriom is in big trouble! He looks ready to tap! But no, he's escaped and dives on top of Hayabusa, into his guard.
Moriom trying to control but Hayabusa is working from the bottom.
That's three minutes gone in the round.
Hammerfist, elbow! yells Moriom's corner. There ya go! There ya go!
Moriom postures up in Hayabusa's guard and throws a big left but Hayabusa blocks it.
Moriom trying to control but Hayabusa is working from the bottom.
Moriom controlling from the top position.
Moriom postures up and scores with a shot to the body and a follow up elbow to the head.
That's four minutes gone in the round.
Moriom looking to sit in guard and control but Hayabusa gets the butterfly guard and sweeps. He's now in the guard on the top.
Hayabusa stands up and looks to throw the legs aside to pass to side control. Moriom swivels though and keeps the full guard.
Moriom lands a beautiful switch and he's in full mount! That could spell trouble for Hayabusa!
As the round comes to an end the crowd are showing their appreciation for a great round of action.
Moriom lands a nice shot to the head.
And thats the end of the round the fighters go back to their corners.
Rake Moriom showed his class in that round. I'd imagine he'll take it on all the scorecards.
The corners get their ten second warning. Both fighters stand from their stools and stare eachother down, ready to get back to the action. This is the final round!

Moriom looks for a takedown. He's got it. We're now in half guard.
Hayabusa has hold of Moriom's hands but Moriom slips his arm to the side and lands an elbow.
Moriom passes the guard and advances to mount!
Moriom lands with some strikes.
Moriom controlling the pace for now.
Moriom working Hayabusa over with strikes here.
That's one minute gone in the round.
Moriom is still in mount, landing shots to his trapped opponent. Hayabusa can't stay in a position like this for much longer.
Moriom lands a couple of nice shots there from mount.
Moriom goes for an armbar but he's fallen flat on his backside there and now Hayabusa is on top in guard.
Moriom takes a big intake of breath there - he's definitely tired.
Moriom wants to sweep but no luck.
Hayabusa scores with a decent looking elbow strike.
Hayabusa slips nicely into half guard.
Hayabusa looking for a kimura but he'll have to free his other leg if he wants to finish that. Perhaps he's just using it as a distraction technique.
Moriom is looking for a sweep. Hayabusa is wise to his cunning plan and keeps the top position.
That's two minutes gone in the round.
Hayabusa throwing shots but they're hitting the canvas more than the man.
Hayabusa is trying to work for a kimura. This could be trouble! No, Moriom has managed to free his arm - good work.
Hayabusa is working for a kimura but Moriom is defending it quite comfortably.
Fantastic stuff here - a very entertaining period of action, which has drawn cheers from the crowd.
Hayabusa prevents Moriom from improving his position.
That's three minutes gone in the round.
Hayabusa is working for a kimura but Moriom is defending it quite comfortably.
Hayabusa looking for a kimura but he'll have to free his other leg if he wants to finish that. Perhaps he's just using it as a distraction technique.
Moriom blocking the ground and pound attempt from Hayabusa.
That's four minutes gone in the round.
Hayabusa is looking for a kimura here.
Rake Moriom has got the better of the ground game so far.
Hayabusa is thinking about going for an arm triangle but he can't free his leg.
Moriom is trying to get back to full guard.
Hayabusa is trying to work for a kimura but Moriom is defending well.
The crowd applaud the fighters efforts here as the round comes to an end.
Moriom is doing well to avoid being mounted. He's controlling the position at the moment.
And that's the end of the fight!
I would just about give that final round to Rake Moriom.
Well Moriom has outworked and out performed his opponent in all aspects of the game today. He was simply too good and the decision should be no more than a formality. Over to the ring announcer for the scorecards.
Ladies and gentlemen, after 3 rounds of action, we go to the scorecards for a decision.
Judge Yuuki Gou scores the fight 27:30
Judge Kenichi Hosakawa scores the fight 27:30
Judge Ren Mimura scores the fight 27:30
In favor of your winner, by unanimous decision... Rake Moriom!
|
|
|
|
|
|
|
|
|
|
|
|
|
|
|
|
|
|
|
|
|
|
|
| S |
C
A |
G |
S |
C
B |
G |
|
S |
C |
G |
|
energy
A | B |
|
hype
A | B |
|
pop
A | B |
|
mgr
A | B |
|
FIGHT
RATING
66% |
|
|
|
|
|
|

