|
|
PBP Commentary |
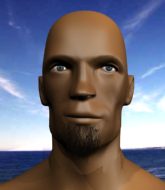
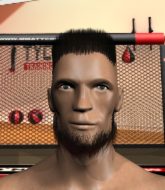
Coming up we have a middleweight MMA rules bout between Mark Coleman (ranked 0 p4p, 0 weight class) and Kiel Flay (ranked 0 p4p, 0 weight class). Coleman comes into the arena with Got Money blaring out of the sound system. Flay is bouncing up and down as he enters the arena, backed by Diabolic- Modern Day Future. Kiel Flay has the power to score a knockout today if he connects clean with Mark Coleman's chin.
 |
|
 |
| 174 cm
43
198 lbs
39 - 34 - 3 |
|
194 cm
33
202 lbs
11 - 5 - 0 |
Great wrestler
Excellent boxer
Cardio machine |
|
Good wrestler
World class MT
Good gas tank |
|
| |
|
Ladies and gentlemen. This fight is 3 rounds, in the middleweight division.
Introducing the fighter to my left, fighting out of the red corner.
With a record of
39 - 34 - 3, fighting out of Tokyo, Mark Coleman!
And introducing the fighter to my right, fighting out of the blue corner.
With a record of
11 - 5 - 0, fighting out of Hilo, Kiel Flay!
The judges for this bout are Yukihiro Yamamoto, Shirou Masuda and Ren Mimura.

The bell rings for round one and we are underway!
Coleman uses some good footwork to avoid the body shot by Flay.

Coleman fakes an overhand right and shoots for a takedown. Flay sprawls well initially but Coleman persists and gets the takedown into half guard.
We must be close to a standup if these guys don't pick up the pace.
Coleman wants to pass to mount but Flay is defending the position.
Flay wants to get back to full guard.
Coleman is looking to stall here but Flay recovers full guard.
Coleman working some ground and pound from guard but it's not doing any damage.
Coleman not doing a lot at the moment. He'll have to show some more aggression or the fight will get stood up.
Coleman stands and throws Flay's legs to the side, diving into side control.
Coleman cracks Flay with a big elbow.

That's one minute gone in the round.
Coleman throwing strikes but missing, from side control.
Coleman tries to cartwheel into mount but he doesn't manage it.
Flay gets back to half guard.
Coleman seems very keen to just sit and control from half guard but Flay does not like that idea so much and is remaining active off his back.
Coleman not throwing his punches with enough precision this time.
Coleman is thwarting Flay's attempts to control the position.
Coleman is keen to just control but Flay is a slippery customer.

That's two minutes gone in the round.
Coleman with a momentary lay and pray from half guard.
Coleman trying to mount his opponent but Flay defends it.
Coleman prevents Flay from standing back up.
Coleman missing with some ground and pound from the half guard.
Coleman looks to land a strike but Flay avoids it nicely and regains full guard.
The fighters are pressed up against the cage, both looking to find a bit of space to work.
Coleman lands a couple of elbows.
This is a great period of action - very entertaining stuff!
Coleman trying to pass the guard but can't manage it just yet.
Coleman lands a couple of digs.

That's three minutes gone in the round.
Coleman throwing shots from guard but he's hitting more mat than opponent.
Flay looking to hit a scissor sweep but Coleman is one step ahead there.
Coleman in full guard, throwing the ground and pound. No damage this time.
Coleman throws a big right hand that misses.
Coleman might be looking to lock onto one of his opponent's long limbs for a submission, whilst we're on the ground.
Coleman trying to control but Flay is working from the bottom.
Flay is trying to control the position but Coleman postures up.
Coleman pressing down on his opponent's thigh, looking to pass guard. Flay is keeping the position for now.
Flay keeping moving, preventing Coleman from controlling successfully.

That's four minutes gone in the round.
Coleman throwing strikes but missing.
Flay looks more muscular than last time we saw him. He must have been on the weights.
The ref warns both fighters not to hold the cage as they work up against the meshing.
Flay looking to hit a scissor sweep but Coleman is one step ahead there.

It looks like we're going to have a standup here. Neither fighter is doing enough on the ground.
Flay misses the shot to the body.
As the round comes to an end the crowd are showing their appreciation for a great round of action.
Coleman tries to shoot in for a takedown. He's got hold of a leg but Flay swivels and escapes.
Coleman swings wildly with a right hand that was never going to find it's target.
And thats the end of the round the fighters go back to their corners.
Mark Coleman dominated that round.
The minute break is over - no more time for sponges and pep talks - back to the action!

Coleman takes a body punch that cleary hurt but he's trying not to show any weakness.
Flay missing with a left hand there. Coleman was out of range so wasted energy throwing that one.
Coleman looks frustrated there after his takedown attempt is stuffed easily.
Coleman misses with a looping left.
Coleman shoots in for a takedown! He's got it and he's managed to land in side control! That's better than Coleman was expecting from the takedown attempt, I'm sure!
Flay regains half guard, as Coleman was trying to land strikes.
Coleman is stalling here. Flay is in no mood to hang around though. He's locked up a kimura from the bottom! Coleman seems to be keeping calm but he's forced to roll out of the hold and Flay has ended up in side control on the top. Nice work.
That's one minute gone in the round.
Flay working away.
Coleman tries to work a leg under to get back to half guard but Flay wriggles his own leg back out and remains in side control.
Mark Coleman overall seems to be getting the better of the ground position in the fight so far.
Coleman gets one leg under and gets the fight to half guard.
Coleman controlling the position well.
Flay wants to take a breather but Coleman is having none of it.
Flay is taking a breather. Coleman says something to him but it's hard to make out. Perhaps he's telling him to get on with it and actually do something.
Coleman is trying to maintain the position but Flay is very close to passing his half guard.
Flay prevents Coleman from improving his position.
That's two minutes gone in the round.

The ref stands the fighters back up, due to lack of action by Kiel Flay.
Coleman tries to score a power double leg takedown but Flay sees that one coming and sprawls well. That will dishearten Coleman somewhat.
Coleman fakes high and shoots in for a takedown but Flay avoids it really well and circles away.
That's three failed takedown attempts in the round for Mark Coleman. That's going to take a lot out of him.
Flay throws a hard body shot but it just misses.
No luck with that takedown attempt from Coleman.
Kiel Flay seems to be the more aggressive standup fighter in this bout.
Coleman takes a body punch but keeps moving.
That's three minutes gone in the round.
Coleman avoids the body shot from Flay.
Coleman shoots in for a takedown and gets it.
Coleman missing with the ground and pound from half guard.
Coleman misses with a head shot. Flay uses the momentum to regain guard.
Coleman advances to half guard.
That's four minutes gone in the round.
Coleman trying to control from half guard but Flay is working away.
Coleman wants to free his trapped foot but Flay is holding on for dear life with his legs.
The two fighters exchange a few words. I couldn't hear what they were saying but maybe it's more fun if you make it up yourself. Coleman connects with a nice short shot to Flay's temple.
Flay is trying to maintain the position but Coleman is very close to passing his half guard.
Flay blocking the ground and pound attempt from Coleman.
The crowd applaud the fighters efforts here as the round comes to an end.
Coleman works his way into full mount!
Flay avoids a series of strikes thrown by Coleman.
And thats the end of the round the fighters go back to their corners.
Mark Coleman dominated that second round.
That's the end of the round. The referee orders the cornermen out of the cage so we can get back down to business. This is the final round!

Coleman shoots in looking for a takedown but Flay manages to keep the fight standing, pushing Coleman's face into the canvas for good measure before circling away.
Flay wants to slow Coleman down by chopping away at his legs.
Coleman lands with a good body shot.
Coleman shoots in for a takedown. "Ole!" shouts Flay as he jumps to the side.
Coleman shoots in looking for a takedown. Flay tries to sprawl out of it but Coleman keeps driving through. The fighters are pinned against the cage. Flay manages to get underhooks and after a bit of a struggle, circles away and we're back to standing.
That's three failed takedown attempts in the round for Mark Coleman. That's going to take a lot out of him.
Nice takedown defense from Flay. No joy for Coleman on that attempt.
Coleman cracks Flay with a right hand to the side of the head.
That's one minute gone in the round.
Flay tries a switch kick but it misses it's target.
Coleman closes the distance and clinches up with Flay, looking for a takedown. Coleman pushes Flay against the cage but Flay circles to the side and manages to break the clinch.
Coleman shoots in for a double leg but Flay sprawls well. That's going to sap some energy.
Flay digs a good hook to Coleman's body.
Flay throws a shot from downtown. Coleman moves away and avoids it.
Flay fakes with the hands and throws a leg kick but Coleman is out of range.
Nice shot by Flay.
Coleman shoots in looking for a single leg takedown. Flay is trying to defend but Coleman finishes it well and ends up in half guard. Let's see if he can advance position further.
Coleman missing with the ground and pound from half guard.
That's two minutes gone in the round.
Flay regains full guard, whilst avoiding punches from Coleman.
Coleman passes Flay's right leg, so he's now in half guard.
The crowd cheering loudly, showing their appreciation for the quality fight we're seeing here.
Coleman looks towards his corner to check for any instructions. The corner give him nothing to work with, so he cracks Flay with a short hammerfist. I guess that's as good as any advice he could get in this position.
Coleman drops an elbow to the side of Flay's head.
Flay is refusing to be controlled, as Coleman sits in half guard.
Flay won't allow Coleman to pass to mount.
Coleman missing with the ground and pound from half guard.
Flay is pressing down on Coleman's left leg trying to get back to full guard. He's managed it.
That's three minutes gone in the round.
Coleman trying to control the position from guard on top but Flay is wriggling around, looking for whatever he can.
Flay controlling Coleman's posture.
Coleman wants to pass the guard but Flay is keeping the position.
Coleman throwing strikes from guard but Flay blocks nicely.
Flay is working the butterfly guard. He manages to land a nice scissor sweep and is now in half guard on the top. Nice move.
That's four minutes gone in the round.
Coleman is looking to escape.
Coleman tries to roll over but Flay keeps him under control.
Mark Coleman is fighting for a decision here - he's started to take the cautious approach.
Coleman is pressing down on Flay's left leg trying to get back to full guard. He's managed it.
Flay trying to control the position from guard on top but Coleman is wriggling around, looking for whatever he can.
Coleman is trying to control the position from the bottom.
Flay postures up to throw the ground and pound strikes but they don't connect.
Coleman controls Flay momentarily but Flay frees himself.
As the round comes to an end the crowd are showing their appreciation for a great round of action.
Coleman pulls Flay in close to prevent any damage.
Kiel Flay has stepped it up - he knows he needs a finish here!
Coleman is working an open guard here, looking to improve his position. No doubt that will leave him open to counters but at least he's being more offensive.
And that's the end of the fight!
Mark Coleman showed his dominance in that final round.
Well I reckon that's a shut out for Coleman, winning every round. Will the judges agree? They are the ones who matter, even if they are often depressingly incompetent. Over to the ring announcer for the scorecards.
Ladies and gentlemen, after 3 rounds of action, we go to the scorecards for a decision.
Judge Yukihiro Yamamoto scores the fight 30:27
Judge Shirou Masuda scores the fight 30:27
Judge Ren Mimura scores the fight 30:27
In favor of your winner, by unanimous decision... Mark Coleman!
Mark Coleman gave a mention to Springfield HW Nutrition in his post fight interview. That will please them (and hopefully generate some sales).
|
|
|
|
|
|
|
|
|
|
|
|
|
|
|
|
|
|
|
|
|
|
|
| S |
C
A |
G |
S |
C
B |
G |
|
S |
C |
G |
|
energy
A | B |
|
hype
A | B |
|
pop
A | B |
|
mgr
A | B |
|
FIGHT
RATING
44% |
|
|
|
|
|
|

