|
|
PBP Commentary |
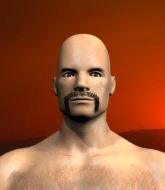
Coming up we have a heavyweight MMA rules bout between Walker Frank (ranked 0 p4p, 0 weight class) and Care Taker (ranked 0 p4p, 0 weight class). Walker Frank has the edge in experience - let's see if he can make that count tonight.
 |
|
 |
| 158 cm
24
279 lbs
1 - 2 - 0 |
|
200 cm
25
260 lbs
1 - 0 - 0 |
BJJ Blue Belt
Counter fighter
Cuts easily |
|
BJJ Blue Belt
Decent boxing
Can Moonwalk |
|
| |
|
Ladies and gentlemen. This fight is 3 rounds, in the heavyweight division.
Introducing the fighter to my left, fighting out of the red corner.
With a record of
1 - 2 - 0, fighting out of Tokyo, Walker Frank!
And introducing the fighter to my right, fighting out of the blue corner.
With a record of
1 - 0 - 0, fighting out of Tokyo, Care Taker!
The judges for this bout are Sosuke Kotani, Tatsuya Matsuyama and Kenichi Hosakawa.

The bell rings for round one and we are underway!
Frank throws a head kick that misses.

Taker clinches up against the cage.

Taker pulls Frank into guard.
Frank throwing elbows and punches but not connecting, as Taker works some decent striking defense from the bottom.
Taker striking off his back but it's not causing Frank any problems.
Taker seems keen to control rather than go for a submission, at least for now.
Taker working the defensive guard well to avoid strikes from Frank.

Taker is scooting his butt against the cage and has managed to get back to his feet. Frank presses him back against the cage, presumably looking to take the fight back to the mat.
Taker drags the fight down to the ground.
Frank working some ground and pound from guard but it's not doing any damage.
Frank has to be careful here, sitting in the guard of a superior BJJ player.
Frank throws a strike but Taker rolls with it and manages to sweep. Now he's in guard on top.

That's one minute gone in the round.
Taker stopping the sweep attempt from Frank.
Taker wants to control from the top but Frank keeps moving.
Taker won't allow Frank to get back to his feet.
Taker seems content to control from guard here. He's going to have to remain active though if he doesn't want to get stood back up.
Frank is looking to stand back up... there's a bit of a scramble and Taker dives into side control.
The ground and pound from Taker seems to be hitting the mat more than his opponent.

That's two minutes gone in the round.
Frank is putting a lot of effort into getting back to his feet here.

Taker working hard here to secure a kimura but he's not really in the right position for it.
Taker throws a knee to the body but it doesn't do much damage.
Frank is looking to work his way out of this bad position but Taker is controlling him well.
Frank parries the strikes from Taker easily there. Taker is wary of posturing up too much because it might enable Frank to escape.
Taker gets to mount! Frank was on the offensive and wasn't defending properly.
Frank working to try and regain half guard.
Taker misses with a series of strikes from mount. He'll no doubt be working on his ground and pound when he gets back to the gym.
Taker looking to ground and pound but Frank is blocking nicely.
Frank wants to try and get back to his feet.

That's three minutes gone in the round.
Frank slips a leg in and gets back to half guard.
Taker throwing shots but they're hitting the canvas more than the man.
Taker is trying to work for a kimura but Frank is defending well.
Taker thows a wild elbow that connects with the canvas.
Taker is pressing down on Frank's thigh, looking to free his foot. Frank is holding on for now.
Taker thows a huge punch but Frank dodges it nicely.
Frank is looking for a sweep. Taker is wise to his cunning plan and keeps the top position.
The fighters are pressed up against the cage, both looking to find a bit of space to work.
Frank is working hard here to advance position.
Taker not throwing his punches with enough precision this time.
Taker is trying to work for a kimura but Frank is defending well.

That's four minutes gone in the round.
Taker performing his best blanket impression for a moment.
The ref warns both fighters not to hold the cage as they work up against the meshing.
Frank is staying active underneath Taker, who seems content to just control the action from this position.
Frank wants to get back to his feet.
Taker seems very keen to just sit and control from half guard but Frank does not like that idea so much and is remaining active off his back.
Taker works his way into side control.
We've seen a great period of action over the last minute or so - credit to both fighters for going all out!
Taker happy to just control the position for now.
As the round comes to an end the crowd are showing their appreciation for a great round of action.
Taker tries for a kimura. Not really close to a finish though.
And thats the end of the round the fighters go back to their corners.
Care Taker dominated that round.
The minute break is over - no more time for sponges and pep talks - back to the action!

Taker wants to clinch.
Taker throws the overhand right but ducks down into a quick takedown attempt. Frank was covering up waiting for the punch and Taker finishes the takedown easily into guard.

Frank looks to be working for a triangle here. Oh, it looks like he might have it! Taker has picked Frank up and slammed him! Frank can't keep hold of the triangle and Taker manages to pass to side control!
Taker tries for a kimura. Not really close to a finish though.
Frank is trying to buck Taker off.
That's one minute gone in the round.
Frank is trying to get back to half guard.
Frank is trying to work for a sweep but Taker has mounted him!
Taker thuds his fist into the canvas! Oooouch!
Taker looking to secure an arm triangle but Frank defends it well.
Care Taker has got the better of the ground game so far.
Frank wriggling around on the bottom manages to avoid the strikes thrown by Taker.
Taker wants to take Frank's back but he can't do it this time.
Frank can't escape the position.
That's two minutes gone in the round.
Taker jumps to side control looking for an arm triangle but Frank manages to avoid the submission attempt.
Taker advances nicely into full mount.
Taker has control of Frank's right arm, working for a kimura. It's a bit of a token attempt though and Frank regains control of the situation pretty easily.
Frank is trying to stand up.
Frank is wriggling around trying to escape.
Taker has the superior BJJ but he's also working some ground strikes into his gameplan.
Taker unloads with some shots from mount but Frank bucks and avoids them well.
Frank can't escape the position.
Taker is thinking about an arm triangle here, looking to tighten it up before moving to side control. Frank can see it coming though and defends well with a couple of strikes to the head and some good arm positioning.
That's three minutes gone in the round.
Frank is wriggling around trying to escape.
Frank blocking the ground and pound.
Taker wants to control the pace but Frank is squirming around nicely.
Taker controlling from the full mount.
Frank wants to try and get back to his feet.
Frank is trying to escape the mount.
Taker misses with a head shot.
Frank really is a fat lump.
Taker looking to control and managing it successfully.
That's four minutes gone in the round.
Frank is in all sorts of trouble here.
Frank is trying to stand.
Both fighters are absolutely exhausted here.
Frank regains half guard.
Frank blocking the ground and pound attempt from Taker.
Frank is trying to stand.
Taker thows a wild elbow that connects with the canvas.
Frank tries to roll over but Taker keeps him under control.
Taker is figuring out what he wants to do next.
The fans in attendance giving it up for the two fighters, who have really let it all hang out in the last minute or so!
The crowd applaud the fighters efforts here as the round comes to an end.
Frank is trying to get back to full guard.
And thats the end of the round the fighters go back to their corners.
Care Taker showed his class in that round. I'd imagine he'll take it on all the scorecards.
That's time! Frank's corner gives him a slap on the ass as he gets ready to fight. This is the final round!


Taker lands a left and a right that send Frank crashing to the mat, dazed. Taker thinks about following him to the mat but decides to wave him back up to his feet!

It looks like Walker Frank has been cut.
This has been an exciting period of action!
The fight stays on the outside here - Frank looks like he's thinking about clinching though.
Taker tries to clinch up but Frank circles away and keeps his distance.
Taker is looking for a takedown here. He's shot in and has managed to get it, finishing up in Frank's half guard.
Taker thumps the canvas. Not on purpose obviously - he just missed Frank's head.
Taker is sneakily working for an arm triangle but Frank sees it coming and defends easily.
Taker is pressing down on Frank's thigh, looking to free his foot. Frank is holding on for now.
Taker frees up his trapped foot and advances to mount.
Taker thowing strikes but they're hitting the gloves, not doing any damage.
That's one minute gone in the round.
Taker throwing sloppy strikes here. Perhaps if he tightened up his striking from such a dominant position, he'd be able to finish easier.
Frank tries to hold on but Taker postures up.
Frank is just holding on here. Taker manages to take his back.

Taker has his opponent's back but Frank is looking to stand. He manages to get to his feet and shakes off Taker.
Walker Frank is looking to throw some combinations by the looks of things.
Frank tries to close the distance and clinch up against the cage but Taker paws at him with a jab and circles away.
Frank tries to clinch there but Taker circles away.
Frank tries to clinch
and Frank takes a counter punch right on the button for his troubles.
Both fighters are breathing heavily.
Frank throws a head kick that misses.
Frank fails in his attempt to clinch.
Taker pushes Frank up against the cage in a clinch.
Taker managing to block the knees to the body from Frank.
That's two minutes gone in the round.
Frank can't find room to land a body shot as Taker controls the action.
Taker gets control of Frank's arms and successfully pulls guard. Taker will no doubt be looking for submissions off his back.
Fantastic stuff here - a very entertaining period of action, which has drawn cheers from the crowd.
Taker throws a couple of shots from the bottom but they don't land.
Taker controls Frank momentarily but Frank frees himself.
Taker is working actively off his back, looking to secure an arm or perhaps work for a triangle.
Frank throwing strikes but missing.
Taker manages to sweep nicely, so he's now on top. Frank manages to get himself to full guard.
That's three minutes gone in the round.
Taker stands up from Frank's guard - Taker perhaps looking for a knockout.

Frank pushes Taker up against the cage in a clinch.
Taker managing to block the knees to the body from Frank.
Frank tried to land a shot to the body but connects with Taker's elbow.
Frank tries to work over Taker's body with a swooping hook but it only glances the target.
Frank tries to throw a body punch but Taker avoids it by throwing Frank back against the cage.
Frank tries to land knees in the clinch but Taker avoids the damage to the body.
Frank is trying to break the clinch but Taker has him pressed against the cage.
Taker prevents a body shot from Frank.
Frank misses with a punch to the body.
That's four minutes gone in the round.
Frank tries to throw a body punch but Taker avoids it by throwing Frank back against the cage.
Frank landing some nice looking knees to the body.
Frank has Taker pressed against the cage, preventing Taker from circling away and getting back to striking at range.
Taker has Frank pressed up against the cage. He's trying to work for a single leg takedown. Taker pulls back from the cage and twists to the side, sending Frank tumbling to the mat - Taker dives into Frank's guard.
Taker content to stall in guard here.
Frank is looking to stand back up but Taker counters by passing into half guard. Oops... bit sloppy there by Frank.
Wooooo! Give it up for these two warriors! They are putting on a show!
Taker postures up and decides to stand up, from the half guard. The ref calls for Frank to stand up.
The crowd are going absolutely nuts as the round comes to an end - what a fantastic round of action!
Taker drives through with a takedown into guard.
Walker Frank has stepped it up - he knows he needs a finish here!
Care Taker is fighting for a decision - hopefully he's judged it right and he's actually winning the fight.
Taker missing there with some ground and pound from the guard.
And that's the end of the fight!
Care Taker comfortably won the final round on my scorecard.
I've got Taker winning every round here. Surely the decision will go his way and he'll pick up a well deserved decision victory. Over to the ring announcer for the scorecards.
Ladies and gentlemen, after 3 rounds of action, we go to the scorecards for a decision.
Judge Sosuke Kotani scores the fight 27:30
Judge Tatsuya Matsuyama scores the fight 27:30
Judge Kenichi Hosakawa scores the fight 27:30
In favor of your winner, by unanimous decision... Care Taker!
|
|
|
|
|
|
|
|
|
|
|
|
|
|
|
|
|
|
|
|
|
|
|
| S |
C
A |
G |
S |
C
B |
G |
|
S |
C |
G |
|
energy
A | B |
|
hype
A | B |
|
pop
A | B |
|
mgr
A | B |
|
FIGHT
RATING
85% |
|
|
|
|
|
|
