|
|
PBP Commentary |
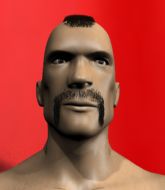
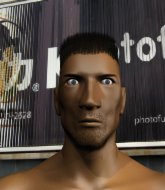
Coming up we have a welterweight MMA rules bout between Abraham Hubbard (ranked 0 p4p, 0 weight class) and Jack Ballarat (ranked 0 p4p, 0 weight class). Abraham Hubbard has the edge in experience - let's see if he can make that count tonight.
 |
|
 |
| 204 cm
19
177 lbs
0 - 5 - 0 |
|
179 cm
18
170 lbs
1 - 0 - 0 |
BJJ Blue Belt
Counter fighter
Cuts easily |
|
BJJ Blue Belt
Basic striking
Determined |
|
| |
|
Ladies and gentlemen. This fight is 3 rounds, in the welterweight division.
Introducing the fighter to my left, fighting out of the red corner.
With a record of
0 - 5 - 0, fighting out of Sydney, Abraham Hubbard!
And introducing the fighter to my right, fighting out of the blue corner.
With a record of
1 - 0 - 0, fighting out of Sydney, Jack Ballarat!
The judges for this bout are Steve Erwin, Darius Henderson and Winston Howard.

The bell rings for round one and we are underway!
Ballarat slips in close and lands a nice hook before moving back out of range.
Ballarat swinging wildly here.
Ballarat throws a decent looking leg kick but it doesn't land clean.
Hubbard moves out of range of the leg kick from Ballarat.
Hubbard shoots in looking for a takedown. Ballarat tries to sprawl out of it but Hubbard keeps driving through. The fighters are pinned against the cage. Ballarat manages to get underhooks and after a bit of a struggle, circles away and we're back to standing.
Ballarat lands a jab, followed by a cross and another cross, as Hubbard backs up against the cage.
Ballarat swings away but doesn't land with a series of punches.
Hubbard takes a body punch that cleary hurt but he's trying not to show any weakness.
Ballarat scores with a nice looking left hook and follows it up with an uppercut!
Ballarat walks straight into an uppercut. Luckily it didn't land flush.
Hubbard is on the wrong end of a nice combination from Ballarat.
Ballarat misses with a few strikes there.

That's one minute gone in the round.
Ballarat throws a jab, cross combination which is slipped

and Hubbard counters with a driving takedown into guard. Nice work there by Hubbard.
Ballarat looks winded!
We may be looking at a referee standup if the pace doesn't pick up soon.
Ballarat working the defensive guard well to avoid strikes from Hubbard.
Hubbard will need to keep those long limbs tucked in whilst he's on the ground, to prevent any submissions.
Ballarat wants to get back to his feet but Hubbard is in a dominant position and won't allow it.
Hubbard throws a big elbow that misses.

Hubbard thinks about going for a leg but decides against it, in order to maintain the position.
Hubbard stops Ballarat from standing up.
The fighters are pressed up against the cage, both looking to find a bit of space to work.

That's two minutes gone in the round.

The ref calls for a clean break and stands the fighters back up. Jack Ballarat wasn't active enough on the ground.
Ballarat throws a lazy uppercut

and Hubbard counters by clinching up.
Ballarat has had enough of the clinch and is looking to separate.
Hubbard taking a breather.

Hubbard escapes the clinch and we're back to striking.
Hubbard is looking to clinch.
The crowd cheering loudly, showing their appreciation for the quality fight we're seeing here.
Hubbard takes the fight into the clinch.
Hubbard pushes off and circles away, back to the middle of the mat.

That's three minutes gone in the round.
A combination from Ballarat does no damage.
Ballarat throws a series of punches but Hubbard avoids them all with ease.
Hubbard is looking to take this fight into the clinch.
Hubbard keeping a good distance there, avoiding the body shot.
Hubbard darts in looking for a takedown but Ballarat gets double underhooks and turns Hubbard into the cage.
Hubbard decides to pull guard.
Hubbard trying to strike off his back.
Ballarat preventing the sweep.
Hubbard not looking particularly offensive just at the moment.
Ballarat is looking to stand up but Hubbard won't let him.

That's four minutes gone in the round.
Hubbard is working an open guard here, looking to improve his position. No doubt that will leave him open to counters but at least he's being more offensive.
Hubbard manages to land a sweep and now he's in mount on top!
Hubbard is in full mount, looking to secure a guillotine but Ballarat is surviving well by controlling Hubbard's body position as best he can.
Hubbard really does look like a pencil wearing a pair of gloves. Let's hope he has a gameplan to suit that ridiculous body shape.
As the round comes to an end the crowd are showing their appreciation for a great round of action.
Hubbard controlling from mount.
And thats the end of the round the fighters go back to their corners.
Abraham Hubbard dominated that round.
That's the end of the round. The referee orders the cornermen out of the cage so we can get back down to business.

Hubbard misses with a takedown attempt. He shot from a bit too far out.
Hubbard misses with a takedown attempt - Ballarat sprawls well and throws a nice strike on the way out which just misses.
Some wild striking there from Ballarat.
Hubbard keeping at a good range here, avoiding a leg kick.
We've had a slow start to the round here - hopefully the action picks up.
Hubbard has his head slapped from side to side by a 3 punch combination. That must have hurt him.
Ballarat will need to tighten up his combinations if he doesn't want to gas himself out, swinging at thin air.
Ballarat is breathing heavily.
Hubbard dives in for a single leg takedown but Ballarat sprawls and the fighters end up clinched against the cage.
That's three failed takedown attempts in the round for Abraham Hubbard. That's going to take a lot out of him.
That's one minute gone in the round.
Ballarat wants to break free. God knows he wants to breaaaak freeee.
Ballarat is trying to push Hubbard away but Hubbard has him pressed against the cage, so he's going nowhere.
Hubbard looking to stall.
Ballarat has had enough of the clinch and is looking to separate.
Ballarat has had enough of the clinch but Hubbard keeps him there for the moment.
Ballarat is trying to break the clinch but Hubbard has him pressed against the cage.
Ballarat is trying to work out of this bad position, with his back against the cage.
Hubbard manages to break the clinch.
Sloppy strikes from Ballarat. Those never looked like landing.
Ballarat misses with an uppercut
and Hubbard counters into the clinch. Nicely done.
Hubbard avoiding damage.
Hubbard breaks from the clinch.
That's two minutes gone in the round.
A telegraphed right hand from Ballarat misses the target.
Ballarat misses with an uppercut. Hubbard saw that one coming.
Hubbard looks frustrated there after his takedown attempt is stuffed easily.
Ballarat throws a right hand that Hubbard ducks under and follows up with a left that Hubbard also avoids with ease.
Ballarat misses with a double jab
and Hubbard counters by moving into the clinch.
Hubbard breaks the clinch and we return to the middle of the mat.
Ballarat jabs Hubbard right on the nose. Hubbard blinks but takes it well.
Jack Ballarat seems to be the more aggressive standup fighter in this bout.
Ballarat throws a combination but it was largely blocked by Hubbard.
Hubbard changes levels and looks for a double leg takedown. Ballarat tries to avoid it but Hubbard manages to keep hold of a leg and drag Ballarat to the ground. Ballarat escapes though and pops straight back up to his feet.
Ballarat throws a left and a right that both miss
and Hubbard connects with a straight left hand counter down the middle.
That's three minutes gone in the round.
Hubbard throws a body punch but Ballarat moves out of range.
Hubbard shoots in looking for a double leg takedown. Ballarat defends it nicely.
Ballarat throws a combination that misses
so Hubbard counters with a double leg into guard. Good agility.
We could do with one of the fighters taking the initiative a bit more on the ground - they're both waiting to capitalize on a mistake.
Hubbard's corner is telling him to maintain position.
Hubbard trying to control the position from guard on top but Ballarat is wriggling around, looking for whatever he can.

Abraham Hubbard has forced the referee to step in and bring the fight back to the feet.
Ballarat lunges in with swinging rights and lefts but Hubbard circles away quickly and effectively.
Hubbard feints and then dives in with a takedown. That was a long way out but the feint bought him enough time to close the distance and complete the takedown. Now we'll play guard for a bit and see who can get the better of that position.
Ballarat is looking to get back to his feet but can't, whilst Hubbard is controlling him.
The ref warns both fighters not to hold the cage as they work up against the meshing.
That's four minutes gone in the round.
Wooooo! Give it up for these two warriors! They are putting on a show!
Hubbard's corner is telling him to maintain position.
The referee claps his hands together and tells the fighters to work.
The ref stands the fighters back up. Abraham Hubbard wasn't doing enough on the ground.
Ballarat falls off balance throwing a combination
and Hubbard counters by moving into the clinch.
Hubbard's corner are urging him to control the action in the clinch for a moment, rather than mount any serious offense. I'm sure the crowd appreciate those instructions... not.
Ballarat wants to get back to striking at distance but Hubbard won't allow it.
As the round comes to an end the crowd are showing their appreciation for a great round of action.
Hubbard breaks the clinch.
Ballarat falls off balance throwing a combination
and Hubbard counters with a nice double leg into guard.
And thats the end of the round the fighters go back to their corners.
Abraham Hubbard dominated that second round.
OK. That's time! The bell goes and we're back to the action. Ladies and gentlemen, this is the final round!

Ballarat swats away the attempt to clinch by Hubbard.
Ballarat ducks under a wild hook from Hubbard.
Ballarat throws a nice looking combination but Hubbard bobs and weaves to avoid any damage.
Ballarat lands with a shot to the body.
Ballarat misses with a low kick.
Ballarat fakes low and throws an overhand right that catches Hubbard on the side of the head.
Ballarat throws a right hand that Hubbard ducks under and follows up with a left that Hubbard also avoids with ease.
Jack Ballarat is looking to throw some combinations by the looks of things.
Ballarat fails to land with a series of punches.
Hubbard looks for a takedown here. Will he get it? Ballarat is fending him off so far but Hubbard persists. Nope, Ballarat circles away and we're back to standing.
Decent striking displayed by Hubbard there.
Ballarat misses with a double jab.
Both fighters are breathing heavily.
That's one minute gone in the round.
Jab by Hubbard.
Ballarat misses with a straight left.
A really sloppy takedown attempt there from Hubbard.
Hubbard uses good footwork to get in and out, landing a nice hook.
Ballarat takes a jab on the nose. He smiles like he loves it and keeps coming.
Sloppy strikes from Ballarat. Those never looked like landing.
Hubbard drives through with a takedown into Ballarat's guard. Let's see what he can do from the top position.
Hubbard stops Ballarat from standing up.
Hubbard wants to control from the top but Ballarat keeps moving.
That's two minutes gone in the round.
The ref stands the fighters back up. Abraham Hubbard wasn't doing enough on the ground.
Hubbard scores with a jab to the jaw.
Ballarat gets his head snapped back by a nice shot there.
Ballarat misses with a double jab.
A really sloppy takedown attempt there from Hubbard.
That's three failed takedown attempts in the round for Abraham Hubbard. That's going to take a lot out of him.
Ballarat throws a right and a left that both miss.
Hubbard avoids a punch combination nicely.
Ballarat misses with a few strikes there.
That's three minutes gone in the round.
Hubbard shoots in looking for a double leg takedown. Ballarat defends it nicely.
No joy there for Ballarat, who threw a few shots but didn't land.
Ballarat tries a switch kick but it misses it's target.
Ballarat takes one on the button.
Hubbard fails with a takedown attempt.
Hubbard throws a right hand that misses
and Ballarat counters with a stiff right hand.
No joy there for Ballarat, who threw a few shots but didn't land.
Ballarat throws a right hand that Hubbard ducks under and follows up with a left that Hubbard also avoids with ease.
That's four minutes gone in the round.
Ballarat throws a series of punches but Hubbard avoids them all with ease.
Ballarat swings wildly with a couple of big hooks
and Hubbard counters with a nice double leg into side control. Ballarat won't be happy with that.
Ballarat wants to get back to his feet but Hubbard drags him back down.
Sloppy strikes there by Hubbard.
Jack Ballarat has stepped it up - he knows he needs a finish here!
Hubbard blocks the strikes from Ballarat.
This is a great period of action - very entertaining stuff!
The crowd applaud the fighters efforts here as the round comes to an end.
Hubbard blocks the strikes from Ballarat.
And that's the end of the fight!
That was a close round. You could make an argument for either fighter but I would give it to Abraham Hubbard.
Well I reckon that's a shut out for Hubbard, winning every round. Will the judges agree? They are the ones who matter, even if they are often depressingly incompetent. Over to the ring announcer for the scorecards.
Ladies and gentlemen, after 3 rounds of action, we go to the scorecards for a decision.
Judge Steve Erwin scores the fight 30:27
Judge Darius Henderson scores the fight 30:27
Judge Winston Howard scores the fight 30:27
In favor of your winner, by unanimous decision... Abraham Hubbard!
|
|
|
|
|
|
|
|
|
|
|
|
|
|
|
|
|
|
|
|
|
|
|
| S |
C
A |
G |
S |
C
B |
G |
|
S |
C |
G |
|
energy
A | B |
|
hype
A | B |
|
pop
A | B |
|
mgr
A | B |
|
FIGHT
RATING
45% |
|
|
|
|
|
|
