|
|
PBP Commentary |
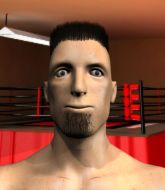
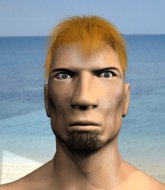
Coming up we have a welterweight MMA rules bout between Heino Green (ranked 0 p4p, 0 weight class) and Martin Harder (ranked 0 p4p, 0 weight class). Both fighters really staring each other down here, as Martin Harder enters the cage!
 |
|
 |
| 190 cm
23
180 lbs
3 - 4 - 1 |
|
170 cm
22
170 lbs
7 - 0 - 0 |
BJJ Blue Belt
Brawler
Very strong |
|
Powerful takedowns
Good kicks
Powerful |
|
| |
|
Ladies and gentlemen. This fight is 3 rounds, in the welterweight division.
Introducing the fighter to my left, fighting out of the red corner.
With a record of
3 - 4 - 1, fighting out of Amsterdam, Heino Green!
And introducing the fighter to my right, fighting out of the blue corner.
With a record of
7 - 0 - 0, fighting out of Amsterdam, Martin Harder!
The judges for this bout are Saam Ante, Nard Betker and Patrick Alders.

The bell rings for round one and we are underway!
Green tries a head kick but it misses.

Green gets caught on his heels momentarily as he allows Harder to score an easy takedown into full guard.
Harder chips away with some ground and pound.
Green keeping full guard, as Harder tries to pass.
Green trying to control the position here.
Harder pressing down on his opponent's thigh, looking to pass guard. Green is keeping the position for now.
Harder working some strikes from top position.
Green is trying to control the position from the bottom.
Green wants to sweep here but Harder controlling him for the moment.
Harder connects with a couple of short punches.

That's one minute gone in the round.
Green keeping full guard, as Harder tries to pass.
Harder throws a big elbow that misses.
Harder in full guard, throwing the ground and pound. No damage this time.
Green knows he needs to get back to his feet asap. He's simply no match for Harder on the ground.
Green controls Harder momentarily but Harder frees himself.
Green definitely looks more muscular than last time we saw him fight.
Harder looking to sit in guard and control but Green gets the butterfly guard and sweeps. He's now in the guard on the top.
Harder keeping moving, preventing Green from controlling successfully.
Green slows down the pace of the fight for a moment. He'll need to remain active if he doesn't want to see the fight stood back up.
The ref warns both fighters not to hold the cage as they work up against the meshing.
Harder looking to control.

That's two minutes gone in the round.
Green wants to control from the top but Harder keeps moving.

The ref stands the fighters back up because Heino Green just wasn't active enough.

Green clinches with his opponent.

Green is working on a single leg takedown against the cage. Harder can't fight it off and eventually Green manages to take the fight to the floor. Harder looks annoyed but at least he's managed to land in guard.
Harder seems keen to control Green's posture.
Green tries to free his leg and advance position but Harder is retaining full guard.
We've seen a great period of action over the last minute or so - credit to both fighters for going all out!
Harder is trying to keep Green in close.
Green looking to pass the guard.
Harder controls Green momentarily but Green frees himself.

Harder is looking for a guillotine. You can't force these things though and Green defends well.

That's three minutes gone in the round.
Harder throwing his legs up looking for a triangle.
Green stays in close to Harder's body and controls the position.
Harder manages to sweep nicely, so he's now on top. Green manages to get himself to full guard.
Harder wants to control from the top but Green keeps moving.
Green can't keep his opponent in guard - Harder advances to half guard, no doubt looking to mount.
Green wants to improve his position but Harder is controlling well.

That's four minutes gone in the round.
Green is working hard here to advance position.
Harder is looking for a kimura but Green is holding onto that half guard position, so it's hard for Harder to get the leverage.
Green trying to control here.
Harder wants to pass to mount but Green is defending the position.
Wooooo! Give it up for these two warriors! They are putting on a show!
Green trying to control but Harder postures up.
Harder looking to pass the half guard. Not this time.
As the round comes to an end the crowd are showing their appreciation for a great round of action.
Harder is looking for a kimura but he's never going to get it from there.
Green is looking for a sweep. Harder is wise to his cunning plan and keeps the top position.
And thats the end of the round the fighters go back to their corners.
Martin Harder dominated that round.
The fighters get back to their feet, the hooter sounds and we're back to the action!

Green drives through and clinches with Harder against the cage.

Green breaks the clinch.

Harder moves into the clinch successfully.
Harder is trying to trip Green. He has hold of a leg but Green is hopping around, keeping his balance for the moment. Harder persists though and gets the takedown into guard.
Green keeping moving, preventing Harder from controlling successfully.
Harder stands up and looks to throw the legs aside to pass to side control. Green swivels though and keeps the full guard.
Green will need to keep those long limbs tucked in whilst he's on the ground, to prevent any submissions.

Green is looking for a triangle but Harder pushes his legs off easily.
Green looking for submissions off his back, moving his hips, looking for an opening.
Green keeping moving, preventing Harder from controlling successfully.
That's one minute gone in the round.
Harder tries to free his leg and advance position but Green is retaining full guard.
Harder controlling from the guard. I say controlling but really, he's stalling.
Green keeping moving, preventing Harder from controlling successfully.
It looks like the ref is thinking about a standup.
Green looking to sweep using the butterfly guard but Harder puts pay to that idea as he passes nicely into half guard.
Neither fighter is being very active at the moment, with Harder in particular looking to stall.
Green pushes Harder off looking to stand but Harder dives back in and keeps control.
Harder trying to mount his opponent but Green defends it.
My spies in **CENTRUM GYM** inform me that Harder has been getting involved in the gym's BJJ sparring sessions. Let's see whether that pays dividends!
Harder is looking for an arm triangle, whilst trying to pass to side control. Green doesn't seem that keen to cooperate though. No luck this time Harder.
That's two minutes gone in the round.
Green looking for submissions from an awkward position here.
Green is trying to get back to full guard.
Harder sitting and controlling from the half guard.
Green tries to get to full guard but Harder has control of the leg.
That's three minutes gone in the round.
Green trying to control but Harder postures up.
Harder wants to lay and pray for a moment but Green keeps working.
Green tries to get to full guard but Harder has control of the leg.
Green is staying active underneath Harder, who seems content to just control the action from this position.
Harder is trying to work for a kimura. This could be trouble! No, Green has managed to free his arm - good work.
Harder is trying a forearm choke
I don't think that's going to do much at this level of the game.
Harder is working for a submission of some sort.
That's four minutes gone in the round.
The fighters are battling for position here. Green manages to regain full guard. Nice work.
Harder wants to pass the guard but Green is keeping the position.
Harder trying to control the position from guard on top but Green is wriggling around, looking for whatever he can.
Green is working an open guard here, looking to improve his position. No doubt that will leave him open to counters but at least he's being more offensive.
The crowd applaud the fighters efforts here as the round comes to an end.
Green working a defensive guard here.
Green wants to sweep here but Harder controlling him for the moment.
And thats the end of the round the fighters go back to their corners.
Martin Harder showed his class in that round. I'd imagine he'll take it on all the scorecards.
That's the end of the interval. I'm sure that seemed a lot quicker than a minute for our two fighters! Back to the action. Let's hear some noise people - this is the final round!

Harder shoots in and gets a takedown into half guard. Harder showed some decent athleticism there.
Harder throwing punches and elbows but they're not doing any damage.
Green is refusing to be controlled, as Harder sits in half guard.
Harder trying to mount his opponent but Green defends it.
Harder is working for a kimura but Green is defending it quite comfortably.
Green manages to get to full guard.
Harder wants to control from the top but Green keeps moving.
That's one minute gone in the round.
Green throwing rabbit punches from the bottom - showing the judges that he's keeping busy.
Green can't keep his opponent in guard - Harder advances to half guard, no doubt looking to mount.
Green is looking to improve his position.
Harder seems like he's working for an arm triangle here. He's freed his trapped foot and he's rotating nicely. Green is in big trouble! He's tapping out! This one is aaaaaaaaaaaall over!
Ladies and gentlemen, after 1:51 of round 3, we have a winner by way of Submission (Arm Triangle). Martin Harder!
|
|
|
|
|
|
|
|
|
|
|
|
|
|
|
|
|
|
|
|
|
|
|
| S |
C
A |
G |
S |
C
B |
G |
|
S |
C |
G |
|
energy
A | B |
|
hype
A | B |
|
pop
A | B |
|
mgr
A | B |
|
FIGHT
RATING
100% |
|
|
|
|
|
|

