|
|
PBP Commentary |
Coming up we have a middleweight MMA rules bout between Estarck Mano (ranked 0 p4p, 0 weight class) and Dreyveon Burnside (ranked 0 p4p, 0 weight class). Burnside has chosen Levels as his entrance music. Dreyveon Burnside will no doubt be looking to use his reach advantage to good effect.
 |
|
 |
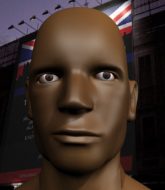
| 179 cm
20
200 lbs
1 - 0 - 0 |
|
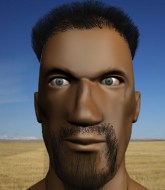
192 cm
20
200 lbs
1 - 0 - 0 |
BJJ Blue Belt
Basic striking
Good chin |
|
BJJ Blue Belt
Counter fighter
Very confident |
|
| |
|
Ladies and gentlemen. This fight is 3 rounds, in the middleweight division.
Introducing the fighter to my left, fighting out of the red corner.
With a record of
1 - 0 - 0, fighting out of Sydney, Estarck Mano!
And introducing the fighter to my right, fighting out of the blue corner.
With a record of
1 - 0 - 0, fighting out of Sydney, Dreyveon Burnside!
The judges for this bout are Summer Carpenter, Darius Henderson and Bruno Hogan.

The bell rings for round one and we are underway!
Mano fakes high and shoots in for a takedown but Burnside avoids it really well and circles away.
Burnside shoots in but Mano avoids the takedown attempt easily.
Burnside tries to drive through with a takedown attempt but Mano defends well and Burnside ends up having to push Mano into the cage where they will battle it out in the clinch.
Mano is looking for a takedown.

Mano pushes off and circles away, back to the middle of the mat.
Burnside avoids a kick to the body.
No luck with that takedown attempt from Mano.
That's three failed takedown attempts in the round for Estarck Mano. That's going to take a lot out of him.
Burnside throws a looping overhand right but Mano ducks down to avoid it.
Mano looks for a takedown here. Will he get it? Burnside is fending him off so far but Mano persists. Nope, Burnside circles away and we're back to standing.
Mano closes the distance and clinches up with Burnside, looking for a takedown. Mano pushes Burnside against the cage but Burnside circles to the side and manages to break the clinch.

That's one minute gone in the round.

Burnside moves into range and clinches up with Mano.

Burnside pushes off and circles away, back to the middle of the mat.
Mano tries for a takedown but Burnside sees it coming a mile off and avoids it easily.
Mano shoots for a double leg takedown but Burnside sprawls well. He's pushed Mano's face into the mat and manages to get back to his feet relatively easily.
Burnside fails with a takedown attempt.
Mano wants to clinch up but Burnside keeps it at a distance.
Mano fails with an attempt to clinch.
Burnside throws a monster uppercut resembling something out of street fighter but it doesn't land.
Mano looks for a takedown but Burnside sprawls well.
Burnside misses with a few strikes there.

That's two minutes gone in the round.
Mano tries to clinch but Burnside moves out of range.
Mano displays good takedown defense there as he swats away a double leg from Burnside.
Mano shoots in looking for a takedown. Burnside tries to sprawl out of it but Mano keeps driving through. The fighters are pinned against the cage. Burnside manages to get underhooks and after a bit of a struggle, circles away and we're back to standing.
Mano checks the leg kick.
Estarck Mano seems to be the more aggressive standup fighter in this bout.
Burnside shoots in with a takedown attempt and he has Mano pinned against the cage. Mano gets the underhooks and manages to circle away.
Mano could do with losing a few pounds - he looks very soft around the mid section, to put it politely.
Burnside scores with a crisp jab that stopped Mano in his tracks.

That's three minutes gone in the round.
Mano tries to clinch but Burnside is having none of it.
Burnside attempts a low kick but it misses it's target.
Mano shoots in for a takedown but Burnside shows good takedown defense.
Burnside misses with a wild combination.
Burnside swats away the attempt to clinch by Mano.
Burnside tries to clinch but Mano moves out of range.
Burnside shoots in for a takedown. "I don't think so" says Mano as he avoids it easily.

Mano moves into the clinch successfully.
Burnside fails to pull the fight into his guard.

That's four minutes gone in the round.
Mano tries to pull guard but can't drag his opponent to the mat. Burnside just stands there and leans against the cage.
Burnside's corner calls for him to break the clinch, which he does.
Burnside is looking to take this fight into the clinch.
Mano is trying hard to land a takedown here. Burnside sprawls well and keeps this one on the feet.
Burnside swats away the attempt to clinch by Mano.
Mano wants to clinch.
Mano shoots in looking for a takedown. Burnside tries to sprawl out of it but Mano keeps driving through. The fighters are pinned against the cage. Burnside manages to get underhooks and after a bit of a struggle, circles away and we're back to standing.
And thats the end of the round the fighters go back to their corners.
A close round but Dreyveon Burnside will probably get the nod.
The corners get their ten second warning. Both fighters stand from their stools and stare eachother down, ready to get back to the action.

Burnside fails miserably with a takedown attempt.
Horrible takedown by Mano or perhaps it was just good defense by Burnside which made him look bad.
Burnside fails with a takedown attempt.
Burnside swats away the attempt to clinch by Mano.
Mano pulls out of a head kick attempt.
Mano clinches.
That's one minute gone in the round.
Burnside breaks the clinch and we return to the middle of the mat.
Nice takedown defense from Burnside. No joy for Mano on that attempt.
Burnside swinging wildly here.
Burnside misses the jab.
Burnside tries a switch kick but it misses it's target.
Mano tries to clinch but is not successful on this occasion.
Burnside misses the shot to the body.
Mano is trying hard to land a takedown here. Burnside sprawls well and keeps this one on the feet.
That's three failed takedown attempts in the round for Estarck Mano. That's going to take a lot out of him.
Burnside tries to score a power double leg takedown but Mano sees that one coming and sprawls well. That will dishearten Burnside somewhat.
Burnside defends well against a solid takedown attempt from Mano.
That's two minutes gone in the round.
Burnside tries to bum rush Mano with a series of wild strikes but Mano uses good footwork to avoid the assault.
Burnside tries to clinch up against the cage, rushing in to close the distance. Mano manages to break the clinch and circles back to the middle of the mat.
Burnside fails to land with the punch combination there - jab, cross, hook, miss, miss, miss.
Mano throws a head kick that misses and slips in the process. He scrambles back to his feet and the fighters circle.
Mano misses with a takedown attempt - Burnside sprawls well and throws a nice strike on the way out which just misses.
Burnside attempts a low kick but it misses it's target.
Dreyveon Burnside seems to be getting the better of the standup.
Mano shoots in for a takedown but Burnside shows good takedown defense there and keeps this one on the feet.
Estarck Mano is looking to throw some combinations by the looks of things.
A head kick misses from Mano.
That's three minutes gone in the round.
Mano misses with a takedown attempt - Burnside sprawls well and throws a nice strike on the way out which just misses.
Both fighters are absolutely exhausted here.
Mano blocks a head kick by Burnside.
Mano moves out of range of the body kick from Burnside.
Burnside pushes Mano up against the cage in a clinch.
Burnside tries to pull guard but can't drag his opponent to the mat. Mano just stands there and leans against the cage.
Mano goes for a takedown attempt but Burnside pushes him away and we're back to fighting at a distance.
Burnside tries to bum rush Mano with a series of wild strikes but Mano uses good footwork to avoid the assault.
Mano stuffs a takedown. It's all about dictating where the fight takes place and Mano wants it to stay on the feet.
That's four minutes gone in the round.
Mano misses with an attempted mid kick.
Burnside takes the fight into the clinch.
Mano breaks the clinch and we return to the middle of the mat.
Mano closes this distance looking for a takedown but Burnside circles away.
Burnside tries to score a power double leg takedown but Mano sees that one coming and sprawls well. That will dishearten Burnside somewhat.
Burnside uses good footwork to get in and out and land a nice right hand before Mano has time to react.
Burnside throws a front kick aimed at Mano's knee but Mano avoids it well.
Mano shoots in for a takedown - he's clinched up with Burnside but Burnside pushes him off and we're back to square one.
And thats the end of the round the fighters go back to their corners.
Dreyveon Burnside showed his class in that round. I'd imagine he'll take it on all the scorecards.
The corners get their ten second warning. Both fighters stand from their stools and stare eachother down, ready to get back to the action. This is the final round!

Burnside fakes with an overhand right and moves in to clinch with Mano, pushing him back against the cage.
Mano breaks the clinch and we're back to striking at distance.
Mano throws a sloppy head kick and Burnside moves out of range easily.
Burnside closes the distance and clinches.
Burnside fails to pull guard.
Burnside is looking to take this one to the mat.
Mano tries to take the fight to the ground by pulling guard but can't manage it.
Burnside blocks an elbow strike.
Mano breaks from the clinch.
Mano shoots in for a takedown but Burnside shows good takedown defense.
Burnside shoots in for a takedown but doesn't get it.
Estarck Mano has stuffed three takedown attempts in the round now. That's going to take a lot out of Dreyveon Burnside.
That's one minute gone in the round.
Burnside shoots for a takedown but Mano saw that one coming a mile off and avoided it easily.
Mano leaves Burnside with his face pressed against the mat as he sprawls beautifully, defending against a solid takedown attempt.
Burnside takes a big intake of breath there - he's definitely tired.
Mano looking to throw a kick but he's pulled out of it.
A really sloppy takedown attempt there from Mano.
Burnside throws a sloppy head kick and Mano moves out of range easily.
Burnside has managed to clinch.
Mano tries to pull guard but Burnside forces him back to his feet, against the cage.
Burnside is trying to push Mano away but Mano has him pressed against the cage, so he's going nowhere.
Burnside is trying to work for a single leg takedown but Mano pulls him back up using the underhooks.
That's two minutes gone in the round.
Burnside tries to break free but Mano pushes him back against the cage.
Mano fails to pull guard.
Burnside is trying to break the clinch but Mano is controlling him.
Burnside prevents a takedown attempt there.
Burnside is trying to pull guard but Mano has him pressed against the cage.
Mano is working for takedown but Burnside is calmly controlling the position for now.
Mano breaks from the clinch.
Burnside clinches with his opponent.
Burnside breaks the clinch.
Mano shoots in for a takedown but Burnside shows good takedown defense there and keeps this one on the feet.
The crowd are loving this. Great action here.
Burnside slaps away a takedown attempt from Mano, before circling back to the center of the mat.
That's three minutes gone in the round.
Burnside fails with the takedown.
Mano shoots for a takedown but Burnside saw that one coming a mile off and avoided it easily.
Burnside shoots in and drives through. Mano sprawls well.
Burnside tries to drive through with a takedown attempt but Mano defends well and Burnside ends up having to push Mano into the cage where they will battle it out in the clinch.
Mano escapes the clinch and we're back to striking.
Mano fakes high and shoots in for a takedown but Burnside avoids it really well and circles away.
A really sloppy takedown attempt there from Mano.
That's four minutes gone in the round.
Mano takes a punch to the jaw and another one to the bread basket.
Burnside pushes forward with a 1-2 combination that forces Mano back to the cage. Burnside follows up with a solid lead hook to the liver.
Mano fails with a rather predictable takedown attempt.
Burnside scores with a nice right hand.
Burnside swats away the attempt to clinch by Mano.
The crowd applaud the fighters efforts here as the round comes to an end.
Mano tries to grapple but his opponent circles
and Burnside counters with a one-two to the body.
And that's the end of the fight!
Dreyveon Burnside comfortably won the final round on my scorecard.
Well Burnside has outworked and out performed his opponent in all aspects of the game today. He was simply too good and the decision should be no more than a formality. Over to the ring announcer for the scorecards.
Ladies and gentlemen, after 3 rounds of action, we go to the scorecards for a decision.
Judge Summer Carpenter scores the fight for Dreyveon Burnside!
Judge Darius Henderson scores the fight for Dreyveon Burnside!
Judge Bruno Hogan scores the fight for Dreyveon Burnside!
Dreyveon Burnside wins by unanimous decision!
Post fight, Dreyveon Burnside stared into the camera and said 'I want to thank my fan, family, and training staffs every thing .... I also want to thank Dana White for the amazing sport we have!!'.
|
|
|
|
|
|
|
|
|
|
|
|
|
|
|
|
|
|
|
|
|
|
|
| S |
C
A |
G |
S |
C
B |
G |
|
S |
C |
G |
|
energy
A | B |
|
hype
A | B |
|
pop
A | B |
|
mgr
A | B |
|
FIGHT
RATING
40% |
|
|
|
|
|
|
