|
|
PBP Commentary |
Coming up we have a light heavyweight MMA rules bout between Shelton David (ranked 0 p4p, 0 weight class) and Max Leyton (ranked 0 p4p, 0 weight class). We have two fighters making their debuts here, so let's see who comes out of this one with their first professional victory.
 |
|
 |
| 185 cm
25
207 lbs
0 - 0 - 0 |
|
185 cm
25
205 lbs
0 - 0 - 0 |
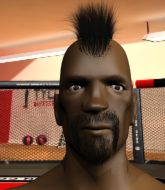
Good wrestling
Counter fighter
Cuts easily |
|
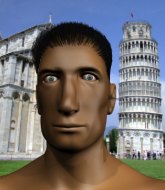
BJJ White Belt
Excellent MT
Determined |
|
| |
|
Ladies and gentlemen. This fight is 3 rounds, in the light heavyweight division.
Introducing the fighter to my left, fighting out of the red corner.
With a record of
0 - 0 - 0, fighting out of Hilo, Shelton David!
And introducing the fighter to my right, fighting out of the blue corner.
With a record of
0 - 0 - 0, fighting out of Hilo, Max Leyton!
The judges for this bout are Colin Fray, Josh West and Micheangelo Fripello.

The bell rings for round one and we are underway!
David listening to his corner there, landing a nice uppercut.
Leyton is looking to clinch but David is avoiding it.

David dives in and scores a takedown into Leyton's guard.
We've had a lack of effective grappling in the last minute or so, which could well see a referee standup.
David missing there with some ground and pound from the guard.
David missing there with some ground and pound from the guard.
David is looking to work some ground and pound but Leyton has wrist control.
David loading up with the ground and pound but he's missing more than he's landing in this flurry.
David working some ground and pound from guard but it's not doing any damage.
David trying to land body shots but he keeps hitting the mat.
David throwing shots from guard but he's hitting more mat than opponent.
David cracks Leyton with a solid left hand.
This is a great period of action - very entertaining stuff!
Leyton avoiding any damage from the ground and pound.
David loading up with the ground and pound but he's missing more than he's landing in this flurry.
The fighters are pressed up against the cage, both looking to find a bit of space to work.

That's one minute gone in the round.
David in full guard, throwing the ground and pound. No damage this time.
David throws a strike but Leyton rolls with it and manages to sweep. Now he's in guard on top.
David throws a couple of shots from the bottom but they don't land.
David throws a couple of shots from the bottom but they don't land.
Leyton slips nicely into half guard, despite the strikes coming from David.
David is looking for a sweep. Leyton is wise to his cunning plan and keeps the top position.
David tries to strike from the bottom but it doesn't land.
David missing with punches from the bottom.

That's two minutes gone in the round.
David punching from the bottom.
David throws a strike from the bottom that misses.
Leyton looks winded!
Leyton blocks the strikes from David.
David tries to strike from the bottom but it doesn't land.
The ref warns both fighters not to hold the cage as they work up against the meshing.
David flails away from the bottom but he's not doing any damage.
David connecting with a few gentle strikes.
David moves into full guard.
David trying to strike off his back.
The crowd cheering loudly, showing their appreciation for the quality fight we're seeing here.
David trying to punch from his back but it's not doing any damage.

That's three minutes gone in the round.
Leyton is on the wrong end of a couple of strikes there.
David trying to strike off his back.
David striking off his back but it's not causing Leyton any problems.
David trying to punch from his back but it's not doing any damage.
David throws a couple of weedy looking strikes off his back.
David throws some sloppy strikes off his back.
David throws a couple of weedy looking strikes off his back.
David punching from the bottom.
David looking for a sweep. Not yet David, not yet.
David on his back here. We all know that wrestlers don't like being on their back so let's see if David tries to get out of the position.
David throws a couple of shots from the bottom but they don't land.

That's four minutes gone in the round.
David striking from the bottom.
David throws a couple of shots from the bottom but they don't land.
David trying to strike from the bottom but really, it's not the best position to be doing that from!
David trying to strike off his back.
David throwing some rather feeble looking strikes off his back.
David tries to strike from the bottom.
David lands some strikes from the bottom.
Wooooo! Give it up for these two warriors! They are putting on a show!
As the round comes to an end the crowd are showing their appreciation for a great round of action.
David throwing short punches from the bottom.
David trying to strike off his back.
David trying to punch from his back but it's not doing any damage.
And thats the end of the round the fighters go back to their corners.
Shelton David dominated that round.
OK. That's time! The bell goes and we're back to the action.

Leyton takes a shot to the body in his stride.
Leyton tries to clinch up against the cage, rushing in to close the distance. David manages to break the clinch and circles back to the middle of the mat.
David looks to land a combination but Leyton avoids it well.
David scores with a sloppy right hand. Leyton should have avoided that one.
Leyton is looking to take this fight into the clinch.
Leyton tries to clinch but David is having none of it.
David swats away the attempt to clinch by Leyton.
That's one minute gone in the round.
Leyton moves in looking to clinch but David pushes him off.
Leyton is looking to clinch but David is avoiding it.
David scores with a body shot.
David shoots in for a takedown but doesn't get it.
Leyton tries to clinch up against the cage, rushing in to close the distance. David manages to break the clinch and circles back to the middle of the mat.
Max Leyton is looking to keep the fight on the feet at all costs.
David circles away from the clinch attempt.
That's two minutes gone in the round.
Leyton is looking to take this fight into the clinch.
Leyton is breathing heavily.

Leyton darts in and clinches David up against the cage.
Leyton with an attempt at a knee that misses.
Leyton is looking to score with knees to the body. Maybe he'll change it up and go body then head. David is defending well for now.
David on the defensive, avoiding the knees to the body.
David is trying to drag Leyton to the mat but Leyton just about manages to keep his footing. He used the cage to his advantage there.
Leyton throws a vicious knee straight up the middle but David blocks it with crossed arms.
Leyton using the Thai plumb to throw knees but David has his back arched nicely, preventing the strike.
That's three minutes gone in the round.
Leyton stops a takedown attempt from David.
That's three failed takedown attempts in the round for Shelton David. That's going to take a lot out of him.
David has had enough of the clinch and is looking to separate.
Leyton with an attempt at a knee that misses.
David goes for a takedown in the clinch but Leyton prevents it.
Leyton with the Thai clinch. He's looking to land a big knee but he's not managed it this time.
David is trying to work for a single leg takedown but Leyton pulls him back up using the underhooks.
Leyton scores a nice knee to the body.
Leyton using the Thai plumb to throw knees but David has his back arched nicely, preventing the strike.
Leyton lands a knee to the head.
David blocks a knee to the body. He'll have a nicely bruised forearm in the morning.
That's four minutes gone in the round.
David avoiding damage as Leyton throws knees to the body.
David tries for a takedown but Leyton manages to get underhooks.
Leyton crunches a lovely knee into David's ribcage.
Leyton keeps the fight in the clinch, despite David's efforts to push away.
Leyton lands a knee to the body.
David on the defensive, avoiding the knees to the body.
Leyton using the Thai plumb to throw knees but David has his back arched nicely, preventing the strike.
Leyton landing knees to the body.
Leyton misses the knee to the body. Nice hip positioning from David.
Leyton tries to land knees in the clinch but David avoids the damage to the body.
And thats the end of the round the fighters go back to their corners.
Max Leyton showed his class in that round. I'd imagine he'll take it on all the scorecards.
That's the end of the round. The referee orders the cornermen out of the cage so we can get back down to business. Ladies and gentlemen, this is the final round!

Leyton stuffs the takedown attempt from David. David gets slowly back to his feet.
David swings and misses with a hook to the body.
David shoots in for a takedown. "Ole!" shouts Leyton as he jumps to the side.
David misses with an uppercut.
We've had a slow start to the round here - hopefully the action picks up.
Leyton is looking to take this fight into the clinch.
David swings away but doesn't land with a series of punches.
Both fighters are breathing heavily.
That's one minute gone in the round.
David looks frustrated there after his takedown attempt is stuffed easily.
That's three failed takedown attempts in the round for Shelton David. That's going to take a lot out of him.
Leyton doesn't manage to clinch there - David circles away.
David avoids the clinch attempt nicely.
David fakes high and shoots in for a takedown but Leyton avoids it really well and circles away.
Leyton tries to close the distance and clinch up but David swats him away and circles back towards the center.
That's two minutes gone in the round.
Leyton is looking to take this fight into the clinch.
The fight stays on the outside here - Leyton looks like he's thinking about clinching though.
Leyton moves in looking to clinch but David pushes him off.
Leyton tries to close the distance and clinch up against the cage but David paws at him with a jab and circles away.
That's three minutes gone in the round.
Leyton slips a straight right by David.
Leyton tries to clinch but David moves out of range.
Shelton David seems to be the more aggressive standup fighter in this bout.
Leyton tries to close the distance and clinch up but David swats him away and circles back towards the center.
David changes levels and looks for a double leg takedown. Leyton tries to avoid it but David manages to keep hold of a leg and drag Leyton to the ground. Leyton escapes though and pops straight back up to his feet.
Leyton tries to clinch but David moves out of range.
Leyton is looking to take this fight into the clinch.
Leyton tries to clinch up.
That's four minutes gone in the round.
Leyton moves in looking to clinch but David pushes him off.
David avoids the clinch attempt nicely.
Leyton tries to close the distance and clinch up but David swats him away and circles back towards the center.
Leyton tries to clinch but David is having none of it.
Leyton tries to clinch up against the cage, rushing in to close the distance. David manages to break the clinch and circles back to the middle of the mat.
Leyton displays good takedown defense there as he swats away a double leg from David.
And that's the end of the fight!
Max Leyton comfortably won the final round on my scorecard.
I think Leyton has won this one but let's see whether the judges agree with me. Over to the ring announcer for the scorecards.
Ladies and gentlemen, after 3 rounds of action, we go to the scorecards for a decision.
Judge Colin Fray scores the fight for Shelton David!
Judge Josh West scores the fight for Shelton David!
Judge Micheangelo Fripello scores the fight for Shelton David!
Shelton David wins by unanimous decision!
|
|
|
|
|
|
|
|
|
|
|
|
|
|
|
|
|
|
|
|
|
|
|
| S |
C
A |
G |
S |
C
B |
G |
|
S |
C |
G |
|
energy
A | B |
|
hype
A | B |
|
pop
A | B |
|
mgr
A | B |
|
FIGHT
RATING
28% |
|
|
|
|
|
|

