|
|
PBP Commentary |
Coming up we have a bantamweight MMA rules bout between Tsutomu Miyazaki (ranked 0 p4p, 0 weight class) and Aron Burza (ranked 0 p4p, 0 weight class). The crowd seem to be enjoying Burza's choice of entrance music: Du Hast - Rammstein. Both fighters look fresh as a daisy as they make their way towards the cage.
 |
|
 |
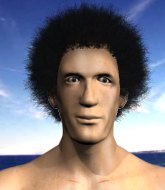
| 165 cm
24
147 lbs
13 - 5 - 2 |
|
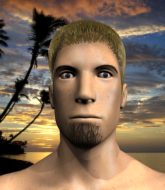
168 cm
28
148 lbs
6 - 0 - 0 |
Good wrestling
Brawler
Granite chin |
|
Good wrestler
Decent boxing
Powerful |
|
| |
|
Ladies and gentlemen. This fight is 3 rounds, in the bantamweight division.
Introducing the fighter to my left, fighting out of the red corner.
With a record of
13 - 5 - 2, fighting out of Helsinki, Tsutomu Miyazaki!
And introducing the fighter to my right, fighting out of the blue corner.
With a record of
6 - 0 - 0, fighting out of Amsterdam, Aron Burza!
The judges for this bout are William Gold, James Ackerman and Phil Schofield.

The bell rings for round one and we are underway!

Burza feints and as Miyazaki raises his hands in defense, Burza changes levels and drives through with a takedown into guard.
We must be close to a standup if these guys don't pick up the pace.
Miyazaki will have to put a bit more behind his punches if he's going to do any damage from this position.
Burza wants to control from the top but Miyazaki keeps moving.
Burza throws a big elbow that misses.
Burza tries to free his leg and advance position but Miyazaki is retaining full guard.
The fighters are pressed up against the cage, both looking to find a bit of space to work.
Both fighters really going for it on the ground here!
Burza slips effortlessly into side control - very nice.
Burza throwing ground and pound but whilst doing so, he forgets to control position and Miyazaki works his way back to half guard. Good composure under pressure.
Burza is keen to just control but Miyazaki is a slippery customer.
Miyazaki lands one or two decent shots to the body here. Although from his own half guard, he's not going to be causing too much damage.
Miyazaki is staying active underneath Burza, who seems content to just control the action from this position.

That's one minute gone in the round.
Miyazaki holds on for dear life, maintaining half guard for now.
Miyazaki regains full guard. Nicely done.

Miyazaki looking for submissions from the bottom here. Moving his hips around, possibly looking for an armbar.
Miyazaki keeping full guard, as Burza tries to pass.
Burza wants to control from the top but Miyazaki keeps moving.
Miyazaki seems to have improved his submission grappling technique since last time we saw him. Let's see if he can pull off a submission.
Miyazaki working a defensive guard here.
Burza works a leg free and moves into half guard.
Burza trying to control from half guard but Miyazaki is working away.
Burza thows a wild elbow that connects with the canvas.
Miyazaki has no desire to be mounted, so is trying to control. Burza is working away from the top position though.

The fighters are starting to perspire pretty heavily.
Burza is looking for a kimura here.

That's two minutes gone in the round.
Burza looking to pass the half guard. Not this time.
Burza is looking for a kimura. It's going to be difficult to finish that from half guard though and Miyazaki defends it well.
Burza is working for submissions here but there's nothing on.
Miyazaki is looking to regain full guard. Not this time though.
Burza is trying to control the action in half guard but Miyazaki is working away on the bottom, looking perhaps to get back to full guard.
The crowd cheering loudly, showing their appreciation for the quality fight we're seeing here.
Miyazaki punching from the bottom.
Miyazaki is not content to let Burza control the position.
The fighters are battling for position here. Miyazaki manages to regain full guard. Nice work.
Burza looking to sit in guard and control but Miyazaki gets the butterfly guard and sweeps. He's now in the guard on the top.

That's three minutes gone in the round.
Burza is active off his back here, looking for submissions.
Burza manages to land a sweep and now he's in mount on top!
Miyazaki throwing hammer fists to the chest of Burza. What's that going to do exactly?
Miyazaki is looking to get to half guard.
Miyazaki is writhing around trying to get back to his feet.
Burza tries to control but Miyazaki wriggling away.
Miyazaki really trying hard to get back to half guard here.
Miyazaki in a bad spot here, taking shots to the head.
Burza with some aggressive grappling here. He's looking for submissions here, rather than waiting for the opportunity to counter.

That's four minutes gone in the round.
Miyazaki is working to get back to half guard.
Miyazaki is writhing around trying to get back to his feet.
Burza wants to finish this one by submission but Miyazaki is holding onto his waist, trying to prevent any attacks from Burza.
Burza moves to take his opponent's back.
The fans in attendance giving it up for the two fighters, who have really let it all hang out in the last minute or so!
Burza patiently working for the choke. Which fighter will keep their nerve here?
Burza looking for the RNC.
Miyazaki tries to roll but Burza sticks to his back.
As the round comes to an end the crowd are showing their appreciation for a great round of action.
Miyazaki trying to control but not successfully.
Burza is hanging on to Miyazaki's back as he tries to escape.
And thats the end of the round the fighters go back to their corners.
Aron Burza dominated that round.
Well, the break between rounds is over. Let's get back to the scrappin!

Burza shoots in for a takedown and gets it. Let's see what he's got on the mat.
Burza tries to free his leg and advance position but Miyazaki is retaining full guard.
Miyazaki throwing his legs up looking for a triangle.
Aron Burza has got the better of the ground game so far.
Burza wants to pass the guard but Miyazaki is keeping the position.
Burza is looking to advance position but Miyazaki has hit a scissor sweep - now he's on top in mount!
Burza is wriggling around trying to escape.
The ref warns both fighters not to hold the cage as they work up against the meshing.
Miyazaki pausing momentarily but resumes with a couple of decent strikes that do a bit of damage.
BOOM! Miyazaki connects with a massive shot to the dome!
Miyazaki raining down hammerfists from mount.
The fans in attendance giving it up for the two fighters, who have really let it all hang out in the last minute or so!
Burza is wriggling around trying to escape.
Burza has found himself in a tricky position here. He's been working his transitions in training so let's see if he can work his way out of it.
Burza is persisting with the attempt to improve his position.
That's one minute gone in the round.
Burza wants to hold on but Miyazaki pushes him away.
Miyazaki landing strikes from the mount.
Miyazaki in mount throwing good strikes here, bouncing his opponent's head off the canvas.

Burza is rocked!
A big strike lands for Miyazaki! That's really hurt Burza and he's turned his back - Miyazaki keeps firing away and the ref dives in to stop the fight! Miyazaki jumps to his feet to celebrate the victory!
Ladies and gentlemen, after 1:40 of round 2, we have a winner by way of TKO (Strikes). Tsutomu Miyazaki!
An out of breath and clearly excited Tsutomu Miyazaki thanked FinnFighter Nutrition (Five 160Q supps!) for their help and support (and free stuff they sent him).
|
|
|
|
|
|
|
|
|
|
|
|
|
|
|
|
|
|
|
|
|
|
|
| S |
C
A |
G |
S |
C
B |
G |
|
S |
C |
G |
|
energy
A | B |
|
hype
A | B |
|
pop
A | B |
|
mgr
A | B |
|
FIGHT
RATING
100% |
|
|
|
|
|
|
