|
|
PBP Commentary |
Coming up we have a super heavyweight MMA rules bout between Anthony Abaddon (ranked 0 p4p, 0 weight class) and Jack Calypso (ranked 0 p4p, 0 weight class). Abaddon comes to the cage accompanied by Limp Bizkit - Break Stuff. Calypso is bobbing his head along to his entrance song: Jedi Mind Tricks - Genghis Khan . Anthony Abaddon could well score a knockout today. He has the power to get to Jack Calypso's chin.
 |
|
 |
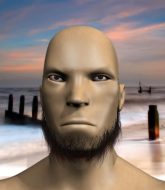
| 182 cm
37
190 lbs
30 - 22 - 0 |
|
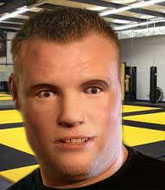
225 cm
37
300 lbs
20 - 10 - 0 |
Good wrestling
World class boxer
Insanely flexible |
|
BJJ Red Belt
Counter fighter
Good gas tank |
|
| |
|
Ladies and gentlemen. This fight is 3 rounds, in the super heavyweight division.
Introducing the fighter to my left, fighting out of the red corner.
With a record of
30 - 22 - 0, fighting out of New York, Anthony Abaddon!
And introducing the fighter to my right, fighting out of the blue corner.
With a record of
20 - 10 - 0, fighting out of London, Jack Calypso!
The judges for this bout are Bruno Lombardi, Chad Campbell and Franklyn Lucas.

The bell rings for round one and we are underway!

Calypso scores with a nice takedown into half guard. Let's see what he's got on the ground.
We may be looking at a referee standup if the pace doesn't pick up soon.
Calypso sitting in half guard, looking to land shots. Abaddon defending well though.
Abaddon blocking the ground and pound attempt from Calypso.
Calypso takes advantage of the dominant position to land a couple of big hammer fists.
Abaddon is staying active underneath Calypso, who seems content to just control the action from this position.

Abaddon looking for submissions from an awkward position here.
Calypso is trying to control the action in half guard but Abaddon is working away on the bottom, looking perhaps to get back to full guard.
Abaddon slips a foot under and gets full guard. Nice work.
Calypso wants to pass the guard but Abaddon is keeping the position.
Calypso's corner is telling him to maintain position.
Abaddon has been talking about how he's improved his wrestling in the run up to the fight so let's see if that's enough to sway the balance.
Abaddon is pulling down on Calypso's head. It's preventing any offense from Calypso, at least for the moment.
We've seen a great period of action over the last minute or so - credit to both fighters for going all out!
Abaddon tries to land a sweep but no joy.

That's one minute gone in the round.
Abaddon is working hard here to advance position.

It looks like we're going to have a standup here. Neither fighter is doing enough on the ground.
Abaddon is trying hard to land a takedown here. Calypso sprawls well and keeps this one on the feet.
Abaddon misses with a head kick.
Calypso dives in for a single leg takedown but Abaddon sprawls and the fighters end up clinched against the cage.
Calypso is working for a takedown up against the cage. He can't get it on this occasion though.
Abaddon working some nice short punches in the clinch.
Calypso is working on a leg, looking for a takedown but Abaddon is defending well.
Anthony Abaddon has stuffed three takedown attempts in the round now. That's going to take a lot out of Jack Calypso.
Abaddon gets underhooks to prevent Calypso's takedown attempt.
Calypso is trying to pull guard but Abaddon has him pressed against the cage.
Abaddon tries to throw a body punch but Calypso avoids it by throwing Abaddon back against the cage.
Abaddon lands a right hand that snaps the head of Calypso backwards.
Abaddon lands with a short shot to the head.
Calypso is trying to work for a single leg takedown but Abaddon pulls him back up using the underhooks.
Still in the clinch, Abaddon scores with a nice short uppercut.

That's two minutes gone in the round.
Calypso tries to take the fight to the ground by pulling guard but can't manage it.
Calypso tries to pull guard but Abaddon forces him back to his feet, against the cage.
A shot in the inside from Abaddon.
A nice left hand lands by Abaddon.
Calypso goes for a takedown attempt but Abaddon pushes him away and we're back to fighting at a distance.
The crowd are loving this. Great action here.
Abaddon shoots for a takedown but Calypso saw that one coming a mile off and avoided it easily.
Abaddon misses with a takedown attempt. He shot from a bit too far out.
Calypso avoids the body shot from Abaddon.
Abaddon has a takedown stuffed.
Abaddon tries to score a power double leg takedown but Calypso sees that one coming and sprawls well. That will dishearten Abaddon somewhat.

That's three minutes gone in the round.
Calypso avoids the clinch attempt nicely.
Calypso slaps away a takedown attempt from Abaddon, before circling back to the center of the mat.
Abaddon with a lazy takedown attempt
and Calypso counters with a takedown into side control.
Abaddon tries to get back to half guard but can't.
Calypso happy to just control the position for now.
Calypso tries to move to mount but Abaddon blocks the move with his legs.

That's four minutes gone in the round.
Calypso is looking to take a break and control but Abaddon is keeping him honest, looking to work from the bottom.
The fighters are pressed up against the cage, both looking to find a bit of space to work.
Abaddon sneaks back into half guard.
Calypso wants to free his trapped foot but Abaddon is holding on for dear life with his legs.
Calypso missing with the ground and pound from half guard.
Calypso is taking a breather. Abaddon says something to him but it's hard to make out. Perhaps he's telling him to get on with it and actually do something.
The crowd cheering loudly, showing their appreciation for the quality fight we're seeing here.
Abaddon looks like he's trying to stand up.
As the round comes to an end the crowd are showing their appreciation for a great round of action.
Calypso wants to take a breather but Abaddon is having none of it.
Calypso prevents Abaddon from improving his position.
And thats the end of the round the fighters go back to their corners.
Jack Calypso dominated that round.
The fighters' corners scream their final instructions, as the referee calls time. Here we go, back to the action!

Calypso rushes in with a sloppy looking punch

and Abaddon counters by moving into the clinch.
Calypso tries for a takedown but Abaddon manages to get underhooks.
Abaddon lands a right uppercut that snaps the head of Calypso backwards.
Abaddon working Calypso over with knees to the body.
Calypso drops down looking for an ankle pick but Abaddon pulls his leg out and moves away.
Abaddon looks frustrated there after his takedown attempt is stuffed easily.
Abaddon fails miserably with a takedown attempt.
Abaddon forces Calypso back against the cage and clinches.
That's one minute gone in the round.
A short left from Abaddon.
Abaddon lands a right uppercut that snaps the head of Calypso backwards.
Calypso is working for a takedown up against the cage. He can't get it on this occasion though.
Anthony Abaddon has stuffed three takedown attempts in the round now. That's going to take a lot out of Jack Calypso.
Abaddon working some nice short punches in the clinch.
Calypso pulls Abaddon into guard.

Calypso working from the bottom, still in full guard. He's managed to get a loose triangle. Abaddon doesn't seem to be doing much to defend here, obviously he feels comfortable in the position. Abaddon manages to throw the legs off his shoulder and he's back into guard - no problem.
Calypso keeping full guard, as Abaddon tries to pass.
Calypso has an active guard here but Abaddon has managed to pass into half guard.
Abaddon is looking to take a break and control but Calypso is keeping him honest, looking to work from the bottom.
That's two minutes gone in the round.
Calypso tries to regain full guard. Instead though, Abaddon has advanced to mount. Uh oh.
Abaddon wants to control the pace but Calypso is squirming around nicely.
Abaddon takes a little breather and maintains the position. The referee will be looking for him to stay active from such a dominant position though.
That's three minutes gone in the round.
Abaddon wants to control the pace but Calypso is squirming around nicely.
Abaddon looking to land elbow strikes but Calypso uses the position to regain half guard.
Abaddon is just sitting in half guard, waiting for something to happen.
Calypso actively working from the bottom here.
That's four minutes gone in the round.
Calypso looking for submissions from an awkward position here.
Abaddon is looking for a kimura but he's never going to get it from there.
Calypso looking to work for a kimura from the bottom.
The crowd applaud the fighters efforts here as the round comes to an end.
Abaddon is looking to advance position but Calypso won't allow it.
And thats the end of the round the fighters go back to their corners.
Anthony Abaddon dominated that second round.
The corners get their ten second warning. Both fighters stand from their stools and stare eachother down, ready to get back to the action. This is the final round!

Abaddon fails with the takedown
and Abaddon takes a counter punch right on the button for his troubles.
Abaddon tries to clinch but Calypso is having none of it.
Abaddon shoots in looking for a double leg takedown. Calypso defends it nicely.
Calypso throws out a loose jab but Abaddon uses good head movement to avoid it.
Abaddon shapes like he's going to throw a leg kick but settles back down.
Calypso ducks down and throws a hook to the body but Abaddon moves away.
Calypso defends well against a solid takedown attempt from Abaddon.
That's three failed takedown attempts in the round for Anthony Abaddon. That's going to take a lot out of him.
That's one minute gone in the round.
Abaddon tries to land with a swinging hook to the body but Calypso was well out of range. Poor timing from Abaddon.
Abaddon wants to clinch up but Calypso keeps it at a distance.
Anthony Abaddon is looking to throw some combinations by the looks of things.
Abaddon moves in looking to clinch but Calypso pushes him off.
Abaddon tries to clinch up.
Anthony Abaddon seems to be the more aggressive standup fighter in this bout.
Abaddon throws a combination but it was largely blocked by Calypso.
Abaddon throws a head kick that misses.
Abaddon is trying hard to land a takedown here. Calypso sprawls well and keeps this one on the feet.
Calypso has been working on his striking defense in training and it's paying off as Abaddon is landing a low percentage of strikes.
Abaddon is looking to clinch.
Abaddon doesn't succeed with the takedown
and Calypso counters with a straight punch to the midsection.
That's two minutes gone in the round.
Abaddon shoots in looking for a takedown. Calypso tries to sprawl out of it but Abaddon keeps driving through. The fighters are pinned against the cage. Calypso manages to get underhooks and after a bit of a struggle, circles away and we're back to standing.
Calypso closes the distance and clinches up with Abaddon, looking for a takedown. Calypso pushes Abaddon against the cage but Abaddon circles to the side and manages to break the clinch.
Abaddon with a lazy takedown attempt
so Calypso counters with a double leg into guard. Good agility.
Calypso slips nicely into half guard.
Calypso trying to pass the guard but Abaddon defending well.
This is a great period of action - very entertaining stuff!
Calypso thows a wild elbow that connects with the canvas.
Abaddon missing with punches from the bottom.
Abaddon is working for an escape here. He's hooked one of Calypso's legs and he's managed to sneak out and take Calypso's back!
That's three minutes gone in the round.
Calypso is keeping busy.
Calypso is in bad spot here.
Calypso keeps trying to improve his position.
Abaddon wants to control but Calypso manages to buck him off and is now in Abaddon's guard! Nice work there by Calypso!
Calypso scoring with some ground and pound.
Jack Calypso has got the better of the ground game so far.
Abaddon is working from a closed guard but he's struggling to control his opponent.
Calypso preventing the sweep.
That's four minutes gone in the round.
Abaddon working the defensive guard well to avoid strikes from Calypso.
Calypso wants to control from the top but Abaddon keeps moving.
Abaddon is working from a closed guard but he's struggling to control his opponent.
Calypso trying to control but Abaddon is working from the bottom.
It looks like we're going to have a standup here. Neither fighter is doing enough on the ground.
Abaddon tries to clinch but is not successful on this occasion.
Abaddon shoots in with a takedown attempt and he has Calypso pinned against the cage. Calypso gets the underhooks and manages to circle away.
The crowd applaud the fighters efforts here as the round comes to an end.
Abaddon tries to close the distance and clinch up but Calypso swats him away and circles back towards the center.
And that's the end of the fight!
I would just about give that final round to Jack Calypso.
I think Calypso has won this one but let's see whether the judges agree with me. Over to the ring announcer for the scorecards.
Ladies and gentlemen, after 3 rounds of action, we go to the scorecards for a decision.
Judge Bruno Lombardi scores the fight 28:29
Judge Chad Campbell scores the fight 28:29
Judge Franklyn Lucas scores the fight 28:29
In favor of your winner, by unanimous decision... Jack Calypso!
|
|
|
|
|
|
|
|
|
|
|
|
|
|
|
|
|
|
|
|
|
|
|
| S |
C
A |
G |
S |
C
B |
G |
|
S |
C |
G |
|
energy
A | B |
|
hype
A | B |
|
pop
A | B |
|
mgr
A | B |
|
FIGHT
RATING
54% |
|
|
|
|
|
|
