|
|
PBP Commentary |
Coming up we have a light heavyweight MMA rules bout between Johnny Munro (ranked 0 p4p, 0 weight class) and Lyoto Aoki (ranked 0 p4p, 0 weight class). Johnny Munro looks tired to me. Hopefully he has got enough gas left in the tank to put in a good performance.
 |
|
 |
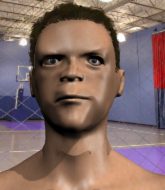
| 181 cm
22
198 lbs
1 - 0 - 0 |
|
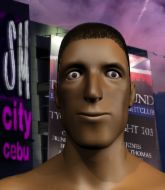
183 cm
18
200 lbs
1 - 0 - 0 |
BJJ Blue Belt
Basic striking
Cuts easily |
|
BJJ Blue Belt
Counter striker
Granite chin |
|
| |
|
Ladies and gentlemen. This fight is 3 rounds, in the light heavyweight division.
Introducing the fighter to my left, fighting out of the red corner.
With a record of
1 - 0 - 0, fighting out of Tokyo, Johnny Munro!
And introducing the fighter to my right, fighting out of the blue corner.
With a record of
1 - 0 - 0, fighting out of Tokyo, Lyoto Aoki!
The judges for this bout are Sosuke Kotani, Ren Mimura and Shigeki Sano.

The bell rings for round one and we are underway!
Nice takedown defense from Munro. No joy for Aoki on that attempt.
Munro looks exhausted already! Oh dear, he should have come in in better shape than this!
Munro fails with a takedown attempt from distance.
Aoki shoots in but no luck this time.
Aoki closes the distance and lands a one-two.
Aoki throws a body kick that sends a sickening thudding noise reverberating around the arena.
Nice body kick there by Aoki.
Aoki shoots and misses
and Munro counters with an inside leg kick.
Johnny Munro has stuffed three takedown attempts in the round now. That's going to take a lot out of Lyoto Aoki.
Aoki looks to land a combination but Munro avoids it well.
Jab by Aoki.
Aoki throws a quick inside leg kick.
Aoki throws a body punch but Munro moves out of range.
Aoki circles away from the clinch attempt.
Aoki shoots in but no luck this time.
Some wild striking there from Aoki.
Aoki stuffs the takedown attempt from Munro. Munro gets slowly back to his feet.
Munro throws a jab, cross combination which is slipped
and Aoki counters with a two punch combo.

That's one minute gone in the round.

Munro gets to the clinch - let's see what his plan is here.
Munro misses with a hook from the clinch.
Aoki wants to break free but Munro has control.

Munro escapes the clinch and we're back to striking.
Aoki throws a series of punches but Munro avoids them all with ease.
Munro throws a jab, cross combination which is slipped
and Aoki counters with a series of strikes. Munro will be more careful next time no doubt.
Aoki darts in and clinches Munro up against the cage.
Aoki tries to pull guard but can't drag his opponent to the mat. Munro just stands there and leans against the cage.
The fighters are pressed against the cage, as the pace of the fight slows.
Munro lands a right hand.
Munro prevents the takedown attempt.
Aoki wants a takedown.
Aoki breaks the clinch and we return to the middle of the mat.
Aoki throws a leg kick which misses Munro's front leg but catches the back leg as Munro tries to avoid it.
Aoki with a poor takedown
and Munro moves into the clinch.
Munro can't find room to land a body shot as Aoki controls the action.

Munro manages to pull guard.

That's two minutes gone in the round.
Aoki looking to pass the guard.
Munro lands a beautiful switch and he's in full mount! That could spell trouble for Aoki!
Aoki wants to get back to his feet.
Aoki is trying desperately to improve position.
Munro avoids the attempt from Aoki to control.
Aoki is working to get back to half guard.
Aoki is writhing around trying to get back to his feet.

That's three minutes gone in the round.
Aoki is working to get back to half guard.
Munro in mount throwing good strikes here, bouncing his opponent's head off the canvas.
Aoki slips a leg in and gets back to half guard.
Aoki gets full guard.

Aoki has his feet on Munro's hips. He pushes off and gets to his feet. Nice work.
Aoki clinches with his opponent.
Munro has moved round to his opponent's back and is looking for a suplex! Oh snap! He's tossed Aoki clear over his head and slammed him to the mat!
Munro connects with a series of strikes and the referee is calling for Aoki to escape the position.
Aoki is trying to get back to his feet but he's not managed it yet.
Munro somehow managing to miss with a strike from the back.

That's four minutes gone in the round.
Aoki looks to control his opponent's hands but he's not mananging it at the moment.
Aoki is defending well here and trying to improve his position.
Aoki is trying to get back to his feet but he's not managed it yet.
Aoki manages to reverse the position and now he's in Munro's guard. Nice work there by Aoki.
Aoki gets to his feet and steps away from his opponent.
Some bone on bone action there as Munro checks a low kick. Luckily it wasn't a particularly hard one.
Munro looks to throw a body kick
and Aoki counters with a nice body shot.
Aoki swats away the attempt to clinch by Munro.
The crowd applaud the fighters efforts here as the round comes to an end.
Aoki moves into range and throws a combination. A nice jab followed by a hook to the body.
Fantastic stuff here - a very entertaining period of action, which has drawn cheers from the crowd.
Horrible takedown by Munro or perhaps it was just good defense by Aoki which made him look bad.
Aoki scores a trip takedown into side control. Nice.
And thats the end of the round the fighters go back to their corners.
Lyoto Aoki dominated that round.
That's time! Munro's corner gives him a slap on the ass as he gets ready to fight.

Munro clinches up against the cage.
Aoki lands a nice elbow.
Aoki lands a nice knee to the body.
Aoki can't break the clinch.
Aoki tries to break the clinch but Munro is controlling the position.
Aoki can't break the clinch.
Aoki breaks from the clinch.
Aoki has a takedown stuffed.
Aoki slips a jab and a cross from Munro.
Munro stuffs the takedown.
Munro bobs and weaves into range and then changes levels and scores with a nice takedown into side control.
Munro decides to stand up, so the ref orders Aoki to his feet.
Aoki misses with a takedown attempt
and Munro counters with a one-two to the body.
Johnny Munro has stuffed three takedown attempts in the round now. That's going to take a lot out of Lyoto Aoki.
Some wild striking there from Aoki.
Both fighters are absolutely exhausted here.
Aoki thuds his shin into the meat of Munro's side.
Aoki moves in looking to clinch but Munro pushes him off.
That's one minute gone in the round.
Munro misses with a combination
and Aoki counters with a nice jab to the body that keeps Munro thinking.
Aoki misses with a series of wild punches.
Johnny Munro seems to be the more aggressive standup fighter in this bout.
Munro takes a body punch that cleary hurt but he's trying not to show any weakness.
Munro takes a nice looking leg kick right on the meat of his thigh there.
Johnny Munro is looking to throw some combinations by the looks of things.
Aoki tries to clinch but Munro moves out of range.
Munro misses with a jab and misses with a cross straight after too.
Aoki lands a two punch combo.
Aoki clinches with his opponent.
Aoki has hold of a leg and is looking for a trip takedown. Munro avoids it nicely though and we remain in the clinch.
The fighters are pressed against the cage, as the pace of the fight slows.
Munro breaks the clinch.
Munro is looking to take this fight into the clinch.
Aoki scores with a nice one two combo and darts back out of range to avoid anything coming in the opposite direction.
That's two minutes gone in the round.
The fight stays on the outside here - Munro looks like he's thinking about clinching though.
Aoki fails with the takedown.
Munro shoots in for a takedown and gets it. Let's see what he's got on the mat.
Aoki manages to escape and get back to his feet.
Munro shoots in but doesn't get the takedown
and Aoki counters with an inside leg kick.
Munro misses with a wild body shot.
Munro wants to clinch up but Aoki keeps it at a distance.
Munro misses with a combination
and Aoki counters with a body kick that brings a smile to the face of both fighters.
Munro tries to clinch but Aoki moves away
and Aoki counters with a good low kick that Munro was not able to check.
Aoki fails with a takedown attempt.
That's three minutes gone in the round.
Munro shoots in for a takedown. "I don't think so" says Aoki as he avoids it easily.
Aoki doesn't succeed with the takedown
and Munro cracks him with a counter punch right on the button.
Aoki tries to clinch but is not successful on this occasion.
Munro gets caught flat footed, as Aoki shoots in with a quick takedown into guard.
Aoki stands up from Munro's guard - Aoki perhaps looking for a knockout.
Aoki feints and as Munro raises his hands in defense, Aoki changes levels and drives through with a takedown into guard.
The ref warns both fighters not to hold the cage as they work up against the meshing.
Munro keeping full guard, as Aoki tries to pass.
Aoki trying to control the position from guard on top but Munro is wriggling around, looking for whatever he can.
Aoki wants to stand but Munro is controlling his posture from full guard.
That's four minutes gone in the round.
Aoki trying to control but Munro is working from the bottom.
Aoki stands and steps away. Munro gets to his feet too and we're back to the striking game.
Munro fails with the takedown
and Aoki counters with a slapping leg kick.
Munro takes a body punch but keeps moving.
Aoki misses with a double jab
and Munro counters with a shoot takedown into half guard.
Fantastic stuff here - a very entertaining period of action, which has drawn cheers from the crowd.
The crowd applaud the fighters efforts here as the round comes to an end.
Aoki wants to control but Munro passes into side.
Aoki takes an elbow right on the bridge of the nose and winces in pain.
And thats the end of the round the fighters go back to their corners.
That was a close second round but I would say that Johnny Munro will probably get the nod.
That's the end of the interval. I'm sure that seemed a lot quicker than a minute for our two fighters! Back to the action. Ladies and gentlemen, this is the final round!

Munro misses with a combination
and Aoki counters by moving into the clinch.
Munro lands with a quick shot inside that doesn't really do much damage.
Aoki breaks the clinch and we're back to striking at distance.
Munro clinches.
Aoki stalling in the clinch but Munro improves position.
Aoki tries a knee to the head but Munro blocks it.
Aoki wants to stall.
Munro leaning against his opponent.
Munro wants to break free but Aoki has control.
Aoki has had enough of the clinch but Munro keeps him there for the moment.
Munro has had enough of the clinch but Aoki keeps him there for the moment.
Aoki goes for a takedown in the clinch but Munro prevents it.
We've had a slow start to the round here - hopefully the action picks up.
Munro slows down the pace here.
Aoki blocking some punches.
Both fighters are breathing heavily.
Munro has hold of one of Aoki's legs. Aoki is fighting the takedown attempt but Munro gets the trip and lands the takedown into guard.
Munro stands and steps away. Aoki gets to his feet too and we're back to the striking game.
That's one minute gone in the round.
Munro with a poor takedown
and Aoki counters with a leg kick.
Aoki throws a right hand that Munro ducks under and follows up with a left that Munro also avoids with ease.
Munro tries to clinch but is not successful on this occasion.
Munro is looking to clinch but Aoki is avoiding it.
Munro stuffs the takedown attempt from Aoki. Aoki gets slowly back to his feet.
Munro tries a switch kick but it misses it's target.
Aoki thows a left - swing and a miss!
Aoki fails with the takedown
and Munro counters with a one-two to the body.
Johnny Munro has stuffed three takedown attempts in the round now. That's going to take a lot out of Lyoto Aoki.
Nice sprawl there from Munro as Aoki shoots in.
Aoki fails to land with a series of punches.
Munro throws a leg kick that misses.
Munro shoots in and bounces Aoki off the cage to secure the takedown into guard.
Munro preventing the sweep.
That's two minutes gone in the round.
Munro is looking to stand up but Aoki won't let him.
Munro gets to his feet. Aoki looking to butt scoot but the ref puts an end to that. On your feet son!
Aoki ducks right into an uppercut from Munro.
Aoki avoids the head kick by Munro.
Munro wants to slow Aoki down by chopping away at his legs.
Munro throws a right hand that Aoki ducks under and follows up with a left that Aoki also avoids with ease.
Munro shoots in for a takedown! He's got it and he's managed to land in full mount! That's better than Munro was expecting from the takedown attempt, I'm sure!
Aoki really trying hard to get back to half guard here.
Munro misses with a series of strikes from mount. He'll no doubt be working on his ground and pound when he gets back to the gym.
Aoki is wriggling around trying to escape.
That's three minutes gone in the round.
Aoki tries to hold on but Munro pushes him away.
Johnny Munro overall seems to be getting the better of the ground position in the fight so far.
Aoki tries to reverse the position but Munro maintains control.
Aoki tries to hold on but Munro postures up.
Aoki sneaks a leg under to get to half guard.

Munro is actively looking for submissions here but good counter grappling here from Aoki as he works his way to full guard.
Aoki controls Munro momentarily but Munro frees himself.
Aoki is looking for a triangle but Munro pushes his legs off easily.
Aoki is trying to keep Munro in close.
Aoki is avoiding any damage by keeping wrist control.
That's four minutes gone in the round.
Aoki trying to control the position.
Aoki wants to sweep but no luck.
Munro trying to control but Aoki is working from the bottom.
Munro tries to stand but Aoki is controlling from the bottom.

The referee decides to stand the fighters back up.
Aoki has closed the distance and engaged Munro in a clinch.
Aoki breaks from the clinch.
Like a baseball bat into the meat of his leg there - nice leg kick by Aoki.
Aoki tries to clinch but Munro moves out of range.
Aoki fails with a takedown attempt.
Munro shoots in for a takedown but doesn't get it.
And that's the end of the fight!
Johnny Munro showed his dominance in that final round.
I think Munro has won this one but let's see what the judges have to say. Over to the ring announcer for the scorecards.
Ladies and gentlemen, after 3 rounds of action, we go to the scorecards for a decision.
Judge Sosuke Kotani scores the fight 28:29
Judge Ren Mimura scores the fight 29:29
Judge Shigeki Sano scores the fight 28:29
In favor of your winner, by majority decision... Lyoto Aoki!
|
|
|
|
|
|
|
|
|
|
|
|
|
|
|
|
|
|
|
|
|
|
|
| S |
C
A |
G |
S |
C
B |
G |
|
S |
C |
G |
|
energy
A | B |
|
hype
A | B |
|
pop
A | B |
|
mgr
A | B |
|
FIGHT
RATING
68% |
|
|
|
|
|
|
