|
|
PBP Commentary |
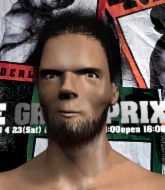
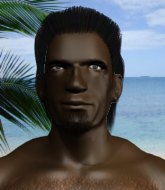
Coming up we have a heavyweight MMA rules bout between Luther Dudley (ranked 0 p4p, 0 weight class) and Gray Hawkes (ranked 0 p4p, 0 weight class). Gray Hawkes will no doubt be looking to use his reach advantage to good effect.
 |
|
 |
| 186 cm
25
279 lbs
2 - 6 - 0 |
|
200 cm
25
235 lbs
0 - 0 - 0 |
BJJ Blue Belt
Counter fighter
Experienced |
|
BJJ Blue Belt
Decent boxing
Solid chin |
|
| |
|
Ladies and gentlemen. This fight is 3 rounds, in the heavyweight division.
Introducing the fighter to my left, fighting out of the red corner.
With a record of
2 - 6 - 0, fighting out of Hilo, Luther Dudley!
And introducing the fighter to my right, fighting out of the blue corner.
With a record of
0 - 0 - 0, fighting out of Hilo, Gray Hawkes!
The judges for this bout are Josh West, Roger Salmon and Micheangelo Fripello.

The bell rings for round one and we are underway!
Dudley moves out of range of the leg kick from Hawkes.

Dudley is looking for a takedown here. He's shot in and has managed to get it, finishing up in Hawkes's half guard.
Dudley really is a fat lump.
The referee looks like he's ready to step in and stand the fighters back up.
Dudley prevents Hawkes from improving his position.

Hawkes looking for submissions off his back.
Hawkes is trying to stand.
Dudley seems content to maintain position for now, rather than mounting any offense.
Dudley wants to lay and pray for a moment but Hawkes keeps working.
Hawkes looking to work for a kimura from the bottom.
Dudley throws a big elbow that misses, also allowing Hawkes to regain full guard.
The fighters are pressed up against the cage, both looking to find a bit of space to work.

That's one minute gone in the round.
There's a bit of a scramble here and now Hawkes is on top in guard.

Dudley had isolated an arm as going for a kimura. Hawkes defends it easily.
Hawkes is pushing down on Dudley's leg trying to pass to half guard. Dudley is fighting to maintain full guard but Hawkes has managed to sneak the leg through.
Hawkes is looking to pass the guard... He's managed it - he's now in full mount!
Dudley working to try and regain half guard.
Dudley holding onto his opponent's waist for dear life, as Hawkes tries to land some strikes to get him to release his grip.

That's two minutes gone in the round.
Hawkes takes a little breather and maintains the position. The referee will be looking for him to stay active from such a dominant position though.
The ref warns both fighters not to hold the cage as they work up against the meshing.
Hawkes throwing sloppy strikes, which aren't doing any damage.
Hawkes throws an elbow from mount that misses. Lucky escape for Dudley because Hawkes loaded up on that one.
Hawkes throws an elbow from mount that misses. Lucky escape for Dudley because Hawkes loaded up on that one.
Hawkes controlling his opponent.
Dudley regains half guard.
We've seen a great period of action over the last minute or so - credit to both fighters for going all out!
Hawkes wants to lay and pray for a moment but Dudley keeps working.

That's three minutes gone in the round.
Hawkes seems to be working for a kimura but Dudley defends the submission attempt.
Hawkes not landing any meaningful shots this time.
Dudley might be looking to lock onto one of his opponent's long limbs for a submission, whilst we're on the ground.
Hawkes is sneakily working for an arm triangle but Dudley sees it coming and defends easily.
Dudley is looking to regain full guard. Not this time though.
Hawkes trying to control the action but Dudley is working from the bottom.

That's four minutes gone in the round.
Dudley manages to get to full guard.
Dudley looking for submissions off his back, moving his hips, looking for an opening.
Hawkes with a flurry of punches that miss.
Hawkes advances to half guard.
Dudley avoiding damage under a succession of punches from Hawkes.
The crowd applaud the fighters efforts here as the round comes to an end.
Dudley wants to get back to full guard.
Hawkes wants to take a breather but Dudley is having none of it.
Hawkes is trying to work for a kimura but Dudley is defending well.
And thats the end of the round the fighters go back to their corners.
Gray Hawkes dominated that round.
Well, the break between rounds is over. Let's get back to the scrappin!

The fight stays on the outside here - Hawkes looks like he's thinking about clinching though.
Hawkes throws a sloppy head kick and Dudley moves out of range easily.
Hawkes throws a left and a right that both miss
and Dudley counters with a good right hand that lands right on the jaw.
Hawkes is looking to take this fight into the clinch.
Dudley fails with the takedown.

Hawkes throws a loose over hand right and dives in with a double leg takedown. Dudley tries to sprawl but it's too late and the fighters hit the mat. Hawkes is in Dudley's guard.
Dudley wants to hit a switch here but Hawkes passes into full mount! Oh no, disaster for Dudley there!
That's one minute gone in the round.
Dudley is trying to escape the mount.
Dudley sneaks a leg under to get to half guard.
Hawkes has the superior BJJ but he's also working some ground strikes into his gameplan.
Hawkes takes a deep breath and rests his weight momentarily on top of his opponent, to control the position.
Dudley is looking to sinch up a guillotine here but Hawkes pulls his head out easily.
Dudley moves his hips nicely and gets into full guard.
Dudley looking for a sweep. Not yet Dudley, not yet.
That's two minutes gone in the round.
Dudley avoiding any damage from the ground and pound.
Hawkes wants to pass the guard but Dudley is keeping the position.
Gray Hawkes has got the better of the ground game so far.
Hawkes is frustrating his opponent with some stalling tactics from top position.
Hawkes slips effortlessly into side control - very nice.
The ground and pound from Hawkes seems to be hitting the mat more than his opponent.
Hawkes working the strikes but Dudley uses the opportunity to regain half guard.
Hawkes is trying to get back to his feet now but his leg is trapped.
Hawkes works his foot free and advances to mount.
That's three minutes gone in the round.
Hawkes thowing shots but they're missing.
Hawkes throwing sloppy strikes here. Perhaps if he tightened up his striking from such a dominant position, he'd be able to finish easier.
Hawkes can't quite control the action as he would like just now, as Dudley is looking to escape.
Hawkes goes for an armbar but he's not got it
Dudley turns into him and now he's in Hawkes's guard.
Dudley lands a couple of elbows.
That's four minutes gone in the round.
Hawkes keeping moving, preventing Dudley from controlling successfully.

Hawkes has his feet on Dudley's hips. He pushes off and gets to his feet. Nice work.
Dudley drives through with a takedown into Hawkes's guard. Let's see what he can do from the top position.
The step up in weight doesn't seem to be a problem for Hawkes. He's performing admirably here against the bigger man.
Hawkes wants to stand and escape but Dudley is having none of it.
The crowd applaud the fighters efforts here as the round comes to an end.
Hawkes trying to keep a closed guard but Dudley is proving a slippery customer.
Dudley wants to control from the top but Hawkes keeps moving.
And thats the end of the round the fighters go back to their corners.
Gray Hawkes showed his class in that round. I'd imagine he'll take it on all the scorecards.
The fighters' corners scream their final instructions, as the referee calls time. Here we go, back to the action! And we move into the final round!

Dudley fails to land the takedown.
Hawkes dives in and scores a takedown into Dudley's guard.
Hawkes throws a big elbow that misses.
Dudley looking to sweep here. No luck so far.
Hawkes sneaks a leg through and gets to half guard. That was like a knife through butter how easily he passed Dudley's guard.
Hawkes trying to control the action but Dudley is working from the bottom.
Hawkes throwing punches and elbows but they're not doing any damage.
Hawkes throwing shots but they're hitting the canvas more than the man.
Hawkes content to sit in half guard and control for a moment.
That's one minute gone in the round.
Dudley blocking the ground and pound attempt from Hawkes.
Hawkes is just content to waste time from the top position. Dudley takes advantage of the situation and regains full guard.
Hawkes is intent on slowing down the pace of the fight, simply looking to control.
Hawkes trying to pass the guard but can't manage it just yet.
Dudley is working an open guard so Hawkes takes the opportunity to get back to his feet.
Dudley tries for a takedown but Hawkes sees it coming a mile off and avoids it easily.
Donk. Dudley catches Hawkes right on the button with a cross.
That's two minutes gone in the round.
Hawkes closes the distance and looks for a trip takedown... aaaand he's got it - Hawkes lands in his opponent's guard.
Dudley bucks up whilst keeping hold of a body lock, managing to reverse the position. Now he's in top in Hawkes's guard.
Hawkes is adopting a defensive guard.
The crowd cheering loudly, showing their appreciation for the quality fight we're seeing here.
Hawkes has an omoplata and is looking to use it perhaps as a submission or perhaps to transition. Dudley is in a bit of discomfort here, but he's managed to free himself and has dived into side control! That didn't work out too well for Hawkes.
Hawkes takes a big intake of breath there - he's definitely tired.
Hawkes is working to avoid the ground and pound but Dudley connects with a decent elbow.
Hawkes is looking for a sweep.
That's three minutes gone in the round.
Hawkes looking for a sweep but Dudley has passed into full mount! Oh no!
Dudley looking to control and managing it successfully.
Hawkes tries to reverse the position but Dudley maintains control.
Dudley trying to control but Hawkes is having none of it.
Dudley thowing shots but they're missing.
Dudley jumps to side control looking for an arm triangle but Hawkes manages to avoid the submission attempt.
That's four minutes gone in the round.
Hawkes sneaks a leg under to get back to half guard.
Dudley tries to stand but can't do so whilst Hawkes controls his leg.
Dudley prevents Hawkes from improving his position.
Dudley is trying to control the action in half guard but Hawkes is working away on the bottom, looking perhaps to get back to full guard.
Dudley seems content to maintain position for now, rather than mounting any offense.
As the round comes to an end the crowd are showing their appreciation for a great round of action.
We may be looking at a referee standup if the pace doesn't pick up soon.
Hawkes slips a foot under and gets full guard. Nice work.
And that's the end of the fight!
Gray Hawkes comfortably won the final round on my scorecard.
Well Hawkes has outworked and out performed his opponent in all aspects of the game today. He was simply too good and the decision should be no more than a formality. Over to the ring announcer for the scorecards.
Ladies and gentlemen, after 3 rounds of action, we go to the scorecards for a decision.
Judge Josh West scores the fight 27:30
Judge Roger Salmon scores the fight 27:30
Judge Micheangelo Fripello scores the fight 27:30
In favor of your winner, by unanimous decision... Gray Hawkes!
|
|
|
|
|
|
|
|
|
|
|
|
|
|
|
|
|
|
|
|
|
|
|
| S |
C
A |
G |
S |
C
B |
G |
|
S |
C |
G |
|
energy
A | B |
|
hype
A | B |
|
pop
A | B |
|
mgr
A | B |
|
FIGHT
RATING
49% |
|
|
|
|
|
|

