|
|
PBP Commentary |
Coming up we have a middleweight MMA rules bout between Mark Stones (ranked 0 p4p, 0 weight class) and Caesar II (ranked 0 p4p, 0 weight class). These two fighters really are very evenly matched on the feet - it will be fascinating to see who can assert themselves in that aspect of the fight.
 |
|
 |
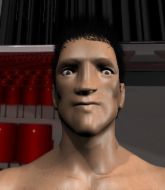
| 189 cm
19
185 lbs
1 - 0 - 0 |
|
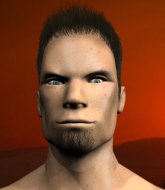
182 cm
20
180 lbs
1 - 0 - 0 |
BJJ Blue Belt
Counter striker
Self confident |
|
BJJ Blue Belt
Brawler
Tends to cut |
|
| |
|
Ladies and gentlemen. This fight is 3 rounds, in the middleweight division.
Introducing the fighter to my left, fighting out of the red corner.
With a record of
1 - 0 - 0, fighting out of London, Mark Stones!
And introducing the fighter to my right, fighting out of the blue corner.
With a record of
1 - 0 - 0, fighting out of London, Caesar II!
The judges for this bout are Paul Tew, James Atkins and Richard Clark.

The bell rings for round one and we are underway!
Stones misses with the combination.
II keeps the fight on the outside.
Stones lands with a head kick! That's gotta hurt.

It looks like Caesar II has been cut.
II thows a body shot but no joy.
Stones lands a nice looking kick to the body. II takes a step back to recover.
II motions for Stones to come forward. II throws a leg kick but it misses it's target.
II circles away from the clinch attempt.
II throws a series of punches but Stones moves out of range.
II takes a head kick and shrugs it off.
Stones lands a kick to the ribs of his opponent. Nice work there - in and out in a flash.
II looks gassed!
Stones throws a combination but it was largely blocked by II.
II keeps the fight standing with a nice sprawl.
Stones connects with a high kick.
Caesar II seems to be the more aggressive standup fighter in this bout.

That's one minute gone in the round.
Stones circles away from the clinch attempt

and Stones decides to take the opportunity to score a takedown. He's landed in II's guard.
The fighters are tangled up in the ropes here. We might need a restart if the fighters can't break free themselves.
Stones would like to get this fight back to the feet but can't get free from the closed guard.
II working a defensive guard here.
Stones wants to control from the top but II keeps moving.

II looking for submissions off his back, moving his hips, looking for an opening.
Stones not doing a lot at the moment. He'll have to show some more aggression or the fight will get stood up.
II keeping moving, preventing Stones from controlling successfully.
The fighters are trapped in the ropes so we're going to have a reposition here. The ref calls for a break and repositions the fighters in the center of the ring.

That's two minutes gone in the round.

It looks like we're going to have a standup here. Neither fight is doing enough on the ground.
Stones moves into range and throws a combination. A nice jab followed by a hook to the body.
Stones lets loose with a powerful body kick. II will feel that in the morning.
Stones thows a body kick. II tries to catch it but that hurt him.
Stones throws a sloppy head kick and II moves out of range easily.
Stones lands with a thumping leg kick.
Stones misses with a series of wild punches.
Stones pulls out of a head kick attempt.

That's three minutes gone in the round.
II takes a kick to the side of the head.
Stones throws a right and a left that II avoids nicely.
II with a poor takedown
and Stones counters with a head kick.
Stones lands a high kick!
Stones pulls out of a head kick attempt.
Stones looks for a takedown. He's got it. We're now in half guard.
Stones sitting and controlling from the half guard.
Stones looks towards his corner to check for any instructions. The corner give him nothing to work with, so he cracks II with a short hammerfist. I guess that's as good as any advice he could get in this position.

That's four minutes gone in the round.
Stones controlling the action here.
Stones is nestled in close to II, controlling him well. He's worked in a nice elbow to the side of the head as well, for good measure.
Stones thows a wild elbow that connects with the canvas.
Stones is just sitting in half guard, waiting for something to happen.
Stones tries to pass the half guard into mount. II knows what he's doing though and prevents the attempt.
The crowd applaud the fighters efforts here as the round comes to an end.
Stones is working hard here to advance position.
And thats the end of the round the fighters go back to their corners.
Mark Stones dominated that round.
The cut man is working on Caesar II's cut.
That's time! Stones's corner gives him a slap on the ass as he gets ready to fight.

A head kick misses from Stones.
II shoots in but doesn't get the takedown
and Stones counters with a flying knee. Nice.
Stones throws a nice head kick!
II throws a body kick but he was well out of range there.
II lands a jab followed by a nice looking cross.
II closes the distance and clinches up, looking for a takedown. He shifts his weight and gets a nice trip into half guard.
Stones wants to control but II is keeping busy.
Stones actively working from the bottom here.
Both fighters are absolutely exhausted here.
Stones trying to hold on to II's head to control him but II postures up.
That's one minute gone in the round.
Stones is looking to escape.
II is thwarting Stones's attempts to control the position.
Still in half guard, II seems content to control.
Stones trying to control but II postures up.
It looks like we're going to have a standup here. Neither fight is doing enough on the ground.
II closes the distance but Stones moves to the side
and Stones counters with a stiff right hand.
That's two minutes gone in the round.
The crowd are hurling abuse towards the fighters... You can hardly blame them though because there isn't a lot going on in the fight.
Stones shoots in for a takedown. "Ole!" shouts II as he jumps to the side.
II changes levels and looks for a double leg takedown. Stones tries to avoid it but II manages to keep hold of a leg and drag Stones to the ground. Stones escapes though and pops straight back up to his feet.
II avoids a kick to the body.
II misses the body punch
and Stones counters with a driving takedown into guard. Nice work there by Stones.
Stones drops back looking for a heel hook - he quickly realises he's not going to get it but II manages to dive on top of him before he can escape and now Stones has II in his guard.
II looking to pass the guard.
Stones bucks up whilst keeping hold of a body lock, managing to reverse the position. Now he's in top in II's guard.
That's three minutes gone in the round.
Stones trying to control the position from guard on top but II is wriggling around, looking for whatever he can.
II looking to control.
Stones trying to control the position from guard on top but II is wriggling around, looking for whatever he can.
Stones prevents II from getting back to his feet.
II working for a triangle but Stones defends it easily.
II is looking to get back to his feet but can't, whilst Stones is controlling him.
That's four minutes gone in the round.
Neither fighter has done anything of merit for a good minute or two here and the crowd are not happy about it.
II keeping busy, throwing shots from the bottom.
Stones wants to control from the top but II keeps moving.
The referee has ruled that neither fighter is active enough on the ground and has stood them back up.
Stones throws a nice looking combination but II bobs and weaves to avoid any damage.
Stones shoots and misses
so II counters with a double leg into guard. Good agility.
Stones working a defensive guard here.
And thats the end of the round the fighters go back to their corners.
A close second round but Caesar II will probably get the nod - 10:9.
The cut man is working on Caesar II's cut.
Well, the break between rounds is over. Let's get back to the scrappin! This is the final round!

II swinging wilding here.
II fakes with the hands and throws a leg kick but Stones is out of range.
Stones misses with a hook to the body
and II counters with a takedown into side control.

II stands up and beckons Stones to his feet.
II has his head slapped from side to side by a 3 punch combination. That must have hurt him.
Stones throws a nice head kick!
Both fighters are breathing heavily.
Stones dances in quickly and lands a nice inside leg kick on II. That did some damage!
Stones lands with a right hand.
Stones dances in quickly and lands a nice inside leg kick on II. That did some damage!
That's one minute gone in the round.
II takes a punch to the jaw and another one to the bread basket.
Danga de danga de dang - Stones scores with a four punch combination!
Excellent takedown into side control there by Stones.
Stones lands a knee to the body and a forearm to the face.
Stones working the ground and pound from side control.
Stones tries for a kimura. Not really close to a finish though.
II manages to get back to half guard.
That's two minutes gone in the round.
Neither fighter is being very active at the moment, with Stones in particular looking to stall.
Stones throwing shots but II is blocking nicely.
Stones is working for a submission of some sort.
II keeping his head moving to avoid the ground and pound.
Stones is tying to control. II wants to improve his position but can't escape this time.
Mark Stones overall seems to be getting the better of the ground position in the fight so far.
That's three minutes gone in the round.
The referee decides to stand the fighters back up.
Stones misses with a kick to the body.
Stones lets the fists fly and connects with a left straight followed by a right hook.
II doesn't succeed with the takedown
and Stones counters with a thumping low kick.
II throws a hook to the body but it doesn't connect.
Stones misses with a half-hearted attempt at a head kick.
II doesn't react quick enough there as he takes a shot to the body.
II shoots and misses
and Stones counters with a head kick. That will keep II thinking before he tries any more sloppy attacks!
II misses with a body shot. Nice footwork from Stones.
That's four minutes gone in the round.
There's not a lot going on here and the crowd are letting the fighters know they're not willing to tolerate a lack of action.
II shoots and misses
and Stones counters with a left and a right that stings II.
Mark Stones has stuffed three takedown attempts in the round now. That's going to take a lot out of Caesar II.
Stones throws a head kick that misses and slips in the process. He scrambles back to his feet and the fighters circle.
II swings wildly with a couple of big hooks
and Stones counters with a good, hard body kick but II shrugs it off.
II has his takedown stuffed
and Stones counters with a stiff right hand.
II misses with a takedown
and Stones counters with a kick to the head that grazes his opponent. II is lucky that one didn't land flush.
II throws a push kick but Stones slaps the foot to one side.
Stones pulls out of a head kick attempt.
Stones misses with a half-hearted attempt at a head kick.
II looks to clinch
and Stones counters with a nice body kick.
And that's the end of the fight!
That was a close round. You could make an argument for either fighter but I would give it to Mark Stones.
Well Stones has outscored his opponent in every aspect of the fight today. Only a scarily incompetent judge or two will keep him from a well deserved win... Over to the ring announcer for the scorecards.
Ladies and gentlemen, after 3 rounds of action, we go to the scorecards for a decision.
Judge Paul Tew scores the fight for Mark Stones!
Judge James Atkins scores the fight for Mark Stones!
Judge Richard Clark scores the fight for Mark Stones!
Mark Stones wins by unanimous decision!
|
|
|
|
|
|
|
|
|
|
|
|
|
|
|
|
|
|
|
|
|
|
|
| S |
C
A |
G |
S |
C
B |
G |
|
S |
C |
G |
|
energy
A | B |
|
hype
A | B |
|
pop
A | B |
|
mgr
A | B |
|
FIGHT
RATING
38% |
|
|
|
|
|
|
