|
|
PBP Commentary |
Coming up we have a lightweight MMA rules bout between Laverne Mazzola (ranked 0 p4p, 0 weight class) and Melcone Aisa (ranked 0 p4p, 0 weight class). Melcone Aisa will no doubt be trying to keep this one on the feet, where he has a distinct advantage.
 |
|
 |
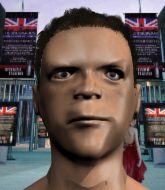
| 170 cm
19
165 lbs
0 - 0 - 0 |
|
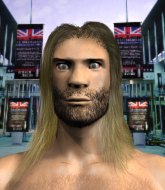
162 cm
19
161 lbs
1 - 1 - 0 |
Good wrestling
Basic striking
Cardio machine |
|
Decent wrestler
Basic striking
Granite chin |
|
| |
|
Ladies and gentlemen. This fight is 3 rounds, in the lightweight division.
Introducing the fighter to my left, fighting out of the red corner.
With a record of
0 - 0 - 0, fighting out of New York, Laverne Mazzola!
And introducing the fighter to my right, fighting out of the blue corner.
With a record of
1 - 1 - 0, fighting out of New York, Melcone Aisa!
The judges for this bout are Anthony Taglia, Jorge Garcia and Bruno Lombardi.

The bell rings for round one and we are underway!
Mazzola throws a right hand that Aisa ducks under and follows up with a left that Aisa also avoids with ease.
Aisa tries to clinch but is not successful on this occasion.
Nice body punch from Aisa.

Mazzola forces Aisa back against the cage and clinches.
Aisa misses with a short punch on the inside.
Mazzola tries a shoulder strike but it doesn't do any damage.
Aisa is trying to maintain a safe position but Mazzola gets an underhook and turns Aisa into the cage.
Mazzola misses with the head strike.
Aisa is trying to stall.
A hook to the body from Mazzola.
A head punch blocked on the inside by Mazzola.
Mazzola slowing the pace effectively.

Mazzola's corner calls for him to break the clinch, which he does.
Aisa lands a nice hook to Mazzola's body. Mazzola takes it in his stride and looks to land his own strikes.
Aisa lands a jab.
Mazzola throws a right hand that Aisa ducks under and follows up with a left that Aisa also avoids with ease.
Some wild striking there from Mazzola.
Wow, both these guys are really going for it!

Mazzola shoots in for a takedown! He's got it and he's managed to land in side control! That's better than Mazzola was expecting from the takedown attempt, I'm sure!
Fantastic stuff here - a very entertaining period of action, which has drawn cheers from the crowd.
Aisa is positioning himself to get back to half guard.

That's one minute gone in the round.
Mazzola scoring with punches and elbows.
Aisa is positioning himself to get back to half guard.
An elbow from Mazzola crashes against the mat.
Mazzola has been looking to land a fair amount of strikes on the ground. He might be looking to soften his opponent up in order to work for a submission.
Aisa struggling a bit here.
Aisa is trying to get back to half guard.
Mazzola landing a few strikes.
Mazzola is looking to take a break and control but Aisa is keeping him honest, looking to work from the bottom.

That's two minutes gone in the round.
Aisa gets back to half guard.
Aisa really doesn't want to stay on the ground with Mazzola. If he can't get it back to his feet, it's only a matter of time before he'll be tapping out.
Aisa wants to improve his position but Mazzola is controlling well.
Ground and pound from Mazzola.
Aisa keeping hold of Mazzola's head, controlling as best he can.

Aisa looking to work for a kimura from the bottom.
Aisa wants to control but Mazzola is keeping busy and won't allow it.
The fighters are pressed up against the cage, both looking to find a bit of space to work.

That's three minutes gone in the round.
Aisa taking some punishment here, with Mazzola in his half guard.
Aisa wants to get back to full guard.
Mazzola working the head and body with strikes.
Aisa is staying active underneath Mazzola, who seems content to just control the action from this position.
Aisa has hold of Mazzola's hands but Mazzola slips his arm to the side and lands an elbow.
Mazzola is looking to take a break and control but Aisa is keeping him honest, looking to work from the bottom.
Aisa is looking to improve his position.
Mazzola missing with some ground and pound from the half guard.
Mazzola throwing shots but Aisa is blocking nicely.
The referee walks around the fighters to get a better view of the action. Mazzola lands a nice short elbow.
Mazzola slips a nice elbow through Aisa's hands, connecting with Aisa's forehead.

That's four minutes gone in the round.
Mazzola thows a huge punch but Aisa dodges it nicely.
Aisa is trying to maintain the position but Mazzola is very close to passing his half guard.
Mazzola looks to score some points with some ground and pound.
We get told so often about how wrestlers don't like to be on their backs. Let's see if Aisa can do anything to dispel that myth.
Mazzola stalling.
Mazzola lands strikes from half guard.
Mazzola working Aisa over with strikes.
The ref warns both fighters not to hold the cage as they work up against the meshing.
Aisa wants to control but Mazzola is keeping busy and won't allow it.
Mazzola throwing shots but they're hitting the canvas more than the man.
Mazzola lands with an elbow from half guard - that looked like it hurt.
Aisa tries to get to full guard but Mazzola has control of the leg.
And thats the end of the round the fighters go back to their corners.
Laverne Mazzola dominated that round.
That's time! Mazzola's corner gives him a slap on the ass as he gets ready to fight.

Mazzola bobs and weaves well there to avoid the strikes.
Some wild striking there from Mazzola.
Mazzola tries to clinch but is not successful on this occasion.
Laverne Mazzola is looking to throw some combinations by the looks of things.
Aisa looks to score with a jab to the body but Mazzola is just out of range.
Mazzola misses with the combination.
Aisa rushes in with a sloppy looking punch
and Mazzola counters into the clinch. Nicely done.
Mazzola softening up his opponent with strikes, against the cage.
Mazzola misses with some punches.
Mazzola is really dominating this fight. Is there anything that Aisa can do to turn this around?
A head punch blocked on the inside by Mazzola.
Mazzola gets through Aisa's defenses to land a nice punch to the side of the head.
Mazzola throws a blind hook that connects with the side of Aisas head.
Mazzola misses with some punches.
Aisa fails to land with a short punch on the inside.
Mazzola lands a body punch in the clinch.
Mazzola misses with a punch to the body.
Aisa blocks a punch to the side of the head.
Mazzola digs a right hand into Aisa's ribs. Those have got to be taking their toll on Aisa's gas tank.
Mazzola tries to work over Aisa's body with a swooping hook but it only glances the target.
This is a great period of action - very entertaining stuff!
Aisa swings wildly with an uppercut but Mazzola uses good head movement to avoid it.
That's one minute gone in the round.
Mazzola lands with a left to the head.
Mazzola misses with a shot to the kidneys.
Aisa tries to circle away but Mazzola has him pinned against the cage.
Aisa working aggressively here.
Mazzola goes for a body shot but it's blocked.
A left hand lands to the body for Mazzola.
Mazzola misses with a punch on the inside.
Mazzola is working hard here but doesn't seem to be able to control effectively, up against the cage.
Mazzola working aggressively here.
Mazzola lands with a short head shot on the inside.
A real battle for position is taking place between these two warriors.
Aisa lands with a quick shot inside that doesn't really do much damage.
An uppercut on the inside fails to land for Aisa.
Aisa is working hard here but doesn't seem to be able to control effectively, up against the cage.
Aisa is looking to break free of the clinch but Mazzola has double underhooks.
Mazzola tries a body shot but Aisa blocks it.
Mazzola fails to land with a short punch on the inside.
That's two minutes gone in the round.
Mazzola misses with a shot to the kidneys.
Still in the clinch, Mazzola scores with a nice short uppercut.
Aisa tries to land a shot to the body but it's blocked.
Aisa fails to land with a short punch on the inside.
Mazzola tries to land a shot to the body but it's blocked.
Aisa wants to stall.
Aisa misses with the head strike.
Laverne Mazzola has scored more points in the clinch so far.
Mazzola lands with a quick shot inside that doesn't really do much damage.
Mazzola presses Aisa against the cage and delivers a mid-strength body shot.
Aisa wants to stall.
An uppercut on the inside fails to land for Aisa.
The crowd are loving this. Great action here.
Aisa throws a punch but it's blocked by Mazzola.
Aisa swings wildly with an uppercut but Mazzola uses good head movement to avoid it.
Mazzola misses with a hook to the ribs.
Mazzola misses with a punch to the body.
Mazzola misses with a hook from the clinch.
Aisa blocks a punch to the side of the head.
That's three minutes gone in the round.
Mazzola blocks a couple of punches on the inside.
Mazzola is looking for a takedown up against the cage. Aisa gets underhooks though and prevents the takedown attempt.
Mazzola blocks an uppercut.
Aisa is trying to slow down the pace of the fight but Mazzola is keeping busy.
Mazzola tries to land a shot to the body but it's blocked.
Aisa is trying to stall.
Mazzola misses with a punch on the inside.
Mazzola working aggressively here.
Aisa is working hard here but doesn't seem to be able to control effectively, up against the cage.
Mazzola goes for a body shot but it's blocked.
A head punch on the inside from Aisa fails to land.
Aisa is working hard here but doesn't seem to be able to control effectively, up against the cage.
Aisa is trying to slow the pace down but that's a couple of times in a row that he's tried to get underhooks and Mazzola has denied him.
Mazzola throws a blind hook that connects with the side of Aisas head.
Aisa prevents a body shot from Mazzola.
Mazzola swings wildly with an uppercut but Aisa uses good head movement to avoid it.
That's four minutes gone in the round.
A battle for position here, against the cage.
Mazzola misses with a shot to the kidneys.
Mazzola working aggressively here.
Aisa is working hard here but doesn't seem to be able to control effectively, up against the cage.
Mazzola blocks an uppercut.
Mazzola lands a nice looking hook to the body, against the cage.
Aisa lands with a right to the head.
Aisa blocking some punches.
Mazzola goes for a body shot but it's blocked.
Aisa wants to break free but Mazzola has control.
Mazzola looking to stall.
Mazzola blocks an uppercut.
Aisa wants to get back to striking at distance but Mazzola won't allow it.
Mazzola blocks an uppercut.
Good body shot from Mazzola.
Mazzola misses with the head strike.
And thats the end of the round the fighters go back to their corners.
Laverne Mazzola dominated that second round.
That's the end of the interval. I'm sure that seemed a lot quicker than a minute for our two fighters! Back to the action. This is the final round!

Aisa misses with a wild combination.
Aisa gets tackled into the cage by Mazzola. Mazzola maintains the clinch.
A head punch blocked on the inside by Aisa.
Mazzola doesn't land with the attempted body shot.
Both guys are working to get underhooks.
Aisa lands a right hand.
Aisa misses with the head strike.
Mazzola fails to land with a short punch on the inside.
Mazzola working some nice short punches in the clinch.
Mazzola misses with some punches.
Aisa stalling in the clinch but Mazzola improves position.
Mazzola blocking some punches.
Aisa misses with some punches.
We've had a slow start to the round here - hopefully the action picks up.
Mazzola blocks an uppercut.
Mazzola swings away with an uppercut that misses.
Aisa is trying to maintain a safe position but Mazzola gets an underhook and turns Aisa into the cage.
Aisa lands with a short head shot on the inside.
A head punch blocked on the inside by Mazzola.
Mazzola lands a nice uppercut.
Aisa throws a head punch that misses.
That's one minute gone in the round.
Mazzola tries a body shot but Aisa blocks it.
Aisa misses with the head strike.
Aisa lands a right hand that snaps the head of Mazzola backwards.
Aisa scores with a hook to the body.
Mazzola tried to land a shot to the body but connects with Aisa's elbow.
Aisa misses with a punch on the inside.
Mazzola lands a hook to the side of the head.

Aisa's corner calls for him to break the clinch, which he does.
Aisa throws the left hand but Mazzola avoids the punch easily.
Mazzola feints a jab promting Aisa to slip. Mazzola then demonstrates his capabilities by jabbing again. Aisa slips again and ducks right into an uppercut.
Aisa swats away the attempt to clinch by Mazzola.
Mazzola takes a punch to the jaw and another one to the bread basket.
Aisa misses with a hook. Mazzola ducked under it nicely.
Aisa takes a solid shot to the body. That one hurt him but he's trying not to show it.
The fans in attendance giving it up for the two fighters, who have really let it all hang out in the last minute or so!
Mazzola clinches with his opponent.
Mazzola goes for a body shot but it's blocked.
Mazzola works on Aisa's body with a couple of short punches.
Laverne Mazzola is fighting for a decision here - he's started to take the cautious approach.
That's two minutes gone in the round.
A short uppercut from Aisa.
Aisa misses with a short punch on the inside.
Aisa throws a punch but it's blocked by Mazzola.
Aisa content to slow the pace in the clinch.
Mazzola blocks an uppercut.
Aisa misses with a short punch on the inside.
Aisa misses with the head strike.
Mazzola blocking some punches.
Aisa has a couple of punches blocked by Mazzola.
A head punch blocked on the inside by Mazzola.
Mazzola blocks an uppercut.
Mazzola lands a right hand.
That's three minutes gone in the round.
Mazzola has Aisa pressed up against the cage. He's trying to work for a single leg takedown. Mazzola pulls back from the cage and twists to the side, sending Aisa tumbling to the mat - Mazzola dives into Aisa's guard.
Aisa keeping moving, preventing Mazzola from controlling successfully.
Mazzola is intent on slowing down the pace of the fight, simply looking to control.
Aisa looking to control the pace of the fight rather than finish it.
Aisa had isolated an arm as going for a kimura. Mazzola defends it easily.
That's four minutes gone in the round.
Mazzola advances position into side control!
You can see the frustration on Aisa's face as Mazzola controls the position.
Aisa tries to work a leg under to get back to half guard but Mazzola wriggles his own leg back out and remains in side control.
Mazzola trying to control the position but Aisa is working away.
Mazzola working the ground and pound.
Aisa struggling a bit here.
Aisa seems a little lost for a moment, as Mazzola dominates the positioning.
Melcone Aisa has stepped it up - he knows he needs a finish here!
And that's the end of the fight!
That was a close round. You could make an argument for either fighter but I would give it to Laverne Mazzola.
Well I reckon that's a shut out for Mazzola, winning every round. Will the judges agree? They are the ones who matter, even if they are often depressingly incompetent. Over to the ring announcer for the scorecards.
Ladies and gentlemen, after 3 rounds of action, we go to the scorecards for a decision.
Judge Anthony Taglia scores the fight 30:27
Judge Jorge Garcia scores the fight 30:27
Judge Bruno Lombardi scores the fight 30:27
In favor of your winner, by unanimous decision... Laverne Mazzola!
|
|
|
|
|
|
|
|
|
|
|
|
|
|
|
|
|
|
|
|
|
|
|
| S |
C
A |
G |
S |
C
B |
G |
|
S |
C |
G |
|
energy
A | B |
|
hype
A | B |
|
pop
A | B |
|
mgr
A | B |
|
FIGHT
RATING
24% |
|
|
|
|
|
|

