|
|
PBP Commentary |
Coming up we have a heavyweight MMA rules bout between Ding Dong (ranked 0 p4p, 0 weight class) and CM Holla (ranked 0 p4p, 0 weight class). Both fighters will be looking to make this an exciting fight for the fans, I'm sure!
 |
|
 |
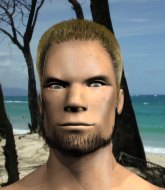
| 225 cm
26
250 lbs
1 - 3 - 0 |
|
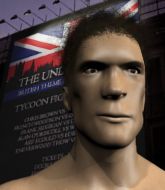
187 cm
18
275 lbs
0 - 1 - 0 |
BJJ White Belt
Solid boxing
KO power |
|
BJJ Blue Belt
Brawler
Granite chin |
|
| |
|
Ladies and gentlemen. This fight is 3 rounds, in the heavyweight division.
Introducing the fighter to my left, fighting out of the red corner.
With a record of
1 - 3 - 0, fighting out of Hilo, Ding Dong!
And introducing the fighter to my right, fighting out of the blue corner.
With a record of
0 - 1 - 0, fighting out of Hilo, CM Holla!
The judges for this bout are Paul Gruel, Ryoma Takatsuka and Jeff Smith.

The bell rings for round one and we are underway!
Dong misses with a few strikes there.
Sloppy strikes from Dong. Those never looked like landing.
Holla wants to clinch up but Dong keeps it at a distance.
Holla misses with a takedown attempt - Dong sprawls well and throws a nice strike on the way out which just misses.
Holla slips a jab and a cross from Dong.
Holla tries to clinch but is not successful on this occasion.
Dong throws a series of punches but Holla avoids them all with ease.
Holla with a lazy takedown attempt
and Dong makes him pay by landing a nice hook to the body before moving out of range.
Holla takes a shot right to the bread basket.
Dong cracks Holla with a hook to the jaw. Both fighters smile at eachother and high-five before getting back down to business.
Dong has been working on his boxing with his coaches at Gracie Barra Hilo (Sauna + Bang for your Buck) in the buildup to the fight.

Holla shoots in from a long way out. He's driving through with the takedown attempt and he eventually gets it, landing in Dong's guard.
Fantastic stuff here - a very entertaining period of action, which has drawn cheers from the crowd.
Holla stops Dong from standing up.
Holla trying to control the position from guard on top but Dong is wriggling around, looking for whatever he can.
Holla might have to switch it up a bit here because his efforts to control Dong haven't been going to plan, at least at the current moment in time.

That's one minute gone in the round.
Dong is looking to stand up but Holla isn't so interested in that idea.

Dong manages to wriggle out and sneak his way back up to his feet, so the fighters are now clinched up against the cage.

Dong breaks the clinch and we're back to striking at distance.
Holla misses with a jab, cross combination.
Holla on the wrong end of a vicious looking body shot.
Dong blocks a head kick by Holla.
Holla throws a looping left and ducks down for a takedown. He's got his arms around Dong's waist but Dong gets an underhook and avoids the takedown by throwing Holla off to one side.
Ding Dong has stuffed three takedown attempts in the round now. That's going to take a lot out of CM Holla.
Holla looks winded!
Dong digs a good body shot into Holla's ribs.
Holla takes a jab on the nose there. A little bit of blood seems to be coming out. Hopefully that won't affect his breathing.
Holla doesn't manage to clinch there - Dong circles away.
Holla has done a lot of speed work in the buildup to this fight.

That's two minutes gone in the round.
Holla moves to clinch but Dong breaks away
letting Dong counter with a right hand.
Dong changes levels and scores with a jab to the body.
The fans in attendance giving it up for the two fighters, who have really let it all hang out in the last minute or so!
Dong's corner calls for a 1, 2 combination and Dong duly obliges.
Holla dodges the punch combination from Dong.
Holla takes a punch to the jaw and another one to the bread basket.
Dong moves into range and throws a combination. A nice jab followed by a hook to the body.
Dong rushes forward with a series of wild hooks but Holla moves out of range and avoids them all easily.
Jab, cross, leg kick. Nice combination by Dong!
Dong lands a jab. Then a cross. Then finally a nice hook to the body. Good work there by Dong.
Dong pushes forward with a 1-2 combination that forces Holla back to the cage. Dong follows up with a solid lead hook to the liver.
Dong wings a very wild body shot but it does the job and lands to the midsection.

That's three minutes gone in the round.
Dong moves into range and throws a lovely three punch combination.
A right-left combo lands from Dong.
Dong lands three nice shots there - that looked like it hurt!
Nice uppercut lands for Dong. That snapped Holla's head back.
Dong lands a jab-cross combination.

Holla is rocked!
Holla slips a jab and a cross from Dong.
Holla is still on wobbly legs! Can Dong finish him?
This has been an exciting period of action!
A combination from Dong does no damage.
Holla seems to have recovered his senses.
Dong jabs Holla to the body, keeping him at a distance.
Dong throws a wild combination but nothing lands.
Dong is working the combinations to good effect here.
Dong lunges in with swinging rights and lefts but Holla circles away quickly and effectively.
Holla drops his hands and takes a jab to the jaw for his troubles.
Holla drives through with a takedown into Dong's guard. Let's see what he can do from the top position.

That's four minutes gone in the round.
Dong is looking to stand up but Holla isn't so interested in that idea.
Holla is taking a break and basically stalling. The referee will not allow him to do that for long.

Holla is trying to work a guillotine from the top, or something like that? Don't know how he thinks he's going to get a finish from there.
Dong on his back here. We all know that wrestlers don't like being on their back so let's see if Dong tries to get out of the position.
Dong wants to get back to his feet but Holla is in a dominant position and won't allow it.
And thats the end of the round the fighters go back to their corners.
Ding Dong dominated that round.
That's the end of the interval. I'm sure that seemed a lot quicker than a minute for our two fighters! Back to the action.

Dong scores with a jab.
Holla tries to shoot in for a takedown. He's got hold of a leg but Dong swivels and escapes.
Dong pushes forward with a 1-2 combination that forces Holla back to the cage. Dong follows up with a solid lead hook to the liver.
Dong slips under a jab from Holla.
A combination from Dong does no damage.
Holla thows a leg kick but Dong checks it
and Dong counters with a one-two to the body.
Dong lands with a nice body punch.
Dong is really dominating this fight. Is there anything that Holla can do to turn this around?
Dong throws a right and a left that Holla avoids nicely.
Holla takes a punch to the jaw and another one to the bread basket.
The crowd cheering loudly, showing their appreciation for the quality fight we're seeing here.
Dong lands a jab, followed by a cross and another cross, as Holla backs up against the cage.
Dong is using his height advantage well here, landing a good percentage of his punches.
Holla is breathing heavily.
Dong works over Holla's head and body with a nice combination.
Holla throws a combination but it was largely blocked by Dong.
That's one minute gone in the round.
Holla fails with the takedown.
Dong is using his reach advantage well here, landing the more effective single shots from range.
Holla doesn't react quick enough there as he takes a shot to the body.
Ding Dong is winning the standup battle so far.
Holla takes a body punch that cleary hurt but he's trying not to show any weakness.
Dong connects with a looping left hand that seems like it dazed Holla momentarily.
Ding Dong is looking to keep the fight on the feet at all costs.
Dong looks to land a combination but Holla avoids it well.
Dong misses with a double jab.
Ding Dong is looking to throw some combinations by the looks of things.
Dong throws a series of punches but Holla avoids them all with ease.
Holla on the wrong end of a nice jab.
Dong scores with a nice looking left hook and follows it up with an uppercut!
Holla has his head snapped back a nice jab. A little nod from Holla there as he acknowledges the shot.
Holla rushes forward with a series of wild hooks but Dong moves out of range and avoids them all easily.
Dong is looking to wear down Holla with body shots, infact he's throwing more body shots than head shots at the moment.
The fans in attendance giving it up for the two fighters, who have really let it all hang out in the last minute or so!
Dong looks to land a combination but Holla avoids it well.
That's two minutes gone in the round.
Dong throws a combination but it was largely blocked by Holla.
Holla swings for the body but Dong moves out of range.
Dong lands a jab, followed by a cross and another cross, as Holla backs up against the cage.
Dong connects with a slap. Keep your fist closed son.
Dong swinging wildly here.
It really doesn't seem like the step up in weight is hurting Dong here at all. He's more than holding his own against the bigger man.
Holla fails with the takedown
and Dong counters with a nice jab to the body that keeps Holla thinking.
Ding Dong has stuffed three takedown attempts in the round now. That's going to take a lot out of CM Holla.
Dong lands with an overhand left.
Dong scores to the head and body with a nice combination!
Dong keeping a good distance there, avoiding the body shot.
Holla gets his takedown attempt stuffed easily
and Dong connects with a straight left hand counter down the middle.
That's three minutes gone in the round.
A jab from Dong finds it's way through Holla's defenses.
Holla slips a jab and a cross from Dong.
Dong misses with the combination.
No joy there for Dong, who threw a few shots but didn't land.
Holla dives in and grabs Dong's left leg, looking for a takedown. Dong pushes down on Holla's head and hops out.
Dong throws a nice looking combination but Holla bobs and weaves to avoid any damage.
Dong displaying good standup as he scores with a three punch combination.
Dong really does look like a pencil wearing a pair of gloves. Let's hope he has a gameplan to suit that ridiculous body shape.
Dong lands a jab followed by a nice looking cross.
Holla takes one to the chin there.
Ding Dong seems to be the more aggressive standup fighter in this bout.
Dong throws a series of punches but Holla avoids them all with ease.
That's four minutes gone in the round.
Wooooo! Give it up for these two warriors! They are putting on a show!
Dong throws a combination but comes up with nothing but fresh air.
Holla slips a jab and a cross from Dong.
Holla moves in looking to clinch but Dong pushes him off.

Holla has managed to clinch.

Holla escapes the clinch and we're back to striking.
Holla showing good head movement there, avoiding the strikes from Dong.
Dong defends well against a solid takedown attempt from Holla.
Dong lands a jab to Holla's midsection.
The crowd applaud the fighters' efforts here as the round comes to an end.
Holla tries to clinch up.
Holla walks into a left hand.
A punch combination from Dong misses.
And thats the end of the round the fighters go back to their corners.
Ding Dong dominated that second round.
The minute break is over - no more time for sponges and pep talks - back to the action! And we move into the final round!

Dong throws a right and a left that both miss.
A punch combination from Dong misses.
Holla fails with an attempt to clinch.
Dong throws a series of punches but Holla moves out of range.
Dong misses with a jab and misses with a cross straight after too.
Dong fakes high and swings low for a body shot but Holla manages to avoid it.
Holla is trying hard to land a takedown here. Dong sprawls well and keeps this one on the feet.
Holla slips a jab and a cross from Dong.
Holla takes a swing at Dong's ribcage but misses.
We've had a slow start to the round here - hopefully the action picks up.
Dong lands with an uppercut that bounces Holla off the cage and back into range.
Holla throws a loose over hand right and dives in with a double leg takedown. Dong tries to sprawl but it's too late and the fighters hit the mat. Holla is in Dong's guard.
The fighters are pressed up against the cage, both looking to find a bit of space to work.

Holla stands up from Dong's guard - Holla perhaps looking for a knockout.
Both fighters are breathing heavily.
Holla looks for a takedown here. Will he get it? Dong is fending him off so far but Holla persists. Nope, Dong circles away and we're back to standing.
That's one minute gone in the round.
Dong misses with a series of wild punches.
Holla tries to clinch up but Dong circles away and keeps his distance.
Dong tries to bum rush Holla with a series of wild strikes but Holla uses good footwork to avoid the assault.
Sloppy strikes from Dong. Those never looked like landing.
Jab by Dong.
Holla misses with a takedown attempt
and Dong counters with a three punch combo that has Holla backing up. Holla nods at Dong to acknowledge the strikes.
Ding Dong has stuffed three takedown attempts in the round now. That's going to take a lot out of CM Holla.
Dong throws a combination but it was largely blocked by Holla.
Holla fails with a takedown attempt.
That's two minutes gone in the round.
Dong misses with a jab and misses with a cross straight after too.
Dong throws a right and a left that Holla avoids nicely.
Dong throws a combination but comes up with nothing but fresh air.
Dong looks to score with a combo but nothing lands.
Holla fails with the takedown.
Dong throws a series of punches but Holla avoids them all with ease.
Wooooo! Give it up for these two warriors! They are putting on a show!
Holla tries to drive through with a takedown attempt but Dong defends well and Holla ends up having to push Dong into the cage where they will battle it out in the clinch.
Dong breaks the clinch and we return to the middle of the mat.
A combination from Dong does no damage.
That's three minutes gone in the round.
Holla throws a head kick that misses and slips in the process. He scrambles back to his feet and the fighters circle.
Dong throws a combination. Holla tries to block but a couple of punches get through.
Holla takes a jab on the nose there. A little bit of blood seems to be coming out. Hopefully that won't affect his breathing.
Holla gets the takedown into side control.
Dong sneaks out the side door and pushes Holla away - he's back to his feet. The crowd show their appreciation for the escape.
Holla darts in and lands a nice takedown into half guard.
We've seen a great period of action over the last minute or so - credit to both fighters for going all out!
Dong is trying to stand.
Holla controlling the action here.
That's four minutes gone in the round.
Holla stands up out of the half guard.
A telegraphed takedown attempt from Holla is defended easily by Dong.
Good shot there by Dong.
Dong misses with a series of wild punches.
Dong lands with an overhand left.
And that's the end of the fight!
Ding Dong showed his dominance in that final round.
Well I reckon that's a shut out for Dong, winning every round. Will the judges agree? They are the ones who matter, even if they are often depressingly incompetent. Over to the ring announcer for the scorecards.
Ladies and gentlemen, after 3 rounds of action, we go to the scorecards for a decision.
Judge Paul Gruel scores the fight 30:26
Judge Ryoma Takatsuka scores the fight 30:26
Judge Jeff Smith scores the fight 30:26
In favor of your winner, by unanimous decision... Ding Dong!
|
|
|
|
|
|
|
|
|
|
|
|
|
|
|
|
|
|
|
|
|
|
|
| S |
C
A |
G |
S |
C
B |
G |
|
S |
C |
G |
|
energy
A | B |
|
hype
A | B |
|
pop
A | B |
|
mgr
A | B |
|
FIGHT
RATING
72% |
|
|
|
|
|
|
