|
|
PBP Commentary |
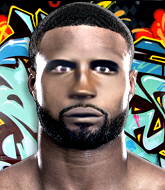
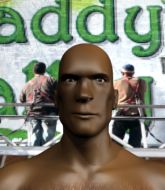
Coming up we have a light heavyweight MMA rules bout between Jermaine Barksdale (ranked 0 p4p, 0 weight class) and Walter White (ranked 0 p4p, 0 weight class). Barksdale comes to the cage accompanied by Ain't No Sunshine- DMX. Both fighters look fresh as a daisy as they make their way towards the cage.
 |
|
 |
| 190 cm
33
211 lbs
19 - 6 - 0 |
|
188 cm
28
217 lbs
10 - 10 - 1 |
Good wrestling
World class boxer
Insanely flexible |
|
Good wrestler
World class boxer
Good gas tank |
|
| |
|
Ladies and gentlemen. This fight is 3 rounds, in the light heavyweight division.
Introducing the fighter to my left, fighting out of the red corner.
With a record of
19 - 6 - 0, fighting out of Las Vegas, Jermaine Barksdale!
And introducing the fighter to my right, fighting out of the blue corner.
With a record of
10 - 10 - 1, fighting out of Tokyo, Walter White!
The judges for this bout are Timothy Bukovac, and Jack Bonds.

The bell rings for round one and we are underway!
White is the aggressor but that punch slipped nicely by Barksdale.
Nice takedown defense from White. No joy for Barksdale on that attempt.
Barksdale thuds a left hand into White's body.
Nice defenses there by White.
White thows a left - swing and a miss!
White throws a hard body shot but it just misses.
White takes a head kick and shrugs it off.
Barksdale tries to land with a swinging hook to the body but White was well out of range. Poor timing from Barksdale.
Barksdale throws a lazy right hand but White sees it coming a mile off and sidesteps it easily.
Nice defenses there by Barksdale.
Barksdale waving his hands out in front of him, looking to distract White.
Barksdale pushing out the jab but it's not landing.
We've had a slow start to the round here - hopefully the action picks up.
Barksdale swings for the body but White moves out of range.
A slow jab from Barksdale misses its intended target.
White ducks under a wild hook from Barksdale.
A punch lands to the side of Barksdale 's head but he takes it in his stride.
A kick lands to the mid section there for Barksdale.
White has been spending a lot of time sparring his boxing in the run up to the fight, trying to sharpen up those hands and look for a knockout.
We've seen a great period of action over the last minute or so - credit to both fighters for going all out!
White slips a jab from Barksdale.

That's one minute gone in the round.
Barksdale throws a head kick that misses.
Nice shot lands for White.

Barksdale darts in and clinches White up against the cage.
A nice right hand lands inside from Barksdale.
White will no doubt start fighting again in a minute but for now he's just having a little rest, leaning Barksdale up against the cage.

White breaks the clinch and we return to the middle of the mat.
Barksdale blocks a leg kick.
Barksdale tries for a takedown but White circles away easily
and White counters with a quick right hand to the jaw.
Barksdale scores with a punch to the head.
Barksdale throws a hard body shot but it just misses.
White uses decent footwork to sidestep a right hand from Barksdale.
White bobs and weaves well there to avoid the strikes.
Barksdale throws a looping overhand right but White ducks down to avoid it.

That's two minutes gone in the round.
Barksdale keeping his hands up high there, blocking the jab from White.
White pulls out of a head kick attempt.
Barksdale swings wildly with a right hand that was never going to find it's target.
Jermaine Barksdale seems to be the more aggressive standup fighter in this bout.
Fantastic stuff here - a very entertaining period of action, which has drawn cheers from the crowd.
Jab, cross, leg kick. Nice combination by White!
White scores with a punch to the head.
Barksdale slips under a jab from White.
White takes a jab on the nose there. A little bit of blood seems to be coming out. Hopefully that won't affect his breathing.
White scores with a jab.
White throws a looping overhand right but Barksdale ducks down to avoid it.
White cracks Barksdale with a nice right hand that draws applause from the crowd.
White throws a good cross that connects.
White scores with a head kick. Barksdale tried to block it but didn't get his arm up in time.
Barksdale tries to clinch up.
Barksdale misses with a leg kick
and White counters with a nice body shot.
Barksdale is trying hard to land a takedown here. White sprawls well and keeps this one on the feet.
That's three failed takedown attempts in the round for Jermaine Barksdale. That's going to take a lot out of him.
White moves out of range as Barksdale strikes.

That's three minutes gone in the round.
Barksdale scores with a crisp jab that stopped White in his tracks.
White throws a wild combination but nothing lands.

Barksdale drives through with a takedown into guard.
Barksdale trying to land body shots but he keeps hitting the mat.
Barksdale trying to land body shots but he keeps hitting the mat.
Barksdale is fighting to break White's control of his arms but White is doing a good job of controlling the position at the moment.
There's a bit of a scramble here and now White is on top in guard.

Barksdale managing to control the position.
Barksdale tries to land a sweep but no joy.
White working some ground and pound from guard but it's not doing any damage.

That's four minutes gone in the round.
Barksdale has control of White's left arm, preventing White from doing any damage.
White preventing the sweep.
White wants to control from the top but Barksdale keeps moving.
Barksdale is doing well to control the posture of his opponent and prevent any damage.
White trying to control the position from guard on top but Barksdale is wriggling around, looking for whatever he can.
White throwing strikes but missing.
Both fighters have adopted an aggressive gameplan on the ground!
Barksdale has his hands on White's head, controlling the position.
Barksdale preventing the ground and pound from doing any damage.
Barksdale keeping moving, preventing White from controlling successfully.
The referee is pacing around the two fighters - he looks like he's thinking about a standup.
Barksdale has White pulled in close to control his posture.

The referee decides to stand the fighters back up.
White moves away from the strike by Barksdale.
And thats the end of the round the fighters go back to their corners.
A close round but Walter White will probably get the nod.
The fighters' corners scream their final instructions, as the referee calls time. Here we go, back to the action!

White fails to land with a series of punches.
White with a nice cross.
White scores with a straight right hand, right through his opponent's guard.
White slips under a jab from Barksdale.
White keeping a good distance there, avoiding the body shot.
Barksdale throws a low kick but White avoids it.
White drops his hands and takes a jab to the jaw for his troubles.
Barksdale tries to land with a swinging hook to the body but White was well out of range. Poor timing from Barksdale.
White works the jab nicely.
Walter White seems to be getting the better of the standup.
White scores with a shot to the body.
Barksdale swats away the attempt to clinch by White.
Barksdale misses with a hook.
Barksdale is looking to slow White down with leg kicks.
Barksdale swings away but doesn't land with a series of punches.
Wooooo! Give it up for these two warriors! They are putting on a show!
White connects with a jab.
That's one minute gone in the round.
White will have to do better than that with his takedown attempts.
Barksdale throws a body shot but no joy.
Barksdale connects nicely with a jab. Noted by the judges no doubt.
White throws a low kick, looking for Barksdale's leg but Barksdale calmly moves out of range.
White with poor footwork there. He got himself in a bit of a tangle, enabling Barksdale to score with a decent uppercut.
Barksdale misses with a straight left.
Barksdale missing with a left hand there. White was out of range so wasted energy throwing that one.
White looks to land a right hand but Barksdale moved out of range.
White shoots in looking for a takedown. Barksdale tries to sprawl out of it but White keeps driving through. The fighters are pinned against the cage. Barksdale manages to get underhooks and after a bit of a struggle, circles away and we're back to standing.
White drops his hands and takes a jab to the jaw for his troubles.
White fails with a takedown attempt from distance.
Jermaine Barksdale has stuffed three takedown attempts in the round now. That's going to take a lot out of Walter White.
Barksdale misses with an uppercut. White saw that one coming.
Barksdale swings away with a body shot that misses
and White counters with a crisp hook to the side of the head.
That's two minutes gone in the round.
White throws out a powerful jab.
Barksdale misses with an attempted mid kick.
Barksdale throws a hook but White blocks it.
Fantastic stuff here - a very entertaining period of action, which has drawn cheers from the crowd.
White slips a straight right by Barksdale.
White bobbing and weaving, closes the distance and lands a hook to the side of Barksdale's head.
Barksdale misses the jab.
Barksdale throws an ugly left hook that misses
and White counters with a crisp hook to the side of the head.
White swings for the body but Barksdale moves out of range.
White fails to land with a series of punches.
Barksdale scores with a kick to the midsection.
Barksdale tries to clinch there but White circles away.
Barksdale rushes forward with a series of wild hooks but White moves out of range and avoids them all easily.
No luck with that takedown attempt from Barksdale.
Barksdale motions for White to come forward. Barksdale throws a leg kick but it misses it's target.
That's three minutes gone in the round.
A big right from Barksdale misses.
Barksdale pivots, looking for a leg kick but White is out of range and Barksdale settles back down.
A leg kick checked by Barksdale.
White throws a leg kick but Barksdale moved away.
Barksdale misses with a two punch combination.
A leg kick checked by White.
A combination from White does no damage.
Barksdale throws a couple of head shots and lands with the final one - a decent hook, which struck White on the side of the head.

White looking to shoot here. He's gone for it and he's landed a takedown into side control! Oh, that's bad for Barksdale!
Barksdale tries to bench press White off him but White keeps the position.
White misses with the ground and pound.
Barksdale tries to improve position but can't.
Barksdale is working hard here to advance position.
Barksdale gets back to half guard.
White seems very keen to just sit and control from half guard but Barksdale does not like that idea so much and is remaining active off his back.
That's four minutes gone in the round.
White throwing punches and elbows but they're not doing any damage.
Barksdale keeping his head moving to avoid the ground and pound.
The crowd are loving this. Great action here.
Barksdale is trying to maintain the position but White is very close to passing his half guard.
White throwing shots but they're hitting the canvas more than the man.
Barksdale is doing well to avoid being mounted. He's controlling the position at the moment.
Barksdale slips a foot under and gets full guard. Nice work.
Barksdale keeping moving, preventing White from controlling successfully.
White trying to land body shots but he keeps hitting the mat.
White postures up to throw the ground and pound strikes but they don't connect.
Barksdale managing to control the position.
White postures up to throw the ground and pound strikes but they don't connect.
And thats the end of the round the fighters go back to their corners.
A close second round but Walter White will probably get the nod - 10:9.
The corners get their ten second warning. Both fighters stand from their stools and stare eachother down, ready to get back to the action. This is the final round!

White needs to keep his hands up - Barksdale had a free shot at his head there.
Barksdale tries to clinch up but White circles away and keeps his distance.
White defending well as Barksdale loads up on a big left hand.
White takes a really solid shot there but just smiles back and shrugs his shoulders.
White moves out of range as Barksdale throws a body kick.
Barksdale digs a good hook to White's body.
Barksdale scores with a punch to the head.
Barksdale misses with a hook.
Barksdale connects with a looping right hand.
White takes a thudding leg kick, right into the meat of the thigh.
Barksdale takes a step towards his opponent and connects with a left hand, before circling away.

White moves into range and clinches up with Barksdale.
Barksdale tries for a takedown. No joy.
This is a great period of action - very entertaining stuff!
White wants a takedown but no success here.
White drops down looking for an ankle pick but Barksdale pulls his leg out and moves away.
White scores with a hook.
That's one minute gone in the round.
White fails with a rather predictable takedown attempt.
Jermaine Barksdale has stuffed three takedown attempts in the round now. That's going to take a lot out of Walter White.
White takes one on the button.
Barksdale connects with a solid leg kick.
Barksdale throws a hook to the side of White's head but White sees it coming and ducks under it beautifully.
White scores to the head and body with a nice combination!
Barksdale tries to clinch up but White circles away and keeps his distance.
Barksdale misses with a head kick.
White ducks under a wild hook from Barksdale.
Barksdale swings wildly with a right hand that was never going to find it's target.
White swats away the attempt to clinch by Barksdale.
Barksdale throws a jab, cross combination which is slipped
letting White counter with a right hand.
That's two minutes gone in the round.
Barksdale thows a left - swing and a miss!
Barksdale connects with a hook to the side of his opponent's head.
White tries to clinch up against the cage, rushing in to close the distance. Barksdale manages to break the clinch and circles back to the middle of the mat.
White slips under a jab from Barksdale.
Barksdale misses with a looping right.
The crowd cheering loudly, showing their appreciation for the quality fight we're seeing here.
White misses with a looping left.
Barksdale scores with a jab. White acknowledges it with a nod of the head.
Barksdale takes a hook to the side of the head. I wonder if that's got his ears ringing.
Barksdale throws a looping left and ducks down for a takedown. He's got his arms around White's waist but White gets an underhook and avoids the takedown by throwing Barksdale off to one side.
White ducks under a wild hook from Barksdale.
Barksdale uses good footwork to avoid the strikes from White.
White blocks a jab.
Barksdale misses with a hook.
White tries to clinch up.
That's three minutes gone in the round.
Barksdale is looking to clinch but White is avoiding it.
White looks to land a left hand but Barksdale moved out of range nicely.
Barksdale throws a jab but it's blocked by White.
Barksdale blocks a jab.
Barksdale ducks down and throws a hook to the body but White moves away.
White keeping at a good range here, avoiding a leg kick.
Barksdale throws the left hand but White avoids the punch easily.
White takes a shot right to the bread basket.
White jabbing away but nothing is landing.
Nice body punch from White.
Barksdale has his front leg slapped to the side - a nice low kick landing there from White.
White defending well as Barksdale loads up on a big left hand.
Barksdale checks a low kick from White.
Barksdale takes a jab right on the kisser.
White lunges in with swinging rights and lefts but Barksdale circles away quickly and effectively.
That's four minutes gone in the round.
White throws a right hand that Barksdale ducks under and follows up with a left that Barksdale also avoids with ease.
White just misses with a punch to the body.
White tries to clinch but Barksdale moves out of range.
White jabbing away but nothing is landing.
White tries to clinch up against the cage, rushing in to close the distance. Barksdale manages to break the clinch and circles back to the middle of the mat.
White shoots in for a takedown. "Ole!" shouts Barksdale as he jumps to the side.
Wooooo! Give it up for these two warriors! They are putting on a show!
Barksdale shoots in for a takedown from distance. He catches White napping and manages to drive through into side control!
Barksdale working the strikes but White uses the opportunity to regain half guard.
The ref warns both fighters not to hold the cage as they work up against the meshing.
Barksdale not landing any meaningful shots this time.
Barksdale is just content to waste time from the top position. White takes advantage of the situation and regains full guard.
The fighters are pressed up against the cage, both looking to find a bit of space to work.
White can't do much from the bottom at the moment, as Barksdale controls the pace.
And that's the end of the fight!
Jermaine Barksdale showed his dominance in that final round.
I think White has won this one but let's see whether the judges agree with me. Over to the ring announcer for the scorecards.
Ladies and gentlemen, after 3 rounds of action, we go to the scorecards for a decision.
Judge Timothy Bukovac scores the fight for Walter White!
Judge Percy O'Donnell scores the fight for Jermaine Barksdale!
Judge Jack Bonds scores the fight for Jermaine Barksdale!
Jermaine Barksdale wins by split decision!
A very excited looking Jermaine Barksdale made sure he remembered to thank all the fans both in the arena and on the internet. He said all the coolest people spend all day on MMA websites, which got a big reaction.
|
|
|
|
|
|
|
|
|
|
|
|
|
|
|
|
|
|
|
|
|
|
|
| S |
C
A |
G |
S |
C
B |
G |
|
S |
C |
G |
|
energy
A | B |
|
hype
A | B |
|
pop
A | B |
|
mgr
A | B |
|
FIGHT
RATING
62% |
|
|
|
|
|
|
