|
|
PBP Commentary |
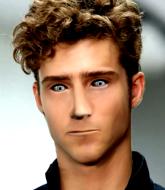
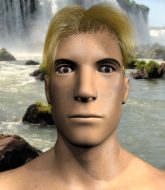
Coming up we have a welterweight MMA rules bout between Jeremy Dunham (ranked 0 p4p, 0 weight class) and Melchizedek Halo (ranked 0 p4p, 0 weight class). Both fighters will be looking to make this an exciting fight for the fans, I'm sure!
 |
|
 |
| 172 cm
20
170 lbs
4 - 2 - 0 |
|
182 cm
21
185 lbs
5 - 0 - 0 |
BJJ Purple Belt
Great low kicks
Cardio machine |
|
Good wrestler
Good kicks
Knockout power |
|
| |
|
Ladies and gentlemen. This fight is 3 rounds, in the welterweight division.
Introducing the fighter to my left, fighting out of the red corner.
With a record of
4 - 2 - 0, fighting out of Amsterdam, Jeremy Dunham!
And introducing the fighter to my right, fighting out of the blue corner.
With a record of
5 - 0 - 0, fighting out of Hilo, Melchizedek Halo!
The judges for this bout are Paul Gruel, Chris Saunders and Josh West.

The bell rings for round one and we are underway!
Dunham tries to land a leg kick but Halo saw it coming and moves away.
Ooooh, nice body kick lands from Dunham. Halo shrugs it off though.
Halo moves out of range of the body kick from Dunham.
Halo takes a solid shot to the body. That one hurt him but he's trying not to show it.
Dunham feints a straight left to the body, then turns around with a flashy move and hits Halos jaw with a dramatic spinning back fist!
Halo misses with a takedown attempt - Dunham sprawls well and throws a nice strike on the way out which just misses.
Halo fails to land the takedown.
Dunham looks to have improved his striking defense since last time we saw him fight.
Dunham tests Halo's chin there with a solid looking shot.
Dunham throws a body kick that misses.
Dunham scores with a leg kick.
Dunham scores with a push kick.
Halo tries to move into range but Dunham moves to the side and lands with a nice right hand.
A kick lands to the mid section there for Dunham.
The crowd are loving this. Great action here.
Dunham displays good takedown defense there as he swats away a double leg from Halo.
Jeremy Dunham has stuffed three takedown attempts in the round now. That's going to take a lot out of Melchizedek Halo.
Halo avoids the head kick by Dunham.

Halo closes the distance and looks for a trip takedown... aaaand he's got it - Halo lands in his opponent's guard.

That's one minute gone in the round.
Dunham being controlled here, momentarily.
Dunham is controlling Halo's posture.
Halo with a couple of shots to the head there. Not particularly brutal.
Dunham is pulling down on Halo's head. It's preventing any offense from Halo, at least for the moment.
Halo in full guard, throwing the ground and pound. No damage this time.
The ref warns both fighters not to hold the cage as they work up against the meshing.
Halo trying to control but Dunham is working from the bottom.
Dunham is adopting a defensive guard.

That's two minutes gone in the round.
Well. There's a bit of a lull in the action here and the crowd are starting to get restless.
Halo wants to control from the top but Dunham keeps moving.
Dunham controls Halo momentarily but Halo frees himself.
We must be close to a standup if these guys don't pick up the pace.
A real slowdown in the pace of the fight for a moment, as Dunham holds on and takes a little breather.

The referee has motioned to the fighters to stand back up. He just wasn't happy with the level of activity.

Halo gets in close and instigates a clinch.
A battle for position here, against the cage.
Halo tries a shoulder strike but it doesn't do any damage.
Halo tries to pull guard but Dunham won't allow it.
A nice right hand lands inside from Dunham.

Dunham escapes the clinch and we're back to striking.
Dunham gets caught on his heels momentarily as he allows Halo to score an easy takedown into full guard.

That's three minutes gone in the round.
Halo loading up with the ground and pound but he's missing more than he's landing in this flurry.
Halo postures up.
A real slowdown in the pace of the fight for a moment, as Dunham holds on and takes a little breather.
Dunham trying to control the position.
The fighters are going at a pretty good pace and they're both starting to sweat now.
Dunham can't keep his opponent in guard - Halo advances to half guard, no doubt looking to mount.

Halo is looking for an arm triangle, whilst trying to pass to side control. Dunham doesn't seem that keen to cooperate though. No luck this time Halo.
Dunham trying to control here.

That's four minutes gone in the round.
There's not a lot going on here and the crowd are letting the fighters know they're not willing to tolerate a lack of action.
Halo wants to take a breather but Dunham is having none of it.
Halo seems to be looking for submissions.
Dunham is pressing down on Halo's left leg trying to get back to full guard. He's managed it.
Dunham trying to control the position here.
Halo throws a big elbow that misses.
Dunham working a defensive guard here.
Dunham looking to control the pace of the fight rather than finish it.
Halo wants to control from the top but Dunham keeps moving.
Dunham seems keen to control Halo's posture.
We've had a lack of effective grappling in the last minute or so, which could well see a referee standup.
And thats the end of the round the fighters go back to their corners.
Jeremy Dunham dominated that round.
The corners get their ten second warning. Both fighters stand from their stools and stare eachother down, ready to get back to the action.

Dunham turns his hip over beautifully as he lands a nice leg kick.
Dunham looks for the body kick but Halo saw that one coming.
Dunham stuffs the takedown.
Dunham tries to work over Halo's front leg with a kick but Halo checks it.
Dunham scores with a kick to the body.
Halo fails with a takedown attempt from distance.
Jeremy Dunham is winning the standup battle so far.
Halo shoots in for a takedown but Dunham shows good takedown defense.
Jeremy Dunham has stuffed three takedown attempts in the round now. That's going to take a lot out of Melchizedek Halo.
Halo takes one to the chin there.
Halo gets a double leg takedown into Dunham's guard.
Dunham not looking particularly offensive just at the moment.
Dunham seems keen to control Halo's posture.
Melchizedek Halo has got the better of the ground game so far.
Halo trying to control the position from guard on top but Dunham is wriggling around, looking for whatever he can.
That's one minute gone in the round.
Dunham not looking particularly offensive just at the moment.
Dunham avoiding any damage from the ground and pound.
Halo drops back for a leg! It's a sloppy attempt though and Halo jumps back into guard quickly, to retain the dominant position.
Halo trying to control but Dunham is working from the bottom.
The referee has motioned to the fighters to stand back up. He just wasn't happy with the level of activity.
Dunham slaps away a takedown attempt from Halo, before circling back to the center of the mat.
Halo shoots in for a takedown - he's clinched up with Dunham but Dunham pushes him off and we're back to square one.
Halo shoots in for a double leg but Dunham sprawls well. That's going to sap some energy.
Halo is breathing heavily.
Halo fails with a takedown attempt.
That kick from Dunham tenderised Halo's leg. Halo is trying to keep his angry face on.
Dunham works his jab well there, keeping his opponent at a distance.
Jeremy Dunham is looking to keep the fight on the feet at all costs.
That's two minutes gone in the round.
Dunham tries a switch kick but it misses it's target.
Thud! ouch! good body kick from Dunham - that will leave a mark!
Dunham ducks low and lands a nice hook to the body of his opponent.
Dunham lands a jab to Halo's midsection.
Dunham lands a nice hook to Halo's body. Halo takes it in his stride and looks to land his own strikes.
Melchizedek Halo seems to be the more aggressive standup fighter in this bout.
Halo avoids the head kick by Dunham.
Dunham tries a head kick but it misses.
This is a great period of action - very entertaining stuff!
Halo goes for a double leg but Dunham avoids the attempt and the two fighters end up clinched against the cage as Dunham continues to drive forward.
Halo tries to pull guard but Dunham forces him back to his feet, against the cage.
Come on Dunham - let's have some action - none of this stalling nonsense.
Dunham is leaning against Halo and scores with a nice uppercut to the body.
A quick uppercut on the inside from Dunham.
Halo tries to pull guard but Dunham holds him up against the cage and eventually Halo drops back down to his feet.
Halo jumps guard but Dunham stands there with Halo around his waist. Halo gives up and drops back to his feet. We remain in the clinch.
That's three minutes gone in the round.
Halo jumps guard but his hands slip and he falls flat on his back. Well, he's made himself look a right mug there, as Dunham walks away with a smile on his face. Halo gets slowly back to his feet and shakes his head.
A nice inside leg kick there by Dunham. That's going to slow Halo down.
Halo shoots in for a takedown but doesn't get it.
Halo shoots in and drives through. Dunham sprawls well.
A solid body kick from Dunham.
Halo has developed a nice purple lump on his ribcage, as a result of some heavy body kicks from Dunham.
Halo takes a shot right to the liver - Bas would have been proud of that punch.
Dunham scores with a spinning back kick!
Dunham ducks low and lands a nice hook to the body of his opponent.
Dunham is really dominating this fight. Is there anything that Halo can do to turn this around?
Crunch! Dunham slams his shin into Halo's torso.

Dunham gets in close and instigates a clinch.
The pace really dropping off here, momentarily.
Halo tries to jump guard but he falls flat on his backside. Dunham smiles and moves away.
That's four minutes gone in the round.
Dunham scores with a sloppy punch to the body. Not much technique there but it did the business.
Dunham is looking to wear down Halo with body shots, infact he's throwing more body shots than head shots at the moment.
A telegraphed takedown attempt from Halo is defended easily by Dunham.
This has been an exciting period of action!
Dunham closes the distance and clinches.
Dunham scores with a shot to the side of Halo's head.
Halo tries to take the fight to the ground by pulling guard but can't manage it.
Dunham manages to break the clinch.
Dunham dips down and scores with a jab to the body.
Dunham connects with a leg kick. He turned his hip over nicely there.
Halo shoots in for a takedown. "Ole!" shouts Dunham as he jumps to the side.
A nice inside leg kick there by Dunham. That's going to slow Halo down.
Dunham displays good takedown defense there as he swats away a double leg from Halo.
Dunham buckles his opponent's knee momentarily with a nice leg kick.
And thats the end of the round the fighters go back to their corners.
Jeremy Dunham dominated that second round.
The fighters' corners scream their final instructions, as the referee calls time. Here we go, back to the action! Let's get this one finished - here comes the final round!

Dunham feints with a shoulder and throws a nice leg kick to Halo's calf.
Dunham moves into range and lands a nice body kick.
Dunham lands a jab to Halo's midsection.
Dunham keeps the fight on the outside.
Dunham connects with a looping left hand that seems like it dazed Halo momentarily.
Halo has a takedown stuffed.
Halo on the wrong end of a kick to the body.
Dunham is looking to slow Halo down with leg kicks.
Halo is looking to clinch.
Dunham scores with a nice body kick.
Halo gets his takedown attempt stuffed easily
and Dunham counters with a nice body kick.
Dunham thumps Halo with a low kick.
Dunham fakes a jab and scores with a low kick.
Melchizedek Halo is looking to throw some combinations by the looks of things.
Halo takes a big intake of breath there - he's definitely tired.
We've seen a great period of action over the last minute or so - credit to both fighters for going all out!
Halo tries to clinch there but Dunham circles away.
Dunham throws a head kick that half lands.
That's one minute gone in the round.
Halo looks for a takedown but Dunham sprawls well.
Jeremy Dunham has stuffed three takedown attempts in the round now. That's going to take a lot out of Melchizedek Halo.
Dunham cracks Halo with a good shot that sees him stumbling back into the cage.
Dunham lands a nice looking kick to the body. Halo takes a step back to recover.
Dunham fakes a jab and scores with a low kick.
Halo is pinned up against the cage taking some big shots here. The referee is looking closely deciding whether he should stop the fight.

Halo is rocked!
Dunham thuds his shin into the meat of Halo's side.
Dunham is moving around nicely and scores here with a single head shot.
Halo is still on wobbly legs! Can Dunham finish him?
Halo wants to stay close but Dunham steps back to make room for something. Halo seems frozen to the spot and bam! huge swing of the leg from Dunham and Halo drops like he has been shot! A huge head kick and it's all over!
Ladies and gentlemen, after 1:38 of round 3, we have a winner by way of KO (Head Kick). Jeremy Dunham!
A very excited looking Jeremy Dunham made sure he remembered to thank all the fans both in the arena and on the internet. He said all the coolest people spend all day on MMA websites, which got a big reaction.
|
|
|
|
|
|
|
|
|
|
|
|
|
|
|
|
|
|
|
|
|
|
|
| S |
C
A |
G |
S |
C
B |
G |
|
S |
C |
G |
|
energy
A | B |
|
hype
A | B |
|
pop
A | B |
|
mgr
A | B |
|
FIGHT
RATING
59% |
|
|
|
|
|
|
