|
|
PBP Commentary |
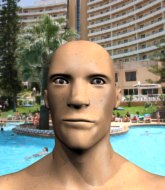
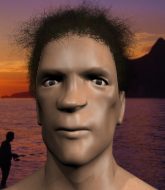
Coming up we have a light heavyweight MMA rules bout between Anarchy Destroy (ranked 0 p4p, 0 weight class) and Karl Crumbie (ranked 0 p4p, 0 weight class). Over to our ring announcer for the fighter introductions!
 |
|
 |
| 188 cm
25
200 lbs
0 - 0 - 0 |
|
190 cm
24
210 lbs
1 - 4 - 0 |
BJJ Blue Belt
Brawler
Intelligent |
|
BJJ Purple Belt
Decent boxing
Enjoys gardening |
|
| |
|
Ladies and gentlemen. This fight is 3 rounds, in the light heavyweight division.
Introducing the fighter to my left, fighting out of the red corner.
With a record of
0 - 0 - 0, fighting out of London, Anarchy Destroy!
And introducing the fighter to my right, fighting out of the blue corner.
With a record of
1 - 4 - 0, fighting out of London, Karl Crumbie!
The judges for this bout are James Atkins, James Ackerman and Steven Brown.

The bell rings for round one and we are underway!
Destroy walks straight into an uppercut. Luckily it didn't land flush.
Crumbie with a jab.
Karl Crumbie seems to be the more aggressive standup fighter in this bout.
Destroy moves forwards but Crumbie connects with a nice, crisp jab.
Crumbie moves in looking to clinch but Destroy pushes him off.
Crumbie lands a jab, followed by a cross and another cross, as Destroy backs up against the cage.
Crumbie keeps the fight on the outside.
Crumbie tries to clinch but Destroy moves out of range.
Crumbie misses with a body kick.
Crumbie connects with a solid leg kick.
Crumbie darts in looking for a takedown but Destroy gets double underhooks and turns Crumbie into the cage.

Destroy's corner calls for him to break the clinch, which he does.
Crumbie shoots in looking for a takedown. Destroy tries to sprawl out of it but Crumbie keeps driving through. The fighters are pinned against the cage. Destroy manages to get underhooks and after a bit of a struggle, circles away and we're back to standing.
Crumbie shoots in for a takedown. "Ole!" shouts Destroy as he jumps to the side.
Anarchy Destroy has stuffed three takedown attempts in the round now. That's going to take a lot out of Karl Crumbie.
The crowd cheering loudly, showing their appreciation for the quality fight we're seeing here.

Destroy shoots in for a takedown and gets it. Let's see what he's got on the mat.
Destroy seems content to control from guard here. He's going to have to remain active though if he doesn't want to get stood back up.
The ref warns both fighters not to hold the cage as they work up against the meshing.

That's one minute gone in the round.
Destroy passes into half guard.
Still in half guard, Destroy seems content to control.
Destroy trying to pass the guard but Crumbie defending well.
Crumbie is looking to escape.
Destroy is trying to control. Crumbie wants to improve his position but can't escape this time.

That's two minutes gone in the round.
There's not a lot going on here and the crowd are letting the fighters know they're not willing to tolerate a lack of action.
Destroy wants to pass to mount but Crumbie is defending the position.

The referee has stepped in and called for a break in the action. We'll restart on the feet.

Destroy forces Crumbie back against the cage and clinches.
Crumbie swings wildly with an uppercut but Destroy uses good head movement to avoid it.
Crumbie fails to pull guard.
Crumbie stops a takedown attempt from Destroy.
Destroy holding his opponent close, against the cage.

Crumbie pulls guard.
Destroy passes into half guard.
Destroy takes a deep breath and rests his weight momentarily on top of his opponent, to control the position.

That's three minutes gone in the round.
Crumbie looks like he's trying to stand up.
Still in half guard, Destroy seems content to control.

Destroy decides to stand up and try his luck on the feet.
Destroy looks frustrated there after his takedown attempt is stuffed easily.
Crumbie tries to close the distance and clinch but Destroy swats him to one side with an open hand palm strike and circles away.
Crumbie tries to close the distance and clinch up but Destroy swats him away and circles back towards the center.

That's four minutes gone in the round.
The crowd are showing their displeasure at the lack of action as loud boos ring out around the arena.
No luck with that takedown attempt from Crumbie.
Destroy moves out of range of the body kick from Crumbie.
Crumbie tries to clinch up.
Destroy moves into the clinch successfully.
Destroy content to slow the pace in the clinch.
Destroy keeps the fight in the clinch, despite Crumbie's efforts to push away.
Destroy prevents Crumbie from breaking the clinch.
Destroy breaks from the clinch.
A head kick misses from Crumbie.
Crumbie throws a push kick but Destroy slaps the foot to one side.
The crowd thankful this round is nearly over.
Crumbie tries a switch kick but it misses it's target.
Destroy moves into range and clinches up with Crumbie.
Destroy drags the fight down to the ground.
And thats the end of the round the fighters go back to their corners.
Anarchy Destroy dominated that round.
The referee calls time. The cornermen exit stage left and we're back to business.

Crumbie tries to clinch up but Destroy circles away and keeps his distance.
Destroy pushing out the jab but it's not landing.
The fighters are starting to get sweaty, which will make takedowns a bit more tricky.
Crumbie paws at his opponent with the jab and then lunges in with a straight, right on the button.
Crumbie throws a combination but it was largely blocked by Destroy.
Crumbie throws a series of punches but Destroy avoids them all with ease.
Crumbie lands a jab-cross combination.
Crumbie fakes high and shoots in for a takedown but Destroy avoids it really well and circles away.
Crumbie tries to clinch up against the cage, rushing in to close the distance. Destroy manages to break the clinch and circles back to the middle of the mat.
Crumbie tries to bum rush Destroy with a series of wild strikes but Destroy uses good footwork to avoid the assault.
We've had a slow start to the round here - hopefully the action picks up.
Crumbie misses with a body kick.
Crumbie pulls out of a head kick attempt.
Destroy drives through and clinches with Crumbie against the cage.
Destroy ties up his opponent against the cage and manages to drag the fight down to the ground. Destroy no doubt will be looking to work submissions from his guard.
This has been an exciting period of action!
Destroy is pulling down on Crumbie's head to control his posture.
That's one minute gone in the round.
Destroy controls Crumbie momentarily but Crumbie frees himself.

Destroy throwing his legs up looking for a triangle.
Destroy looking to control.
Crumbie wants to stand but Destroy is controlling his posture from full guard.
Destroy utilising some decent striking defenses from the guard, preventing the ground and pound.
Crumbie chips away with some ground and pound.
That's two minutes gone in the round.
Well. There's a bit of a lull in the action here and the crowd are starting to get restless.
Destroy looking for a sweep. Not yet Destroy, not yet.
Destroy utilising some decent striking defenses from the guard, preventing the ground and pound.
The referee has stepped in and called for a break in the action. We'll restart on the feet.
Crumbie tries to clinch up against the cage, rushing in to close the distance. Destroy manages to break the clinch and circles back to the middle of the mat.
Crumbie shuffles to his left behind two crisp jabs. Destroy eats them both and turns towards Crumbie to reposition himself and eats a stinging right hand-left hook combo.
Destroy fails to land the takedown.
Crumbie misses with a kick to the body.
Crumbie goes to the watering hole and comes back with a big thumbs up from the judges as he scores a three punch combo.
Destroy has managed to clinch.
Crumbie tries to stall but Destroy uses the opportunity to gain a better position.
Destroy manages to pull guard. Let's see whether he can land a sub off his back.
Destroy is doing well to control the posture of his opponent and prevent any damage.
Both fighters are absolutely exhausted here.
That's three minutes gone in the round.
Destroy working the defensive guard well to avoid strikes from Crumbie.
Crumbie in full guard, throwing the ground and pound. No damage this time.
Crumbie trying to control the position from guard on top but Destroy is wriggling around, looking for whatever he can.
A big thud reverberates around the arena there as Crumbie accidentally thumps the mat. Hopefully he's not broken his hand.
Crumbie would like to get this fight back to the feet but can't get free from the closed guard.
Destroy tries to land a sweep but no joy.
The fighters are pressed up against the cage, both looking to find a bit of space to work.
Destroy lands with a heel strike from the guard.
The ref stands the fighters back up due to a lack of activity.
Destroy looking to shoot here. He's gone for it and he's landed a takedown into side control! Oh, that's bad for Crumbie!
Destroy tries to move to full mount but Crumbie actually manages to regain half guard.
That's four minutes gone in the round.
Crumbie trying to control from the bottom.
Crumbie moves his hips nicely and gets into full guard.
Crumbie wants to stand up but Destroy is controlling him.
The crowd thankful this round is nearly over.
Destroy is frustrating his opponent with some stalling tactics from top position.
We may be looking at a referee standup if the pace doesn't pick up soon.
And thats the end of the round the fighters go back to their corners.
Karl Crumbie showed his class in that round. I'd imagine he'll take it on all the scorecards.
That's time! Destroy's corner gives him a slap on the ass as he gets ready to fight. This is the final round!

Destroy changes levels and looks for a double leg takedown. Crumbie tries to avoid it but Destroy manages to keep hold of a leg and drag Crumbie to the ground. Crumbie escapes though and pops straight back up to his feet.
Destroy checks a leg kick.
Crumbie tries to clinch up against the cage, rushing in to close the distance. Destroy manages to break the clinch and circles back to the middle of the mat.
Crumbie scores with a nice takedown into half guard. Let's see what he's got on the ground.
Crumbie wants to take a breather but Destroy is having none of it.

Crumbie is trying to work for a kimura but Destroy is defending well.
Crumbie is looking for an arm triangle, whilst trying to pass to side control. Destroy doesn't seem that keen to cooperate though. No luck this time Crumbie.
We've had a slow start to the round here - hopefully the action picks up.
Destroy looking to work for a kimura from the bottom.
That's one minute gone in the round.
Destroy is looking to improve his position.
Destroy flails away from the bottom but he's not doing any damage.
Destroy has no desire to be mounted, so is trying to control. Crumbie is working away from the top position though.
Crumbie missing with the ground and pound from half guard.
Crumbie is keeping good posture, landing some ground and pound.
Destroy has no desire to be mounted, so is trying to control. Crumbie is working away from the top position though.
That's two minutes gone in the round.
My god... these two guys really need to pick up the pace or everyone will leave to go get a beer.
Crumbie thows a wild elbow that connects with the canvas.
Destroy is staying active underneath Crumbie, who seems content to just control the action from this position.
The referee decides to stand the fighters back up.
Destroy shoots in for a double leg but Crumbie sprawls well. That's going to sap some energy.
Both fighters are breathing heavily.
Destroy throws a series of punches but Crumbie avoids them all with ease.
Crumbie shoots in looking for a takedown. Destroy tries to sprawl out of it but Crumbie keeps driving through. The fighters are pinned against the cage. Destroy manages to get underhooks and after a bit of a struggle, circles away and we're back to standing.
Crumbie lands with a nice combination. Destroy backs away looking to recover.
Nice sprawl there from Crumbie as Destroy shoots in.
That's three failed takedown attempts in the round for Anarchy Destroy. That's going to take a lot out of him.
Crumbie shoots in looking for a double leg takedown. Destroy defends it nicely.
Crumbie throws a good cross that connects.
That's three minutes gone in the round.
Crumbie shoots in for a takedown. "I don't think so" says Destroy as he avoids it easily.
Crumbie shoots in for a takedown. He's persisting with it as Destroy sprawls well. Destroy wins this battle and keeps the fight standing. Crumbie gets slowly back to his feet.
Anarchy Destroy is looking to throw some combinations by the looks of things.
A punch combination from Crumbie misses.
Destroy shoots in but Crumbie avoids the takedown attempt easily.
A head kick by Crumbie misses
and Destroy counters into the clinch. Nicely done.
Crumbie decides to pull guard.
Destroy looking to pass the guard.
Crumbie looking to sweep here. No luck so far.
That's four minutes gone in the round.
Destroy not doing a lot at the moment. He'll have to show some more aggression or the fight will get stood up.
Destroy has controlled the position for a good 20 seconds, which will no doubt be starting to frustrate his opponent.
Destroy pressing down on his opponent's thigh, looking to pass guard. Crumbie is keeping the position for now.
Destroy throws a strike but Crumbie rolls with it and manages to sweep. Now he's in guard on top.

The crowd thankful this round is nearly over.
Crumbie got a little sloppy there for a moment and Destroy has worked his way into a loose triangle - can he finish it?! No, Crumbie has managed to get both his arms back between Destroy's legs - danger averted.
Crumbie is working Destroy over from the guard. He should look to pass the guard and do a little more damage with these strikes.
And that's the end of the fight!
Karl Crumbie comfortably won the final round on my scorecard.
I think Crumbie has won this one but let's see whether the judges agree with me. Over to the ring announcer for the scorecards.
Ladies and gentlemen, after 3 rounds of action, we go to the scorecards for a decision.
Judge James Atkins scores the fight 28:29
Judge James Ackerman scores the fight 28:29
Judge Steven Brown scores the fight 28:29
In favor of your winner, by unanimous decision... Karl Crumbie!
|
|
|
|
|
|
|
|
|
|
|
|
|
|
|
|
|
|
|
|
|
|
|
| S |
C
A |
G |
S |
C
B |
G |
|
S |
C |
G |
|
energy
A | B |
|
hype
A | B |
|
pop
A | B |
|
mgr
A | B |
|
FIGHT
RATING
35% |
|
|
|
|
|
|
