|
|
PBP Commentary |
Coming up we have a welterweight MMA rules bout between Connor McGuinness (ranked 0 p4p, 0 weight class) and Juan Gabaldon (ranked 0 p4p, 0 weight class). McGuinness comes to the cage accompanied by Ain't a party without me . Juan Gabaldon is staring across the cage at his opponent, tweaking his nipples.
 |
|
 |
| 183 cm
23
185 lbs
6 - 5 - 0 |
|
175 cm
28
182 lbs
5 - 2 - 1 |
BJJ Brown Belt
World class boxer
Granite chin |
|
Good wrestler
Counter fighter
Granite chin |
|
| |
|
Ladies and gentlemen. This fight is 3 rounds, in the welterweight division.
Introducing the fighter to my left, fighting out of the red corner.
With a record of
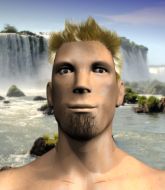
6 - 5 - 0, fighting out of Los Angeles, Connor McGuinness!
And introducing the fighter to my right, fighting out of the blue corner.
With a record of
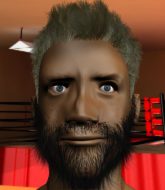
5 - 2 - 1, fighting out of Los Angeles, Juan Gabaldon!
The judges for this bout are Jack Bonds, Timothy Bukovac and .

The bell rings for round one and we are underway!
McGuinness throws a hook but Gabaldon avoids it easily.
McGuinness throws a wild combination but nothing lands.
Gabaldon closes the distance but McGuinness moves to the side
and McGuinness cracks him with a counter punch right on the button.
Nice shot by McGuinness.

It looks like Juan Gabaldon has been cut.
Gabaldon takes an uppercut right on the button but keeps his composure.
McGuinness lands a jab to the head.
A cross from McGuinness lands.
McGuinness with a jab.
Nice uppercut there from McGuinness.
McGuinness is using his height advantage well here, landing a good percentage of his punches.
The fans in attendance giving it up for the two fighters, who have really let it all hang out in the last minute or so!
Gabaldon needs to keep his hands up - McGuinness had a free shot at his head there.
A left lands for McGuinness.
Gabaldon on the wrong end of an overhand right that came out of nowhere.
McGuinness keeps the fight on the outside.
McGuinness throwing a counter right hand but Gabaldon manages to avoid it.
Connor McGuinness is looking to keep the fight on the feet at all costs.

That's one minute gone in the round.
McGuinness misses with a hook. Gabaldon ducked under it nicely.
Gabaldon feints the counter takedown.
McGuinness dips down and scores with a jab to the body.
Gabaldon takes one on the chin but seems OK.
Gabaldon throws a leg kick
and Gabaldon takes a counter punch right on the button for his troubles.
Decent striking displayed by McGuinness there.
McGuinness slaps away a takedown attempt from Gabaldon, before circling back to the center of the mat.
McGuinness digs a good hook to Gabaldon's body.
McGuinness fails to land with a series of punches.
McGuinness throws a body shot but no joy.
McGuinness swings wildly with a hook that is half blocked by Gabaldon.

That's two minutes gone in the round.
Gabaldon throws a looping left and ducks down for a takedown. He's got his arms around McGuinness's waist but McGuinness gets an underhook and avoids the takedown by throwing Gabaldon off to one side.
McGuinness scores with the left hand. Gabaldon knows he should have avoided that one.
We've been told by McGuinness's head coaches at Bloodsport Gym 16 Elites that he's been working on his takedown defense in preparation for this fight.
This is a great period of action - very entertaining stuff!
McGuinness throws a two punch combo that lands nicely.
McGuinness rushes forward with a series of wild hooks but Gabaldon moves out of range and avoids them all easily.
McGuinness fakes a head shot and lands one to the body.
Nice uppercut lands for McGuinness. That snapped Gabaldon's head back.
That has opened up Juan Gabaldon's cut even more.

Gabaldon scores a trip takedown into side control. Nice.
McGuinness is not content to let Gabaldon control the position.
McGuinness is looking for a sweep.

That's three minutes gone in the round.
Gabaldon trying to control the position but McGuinness is working away.
McGuinness prevents Gabaldon from improving position.
McGuinness tries to buck Gabaldon off but Gabaldon is having none of it.
McGuinness struggling a bit here.
McGuinness is looking for a sweep.
Gabaldon wants to control but McGuinness is keeping him busy.
Gabaldon tries to move to mount but McGuinness blocks the move with his legs.
In the pre-fight buildup videos we saw Gabaldon working his ground and pound in the gym. He isn't landing a great percentage of his ground strikes so far though.

That's four minutes gone in the round.
Well. There's a bit of a lull in the action here and the crowd are starting to get restless.
McGuinness is not content to let Gabaldon control the position.
McGuinness is looking for a sweep.
McGuinness can't do much from the bottom here.
McGuinness regains half guard.
The fighters are starting to get a bit slippery now, which will make submissions a bit more difficult.
McGuinness tries to get to full guard but Gabaldon has control of the leg.
The fighters are pressed up against the cage, both looking to find a bit of space to work.
McGuinness wants to sweep but Gabaldon has passed to side control!
And thats the end of the round the fighters go back to their corners.
Connor McGuinness dominated that round.
The cut man is working on Juan Gabaldon's cut.
The fighters' corners scream their final instructions, as the referee calls time. Here we go, back to the action!

McGuinness leaves Gabaldon with his face pressed against the mat as he sprawls beautifully, defending against a solid takedown attempt.
McGuinness throws a one two combo.
McGuinness changes levels and scores with a jab to the body.
McGuinness jabs. That one connects to the head of his opponent.
McGuinness lands a jab, followed by a cross and another cross, as Gabaldon backs up against the cage.
Nice body punch from McGuinness.
Gabaldon fails miserably with a takedown attempt.
A counter left hand to the body from McGuinness misses its target.
McGuinness bobbing and weaving, closes the distance and lands a hook to the side of Gabaldon's head.
The crowd are loving this. Great action here.

Gabaldon closes the distance and clinches.
That's one minute gone in the round.
McGuinness is trying to force a seperation but Gabaldon has the dominant position.
Gabaldon stalling in the clinch but McGuinness improves position.

McGuinness breaks the clinch and we're back to striking at distance.
McGuinness connects with a jab.
Gabaldon's hands are dropping dangerously low here and McGuinness connects clean with a right hook that sends him down to one knee! Gabaldon scrambles back to his feet.
The cut above Juan Gabaldon's eye is starting to cause him problems now.
McGuinness lands a powerful looking uppercut that connected with his opponent's jaw.
Gabaldon fails with the takedown.
Connor McGuinness has stuffed three takedown attempts in the round now. That's going to take a lot out of Juan Gabaldon.
McGuinness lands a beauty of a right hand that gets the crowd cheering.
Gabaldon has a pretty nasty looking mouse under his right eye.
That's two minutes gone in the round.
Nice shot by McGuinness.
Gabaldon throws a low kick but his opponent is out of range.
Gabaldon shoots in looking for a double leg takedown. McGuinness defends it nicely.
A jab from McGuinness does it's job there.
Gabaldon shoots in from a long way out. He's driving through with the takedown attempt and he eventually gets it, landing in McGuinness's guard.
The crowd cheering loudly, showing their appreciation for the quality fight we're seeing here.

McGuinness is working actively off his back, looking to secure an arm or perhaps work for a triangle.
McGuinness wants to sweep but no luck.
That's three minutes gone in the round.
McGuinness not looking particularly offensive just at the moment.
Gabaldon pushing down on McGuinness's thigh, trying to pass to half guard. He's managed it... Nice work.
Gabaldon wants to take a breather but McGuinness is having none of it.
McGuinness wants to get back to full guard.
Gabaldon wants to take a breather but McGuinness is having none of it.
Gabaldon looks to land a strike but McGuinness avoids it nicely and regains full guard.
McGuinness lands a beautiful sweep and he's now moved into his opponent's guard.

McGuinness trying to control but Gabaldon is working from the bottom.
That's four minutes gone in the round.

Gabaldon kicks McGuinness off and gets to his feet.
McGuinness throws a couple of head shots and lands with the final one - a decent hook, which struck Gabaldon on the side of the head.
McGuinness jabs. That one connects to the head of his opponent.
Juan Gabaldon's cut is absolute horrible now. This looks like something out of a horror film with blood covering both fighters.
McGuinness connects with a single shot there.
Gabaldon takes a jab on the nose there. A little bit of blood seems to be coming out. Hopefully that won't affect his breathing.
This has been an exciting period of action!
Gabaldon tries to move into range but McGuinness moves to the side and lands with a nice right hand.
The referee calls the doctor in to look at Juan Gabaldon's cut. Oh no, the doctor has called an end to the bout!
Ladies and gentlemen, after 4:59 of round 2, we have a winner by way of TKO (Cut). Connor McGuinness!
After winning the bout, Connor McGuinness thanked all his fans and promised he'd do even better in his next fight. The crowd seemed to love his humility.
|
|
|
|
|
|
|
|
|
|
|
|
|
|
|
|
|
|
|
|
|
|
|
| S |
C
A |
G |
S |
C
B |
G |
|
S |
C |
G |
|
energy
A | B |
|
hype
A | B |
|
pop
A | B |
|
mgr
A | B |
|
FIGHT
RATING
44% |
|
|
|
|
|
|

