|
|
PBP Commentary |
Coming up we have a light heavyweight MMA rules bout between Frodo Baggins (ranked 0 p4p, 0 weight class) and Cameron Hicks (ranked 0 p4p, 0 weight class). I can't wait for this one - let's get the fighter introductions out of the way and get this one started!
 |
|
 |
| 170 cm
25
200 lbs
1 - 0 - 0 |
|
183 cm
25
202 lbs
1 - 0 - 0 |
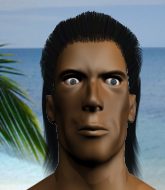
BJJ Blue Belt
Solid Muay Thai
Good chin |
|
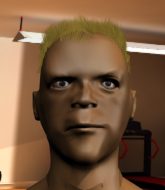
BJJ Purple Belt
Brawler
Enjoys gardening |
|
| |
|
Ladies and gentlemen. This fight is 3 rounds, in the light heavyweight division.
Introducing the fighter to my left, fighting out of the red corner.
With a record of
1 - 0 - 0, fighting out of The Island, Frodo Baggins!
And introducing the fighter to my right, fighting out of the blue corner.
With a record of
1 - 0 - 0, fighting out of The Island, Cameron Hicks!
The judges for this bout are Daniel Franklin, David Hoff and Santiago Holmes.

The bell rings for round one and we are underway!
Baggins tries to clinch but is not successful on this occasion.
Baggins shoots in for a takedown but Hicks shows good takedown defense there and keeps this one on the feet.

Baggins darts in and clinches Hicks up against the cage.
Hicks is working for a takedown up against the cage. He can't get it on this occasion though.
Hicks tries to break the clinch but Baggins is controlling the position.

Hicks has managed to pull guard. Let's see whether he can work an aggressive guard. It will also be interesting to see what tactics Baggins uses from the top position.
A real slowdown in the pace of the fight for a moment, as Hicks holds on and takes a little breather.
Baggins definitely looks more muscular than last time we saw him fight.
Hicks trying to control the position.
Baggins might be looking to lock onto one of his opponent's long limbs for a submission, whilst we're on the ground.
We've had a slow start to the round here - hopefully the action picks up.

Hicks uses the cage to get back to his feet.
Baggins lands with a nice combination. Hicks backs away looking to recover.
Hicks throws a looping left and ducks down for a takedown. He's got his arms around Baggins's waist but Baggins gets an underhook and avoids the takedown by throwing Hicks off to one side.

That's one minute gone in the round.
Baggins throws a feint and then finishes with a kick to the body.
Hicks tries to clinch up but Baggins circles away and keeps his distance.
Baggins shoots in for a double leg but Hicks sprawls well. That's going to sap some energy.
Baggins moves into the clinch successfully.

Baggins's corner calls for him to break the clinch, which he does.
Baggins shoots in for a takedown. He's persisting with it as Hicks sprawls well. Hicks wins this battle and keeps the fight standing. Baggins gets slowly back to his feet.
That's three failed takedown attempts in the round for Frodo Baggins. That's going to take a lot out of him.
Baggins shoots in for a takedown but Hicks shows good takedown defense.
Hicks let fly with a counter punch to the body but it didn't land.
Baggins is trying hard to land a takedown here. Hicks sprawls well and keeps this one on the feet.
Baggins displays good takedown defense there as he swats away a double leg from Hicks.
Baggins seem to be loading up, looking for a big counter.
Baggins shoots in for a takedown. "Ole!" shouts Hicks as he jumps to the side.
Hicks's coach down at Fitness elite 24/7 was telling us pre-fight that they have been working on Hicks's balance. Obviously they view that as a key factor in the outcome of this fight.

That's two minutes gone in the round.
Hicks shoots in and drives through. Baggins sprawls well.
Baggins shoots in but Hicks avoids the takedown attempt easily.
Baggins is breathing heavily.
Baggins tries to clinch but Hicks is having none of it.
Baggins looks frustrated there after his takedown attempt is stuffed easily.
Hicks tries to clinch there but Baggins circles away.

Hicks has closed the distance and engaged Baggins in a clinch.
Baggins breaks the clinch and we return to the middle of the mat.
Baggins stuffs the takedown attempt from Hicks. Hicks gets slowly back to his feet.
The crowd are loving this. Great action here.
Hicks misses the shot to the body.
Baggins fails with the takedown.

That's three minutes gone in the round.
Hicks shoots in looking for a single leg takedown. Baggins is trying to defend but Hicks finishes it well and ends up in half guard. Let's see if he can advance position further.
Hicks not doing much here.
Baggins throws a strike from the bottom that misses.

That's four minutes gone in the round.
The referee calls for the fighters to work.
Baggins really is a fat lump.

Hicks is working for a kimura but Baggins is defending it quite comfortably.
Hicks prevents Baggins from standing back up.
And thats the end of the round the fighters go back to their corners.
Cameron Hicks dominated that round.
The fighters get back to their feet, the hooter sounds and we're back to the action!

Baggins throws a nice head kick!
Baggins shoots for a double leg takedown but Hicks sprawls well. He's pushed Baggins's face into the mat and manages to get back to his feet relatively easily.
Baggins lands a big head kick that sends Hicks to the canvas! Baggins follows up with strikes from the mount that forces the ref to step in and stop the fight!
Ladies and gentlemen, after 0:14 of round 2, we have a winner by way of TKO (Strikes). Frodo Baggins!
|
|
|
|
|
|
|
|
|
|
|
|
|
|
|
|
|
|
|
|
|
|
|
| S |
C
A |
G |
S |
C
B |
G |
|
S |
C |
G |
|
energy
A | B |
|
hype
A | B |
|
pop
A | B |
|
mgr
A | B |
|
FIGHT
RATING
34% |
|
|
|
|
|
|

