|
|
PBP Commentary |
Coming up we have a lightweight MMA rules bout between Gordon Lamond (ranked 0 p4p, 0 weight class) and Ryo Miyaichi (ranked 0 p4p, 0 weight class). Over to our ring announcer for the fighter introductions!
 |
|
 |
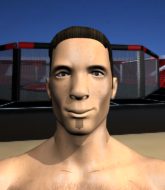
| 171 cm
26
168 lbs
6 - 6 - 0 |
|
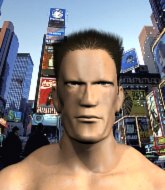
175 cm
22
170 lbs
7 - 7 - 0 |
Good wrestling
Great elbows
Granite chin |
|
Good wrestler
Excellent boxer
Good gas tank |
|
| |
|
Ladies and gentlemen. This fight is 3 rounds, in the lightweight division.
Introducing the fighter to my left, fighting out of the red corner.
With a record of
6 - 6 - 0, fighting out of St Petersburg, Gordon Lamond!
And introducing the fighter to my right, fighting out of the blue corner.
With a record of
7 - 7 - 0, fighting out of Las Vegas, Ryo Miyaichi!
The judges for this bout are Jack Bonds, Timothy Bukovac and .

The bell rings for round one and we are underway!
A cross from Miyaichi lands.
A punch combination from Miyaichi misses.
The fight stays on the outside here - Lamond looks like he's thinking about clinching though.
Lamond tries to clinch up but Miyaichi circles away and keeps his distance.
Lamond moves in looking to clinch but Miyaichi pushes him off.
Miyaichi tries a counter takedown but it's more of a dummy move, and he uses it to push himself away.
Miyaichi avoids the clinch attempt nicely.

Lamond moves into the clinch.
Lamond tries a knee to the head but Miyaichi blocks it.
Miyaichi fails to land with a short punch on the inside.
Lamond takes a shot to the head.
Lamond just leaning against Miyaichi, taking a breather.
Miyaichi tries for a takedown. No joy.
We've had a slow start to the round here - hopefully the action picks up.
Lamond misses with a punch to the body.
Lamond misses the knee to the body. Nice hip positioning from Miyaichi.
Lamond lands a nice knee to the body.
Miyaichi misses with some punches.
Miyaichi blocks a body shot from Lamond.
Miyaichi tried to land a shot to the body but connects with Lamond's elbow.

That's one minute gone in the round.
Lamond stalling the fight.
Miyaichi has dropped down and is looking to force the takedown but it's defended by Lamond after a bit of a struggle.
A short right hand to the side of the head by Miyaichi.
Miyaichi blocking some punches.
Knees in the clinch landing for Lamond.
Lamond lands with a short punch from the clinch.
Lamond scores with a hook to the body.
Lamond keeps control of Miyaichi as he tries to wriggle out of the double underhooks.
Lamond throws an elbow but it's blocked.
Lamond has Miyaichi pressed against the cage, preventing Miyaichi from circling away and getting back to striking at range.
Lamond has a couple of punches blocked by Miyaichi.
Miyaichi doesn't land with the attempted body shot.

Miyaichi breaks from the clinch.
Miyaichi rushes forward with a series of wild hooks but Lamond moves out of range and avoids them all easily.
Lamond rushes Miyaichi and pushes him back against the cage in a clinch.
Lamond with the Thai clinch, lands a knee to the head.
Miyaichi scores with a nice hook to the head.
Wooooo! Give it up for these two warriors! They are putting on a show!
Lamond with the Thai clinch. He's looking to land a big knee but he's not managed it this time.
A real battle for position is taking place between these two warriors.

That's two minutes gone in the round.
Lamond unloads a knee to the mid-section.
Lamond leaning his opponent against the cage.
Miyaichi scores with an uppercut up the middle.
Lamond looking to throw knees to the head but Miyaichi is blocking nicely.
Miyaichi tries a body shot but Lamond blocks it.
Miyaichi takes an elbow to the temple.
Lamond lands a glancing elbow in the clinch.
Miyaichi tries to break the clinch but Lamond is controlling the position.
Lamond cracks Miyaichi with a nice body shot.
Knees to the body from Lamond.
Lamond landing knees to the body.
Miyaichi has had enough of the clinch and is looking to separate.
Lamond lands a body punch in the clinch.
Miyaichi looks winded!
Lamond misses with a knee strike.
Miyaichi blocks a knee to the body. He'll have a nicely bruised forearm in the morning.
Lamond lands a damaging elbow.

That's three minutes gone in the round.
Lamond lands a damaging elbow.
Miyaichi goes for a body shot but it's blocked.
Miyaichi takes an elbow to the temple.
Miyaichi tries for a takedown but Lamond manages to get underhooks.
Gordon Lamond has stuffed three takedown attempts in the round now. That's going to take a lot out of Ryo Miyaichi.
Lamond using the Thai plumb to throw knees but Miyaichi has his back arched nicely, preventing the strike.
A head punch on the inside from Miyaichi fails to land.
Knees in the clinch landing for Lamond.
Miyaichi takes a shot to the head.
Lamond lands a knee to the body.
Lamond crunches a lovely knee into Miyaichi's ribcage.
Knees to the body from Lamond.
Lamond utilising his Muay Thai to score with a knee to the body.
Lamond holding his opponent close, against the cage.
Lamond lands a knee to the head.
The crowd are loving this. Great action here.
Lamond content to slow the pace in the clinch.
Miyaichi working hard to break the clinch.

That's four minutes gone in the round.
Miyaichi takes a knee to the side of the body.
Miyaichi is looking to break free of the clinch but Lamond has double underhooks.
Lamond landing knees to the body. They look like they could hurt.
Miyaichi on the defensive, avoiding the knees to the body.
Lamond lands with a right to the head.
Lamond lands a nice elbow.
Lamond lands with a left to the head.
A short right from Lamond on the inside.
Lamond lands a knee to the head there! That was nasty!
Lamond looking to slow down the pace here.
Lamond fails to land with a short punch on the inside.
Lamond lands a right uppercut that snaps the head of Miyaichi backwards.
Miyaichi wants to take the fight to the mat but Lamond manages to get underhooks and keep the fight in the clinch.
Miyaichi wants to take the fight to the mat but Lamond manages to get underhooks and keep the fight in the clinch.
The crowd applaud the fighters' efforts here as the round comes to an end.
Miyaichi scores with a nice hook to the head.
Miyaichi's head jolts backwards as he takes an uppercut right on the button!
And thats the end of the round the fighters go back to their corners.
Gordon Lamond dominated that round.
The minute break is over - no more time for sponges and pep talks - back to the action!

Lamond wants to clinch up but Miyaichi keeps it at a distance.
Miyaichi misses with a body shot
and Lamond counters with a quick right hand to the jaw.
Miyaichi throws an off balance right hand
and Lamond counters with a stiff right hand.
Lamond is looking to take this fight into the clinch.
Lamond drives through and clinches with Miyaichi against the cage.
Knees to the body from Lamond.
Gordon Lamond has scored more points in the clinch so far.
Lamond blocking some punches.
Lamond lands a damaging elbow.
Lamond connects with a knee to the head.
We've had a slow start to the round here - hopefully the action picks up.
Kneeeeees! The crowd are calling for knees to the body. Lamond obliges.
Miyaichi pushes off and circles away, back to the middle of the mat.
Lamond tries to clinch up but Miyaichi circles away and keeps his distance.
Miyaichi keeps the fight on the outside.
Miyaichi has done a lot of speed work in the buildup to this fight.
Lamond wants to clinch up but Miyaichi keeps it at a distance.
That's one minute gone in the round.
Miyaichi missing with a left hand there. Lamond was out of range so wasted energy throwing that one.
Miyaichi keeps the fight on the outside.
Miyaichi tries a counter takedown but it's more of a dummy move, and he uses it to push himself away.
Miyaichi loads up on a big right hand but Lamond slips the punch.
Miyaichi throws a poor cross that misses
and Lamond counters with a right hand to the body.
Nice uppercut lands for Lamond. That snapped Miyaichi's head back.
Miyaichi throws out a loose jab but Lamond uses good head movement to avoid it.
Lamond misses with a two punch combination.
Lamond tries to close the distance and clinch but Miyaichi swats him to one side with an open hand palm strike and circles away.
Lamond tries to clinch but Miyaichi moves out of range.
Lamond wants to clinch.
Lamond lands with a nice body kick.
That's two minutes gone in the round.
Miyaichi connects with a jab.
Lamond tries to clinch up against the cage, rushing in to close the distance. Miyaichi manages to break the clinch and circles back to the middle of the mat.
Miyaichi feints the counter takedown.
Lamond fails in his attempt to clinch.
Miyaichi lands with a nice combination. Lamond backs away looking to recover.
We've seen a great period of action over the last minute or so - credit to both fighters for going all out!
Lamond tries to clinch but Miyaichi is having none of it.
Ryo Miyaichi seems to be getting the better of the standup.
Miyaichi lands a nice looking body shot.
Lamond doesn't manage to clinch there - Miyaichi circles away.
Lamond fails in his attempt to clinch.
Miyaichi misses the shot to the body.
It looked like Lamond was looking amped, ready to throw a big counter but didn't commit.
Lamond moves in looking to clinch but Miyaichi pushes him off.
Miyaichi on the wrong end of a nice low kick. He's acting like it's no big deal but he doesn't want to take many more of those.
Lamond tries to close the distance and clinch up against the cage but Miyaichi paws at him with a jab and circles away.
That's three minutes gone in the round.
Lamond drives through and clinches with Miyaichi against the cage.
Some stalling of biblical proportions here from Lamond.
A nice left hand lands by Lamond.
Lamond has Miyaichi pressed against the cage, preventing Miyaichi from circling away and getting back to striking at range.
Lamond working on landing some head shots here - that one got through nicely.
Miyaichi is looking for a takedown.
Miyaichi is trying to pull guard but being pressed up against the cage enables Lamond to keep the fight standing.
Miyaichi on the defensive, avoiding the knees to the body.
Lamond missing with knees to the body.
Miyaichi is trying to force a seperation but Lamond has the dominant position.
Miyaichi is looking to take this one to the mat.
Gordon Lamond has stuffed three takedown attempts in the round now. That's going to take a lot out of Ryo Miyaichi.
Lamond unloads a knee to the mid-section.
Miyaichi is breathing heavily.
Lamond lands a damaging elbow.
Miyaichi takes an elbow to the temple.
Lamond tries to land a knee to the body but he is off balance and Miyaichi avoids it.
Lamond makes some space for himself and lands an uppercut.
Lamond using the Thai plumb to throw knees but Miyaichi has his back arched nicely, preventing the strike.
Lamond is really dominating this fight. Is there anything that Miyaichi can do to turn this around?
Lamond with the Thai clinch. He's looking to land a big knee but he's not managed it this time.
That's four minutes gone in the round.
Lamond is struggling to control the position.
Fantastic stuff here - a very entertaining period of action, which has drawn cheers from the crowd.
Lamond lands an elbow inside that Miyaichi shrugs off.
Both fighters working to control the clinch.
Miyaichi is trying to work for a single leg takedown but Lamond pulls him back up using the underhooks.
Lamond misses with a hook to the ribs.
Miyaichi drops to a knee looking for a takedown but Lamond gets the underhooks and prevents it.
Miyaichi breaks the clinch and we return to the middle of the mat.
Lamond avoids a lazy jab quite easily.
Lamond was looking to counter that move with a punch but didn't quite pull the trigger.
Lamond tries to clinch but Miyaichi moves out of range.
Lamond tries to clinch but is not successful on this occasion.
Miyaichi is definitely looking for the counter takedowns here.
Lamond moves in looking to clinch but Miyaichi pushes him off.
Miyaichi changes levels for a counter takedown but doesn't follow through with his attempt.
Lamond tries to close the distance and clinch but Miyaichi swats him to one side with an open hand palm strike and circles away.
And thats the end of the round the fighters go back to their corners.
Gordon Lamond dominated that second round.
That's time! Back to the action! This is the final round!

Miyaichi with a jab.
Miyaichi circles away from the clinch attempt.
Lamond tries to clinch there but Miyaichi circles away.
Miyaichi swats away the attempt to clinch by Lamond.
Miyaichi throws a hard body shot but it just misses.
Miyaichi just misses with a punch to the body.
Lamond tries to close the distance and clinch up against the cage but Miyaichi paws at him with a jab and circles away.
Lamond tries to close the distance and clinch up against the cage but Miyaichi paws at him with a jab and circles away.
Lamond fails in his attempt to clinch.
We've had a slow start to the round here - hopefully the action picks up.
Miyaichi with a body punch. A glancing blow.
Miyaichi misses with an uppercut.
Miyaichi just manages to avoid a counter high kick fromLamond.
Lamond doesn't manage to clinch there - Miyaichi circles away.
Miyaichi takes a shot right to the liver - Bas would have been proud of that punch.
That's one minute gone in the round.
Lamond tries to clinch up.
Lamond avoids the body shot from Miyaichi.
Lamond tries to clinch up against the cage, rushing in to close the distance. Miyaichi manages to break the clinch and circles back to the middle of the mat.
Lamond moves in looking to clinch but Miyaichi pushes him off.
Lamond tries a switch kick but it misses it's target.
Miyaichi swats away the attempt to clinch by Lamond.
Miyaichi ducks down and throws a hook to the body but Lamond moves away.
Lamond doesn't react quick enough there as he takes a shot to the body.
Miyaichi cracks Lamond with a hook to the jaw. Both fighters smile at eachother and high-five before getting back down to business.
Lamond connects with a good right hand that stumbles Miyaichi. Miyaichi circles away out of range and recomposes himself.
Miyaichi lands a nice looking body shot.
Lamond tries to clinch there but Miyaichi circles away.
Miyaichi throws a hook to the body but it doesn't connect.
That's two minutes gone in the round.
Miyaichi just misses with a punch to the body.
Lamond tries to clinch but Miyaichi is having none of it.
Miyaichi feints the counter takedown.
Miyaichi fakes high and swings low for a body shot but Lamond manages to avoid it.
Lamond is looking to take this fight into the clinch.
Miyaichi tries to keep at a distance but Lamond has taken the fight into the clinch.
Both fighters working to control the clinch.
Lamond missing with knees to the body.
Miyaichi avoiding damage as Lamond throws knees to the body.
Lamond misses with a punch on the inside.
This is a great period of action - very entertaining stuff!
Lamond working aggressively here.
Lamond tries to land a knee to the body but he is off balance and Miyaichi avoids it.
That's three minutes gone in the round.
Lamond using the Thai plumb to throw knees but Miyaichi has his back arched nicely, preventing the strike.
Lamond creates a bit of space for himself and sneaks an elbow through Miyaichi's defenses.
Lamond has a couple of punches blocked by Miyaichi.
Miyaichi tries to land a shot to the body but it's blocked.
Knees in the clinch landing for Lamond.
Miyaichi takes a big intake of breath there - he's definitely tired.
Lamond using the Thai clinch to land knees to the body.
Lamond is trying to wear down his opponent with knees to the body.
Lamond is working Miyaichi over against the cage.
Lamond with a knee to the head.

Miyaichi jumps guard.
The ref warns both fighters not to hold the cage as they work up against the meshing.
Lamond throwing strikes from guard but Miyaichi blocks nicely.

Lamond stands up from guard. Let's bang!
Lamond tries to clinch there but Miyaichi circles away.
That's four minutes gone in the round.
Good leg kick by Lamond there. It's the ones that make that thud noise that hurt and that was an almighty thud.
Lamond is looking to take this fight into the clinch.
Miyaichi looks to land a right hand but Lamond moved out of range.
The crowd are loving this. Great action here.
Miyaichi avoids the clinch attempt nicely.
Miyaichi thows a left - swing and a miss!
Lamond tries to close the distance and clinch but Miyaichi swats him to one side with an open hand palm strike and circles away.
Miyaichi with the counter takedown but Lamond avoids it easily.
Miyaichi misses the shot to the body.
Lamond is looking to take this fight into the clinch.
Miyaichi scores with a jab.
Ryo Miyaichi has stepped it up - he knows he needs a finish here!
Gordon Lamond is fighting for a decision here - he's started to take the cautious approach.
Lamond tries to close the distance and clinch up against the cage but Miyaichi paws at him with a jab and circles away.
And Miyaichi tries to counter it with a takedown but Lamond pushes his down on his head and steps out.
And that's the end of the fight!
I would just about give that final round to Ryo Miyaichi.
I think Lamond has won this one but let's see what the judges have to say. Over to the ring announcer for the scorecards.
Ladies and gentlemen, after 3 rounds of action, we go to the scorecards for a decision.
Judge Jack Bonds scores the fight 29:28
Judge Timothy Bukovac scores the fight 29:28
Judge Percy O'Donnell scores the fight 29:28
In favor of your winner, by unanimous decision... Gordon Lamond!
An out of breath Gordon Lamond thanked his loyal fans in his post fight interview, giving them credit for his success over the course of his career.
|
|
|
|
|
|
|
|
|
|
|
|
|
|
|
|
|
|
|
|
|
|
|
| S |
C
A |
G |
S |
C
B |
G |
|
S |
C |
G |
|
energy
A | B |
|
hype
A | B |
|
pop
A | B |
|
mgr
A | B |
|
FIGHT
RATING
59% |
|
|
|
|
|
|
