|
|
PBP Commentary |
Coming up we have a bantamweight MMA rules bout between Marty Atkinson (ranked 0 p4p, 0 weight class) and Jon Howard (ranked 0 p4p, 0 weight class). Both fighters look fresh as a daisy as they make their way towards the cage.
 |
|
 |
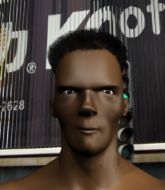
| 154 cm
24
140 lbs
1 - 2 - 0 |
|
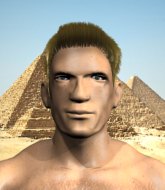
170 cm
22
140 lbs
2 - 0 - 0 |
BJJ Blue Belt
Counter fighter
Cuts easily |
|
BJJ White Belt
Brawler
Solid chin |
|
| |
|
Ladies and gentlemen. This fight is 3 rounds, in the bantamweight division.
Introducing the fighter to my left, fighting out of the red corner.
With a record of
1 - 2 - 0, fighting out of St Petersburg, Marty Atkinson!
And introducing the fighter to my right, fighting out of the blue corner.
With a record of
2 - 0 - 0, fighting out of St Petersburg, Jon Howard!
The judges for this bout are Sergei Dronov, Fedor Mirinova and Aleksei Zolotukhin.

The bell rings for round one and we are underway!
Atkinson is trying hard to land a takedown here. Howard sprawls well and keeps this one on the feet.
Howard tries a counter takedown but it's more of a dummy move, and he uses it to push himself away.
Howard swings for the body but Atkinson moves out of range.
Atkinson closes this distance looking for a takedown but Howard circles away.
Atkinson throws a combination but it was largely blocked by Howard.
Howard with the counter takedown but Atkinson avoids it easily.
Howard throws a series of strikes that have Atkinson backpedaling.

It looks like Marty Atkinson has been cut.

Howard moves into range and clinches up with Atkinson.
Atkinson tries to pull guard but Howard holds him up against the cage and eventually Atkinson drops back down to his feet.
That's three failed takedown attempts in the round for Marty Atkinson. That's going to take a lot out of him.
A right hand to the body from Atkinson.
We've had a slow start to the round here - hopefully the action picks up.
Howard putting his Muay Thai to good use. He has Atkinson in a tight clinch and is doing some damage with knees to the body.
Atkinson is trying to work for a single leg takedown but Howard pulls him back up using the underhooks.
Atkinson lands an elbow that stopped Howard in his tracks for a moment.
Atkinson prevents Howard from breaking the clinch.

Howard successfully pulls guard.
The fans in attendance giving it up for the two fighters, who have really let it all hang out in the last minute or so!
Atkinson being controlled here momentarily.

That's one minute gone in the round.
Howard is trying to keep Atkinson in close.
The fighters are pressed up against the cage, both looking to find a bit of space to work.

Howard had isolated an arm as going for a kimura. Atkinson defends it easily.
The ref warns both fighters not to hold the cage as they work up against the meshing.
Atkinson throws a big right hand that misses.
Howard is pulling down on Atkinson's head to control his posture.
Howard is looking for a triangle but Atkinson pushes his legs off easily.

That's two minutes gone in the round.
The crowd are hurling abuse towards the fighters... You can hardly blame them though because there isn't a lot going on in the fight.
Howard trying to strike from the bottom but really, it's not the best position to be doing that from!

The ref stands the fighters back up due to a lack of activity.
Atkinson shoots in but Howard avoids the takedown attempt easily.
And an attempted straight right on the counter from Howard! But no joy.
Howard scores with a takedown into Atkinson's guard.
Howard trying to control the position from guard on top but Atkinson is wriggling around, looking for whatever he can.

That's three minutes gone in the round.
Atkinson might be looking to lock onto one of his opponent's long limbs for a submission, whilst we're on the ground.
Atkinson wants to sweep but no luck.
Atkinson has a closed guard, preventing Howard from standing up.
Howard must be cautious of submissions here, given that his opponent has the superior Jiu Jitsu.

That's four minutes gone in the round.
The crowd are showing their displeasure at the lack of action as loud boos ring out around the arena.

Howard gets to his feet and steps away from his opponent.
Atkinson avoids the clinch attempt nicely.
Howard closes the distance and gets a trip takedown into side control. Atkinson quickly recovers to half guard.
Howard seems to be looking for submissions.
Howard moves nicely into side control.
The crowd thankful this round is nearly over.
The fighters are starting to get a bit slippery now, which will make submissions a bit more difficult.
Atkinson manages to get back to half guard.
And thats the end of the round the fighters go back to their corners.
Jon Howard dominated that round.
The cut man is working on Marty Atkinson's cut.
That's time! Back to the action!

Howard scores with a three punch combo!
Jon Howard seems to be the more aggressive standup fighter in this bout.
Howard shoots in looking for a single leg takedown. Atkinson is trying to defend but Howard finishes it well and ends up in half guard. Let's see if he can advance position further.
Atkinson tries to get to full guard but Howard has control of the leg.
Howard is thwarting Atkinson's attempts to control the position.
We've had a slow start to the round here - hopefully the action picks up.
Atkinson wants to improve his position but Howard is controlling well.
Howard perhaps working for something from half guard, or maybe not. It looks like he's just sitting there.
That's one minute gone in the round.
Atkinson is defending against the submission attempts here by Howard.
Atkinson is pressing down on Howard's left leg trying to get back to full guard. He's managed it.
Howard has been the more effective fighter overall so far.
Howard slows down the pace of the fight for a moment. He'll need to remain active if he doesn't want to see the fight stood back up.
The referee decides to stand the fighters back up.
Atkinson gets caught flat footed, as Howard shoots in with a quick takedown into guard.
That's two minutes gone in the round.
Howard looking to control the position here, rather than advance.
Howard wants to control from the top but Atkinson keeps moving.
Atkinson wants to sweep but no luck.
That's three minutes gone in the round.
Atkinson is working hard here to advance position.
Howard drops back, looking for a kneebar! Atkinson looks panicked! The fighters roll across the mat, one looking to finish, one looking to escape. Atkinson looks to have wriggled free... Yes, he's got his leg free and he's dived into side control! Good work there from Atkinson!

Atkinson trying to control the action but Howard is working from the bottom.

Atkinson is trying to get an arm triangle but Howard is defending well.
We get told so often about how wrestlers don't like to be on their backs. Let's see if Howard can do anything to dispel that myth.
That's four minutes gone in the round.
Howard manages to get back to half guard.
Howard trying to control but Atkinson postures up.
Atkinson is working for a kimura but Howard is defending it quite comfortably.
Boooooooooooooooooooo!!! God, this has been a terrible round. Come on you two, sort yourselves out!
Howard is doing well to avoid being mounted. He's controlling the position at the moment.
And thats the end of the round the fighters go back to their corners.
Jon Howard showed his class in that round. I'd imagine he'll take it on all the scorecards.
The cut man is working on Marty Atkinson's cut.
That's the end of the round. The referee orders the cornermen out of the cage so we can get back down to business. This is the final round!

Howard shoots in and gets a takedown into half guard. Howard showed some decent athleticism there.
Howard is trying a forearm choke
I don't think that's going to do much at this level of the game.
Atkinson regains full guard. Nicely done.
We've had a slow start to the round here - hopefully the action picks up.
Atkinson is controlling Howard's posture.
That's one minute gone in the round.
Howard controlling from the top position.
Howard scoring with punches to the head and body.
Howard is looking to work some ground and pound but Atkinson has wrist control.
Howard wants to stand up, so he's looking to wriggle free of Atkinson's closed guard. He's half up but Atkinson has locked on to an arm! Uh oh! Atkinson pivots and extends the arm, Howard falls face first to the mat and taps??... does he?? YES! He's tapping! Excellent counter grappling there by Atkinson! Well done that man!
Ladies and gentlemen, after 2:59 of round 3, we have a winner by way of Submission (Armbar). Marty Atkinson!
|
|
|
|
|
|
|
|
|
|
|
|
|
|
|
|
|
|
|
|
|
|
|
| S |
C
A |
G |
S |
C
B |
G |
|
S |
C |
G |
|
energy
A | B |
|
hype
A | B |
|
pop
A | B |
|
mgr
A | B |
|
FIGHT
RATING
31% |
|
|
|
|
|
|
