|
|
PBP Commentary |
Coming up we have a bantamweight MMA rules bout between Yonsil Clanger (ranked 0 p4p, 0 weight class) and Yoko Gushiken (ranked 0 p4p, 0 weight class). Chooooooooon! I think Clanger might be my favorite fighter, now he's come out to Youth Blood. Yoko Gushiken has the better chin. Will he look to stand and bang today?
 |
|
 |
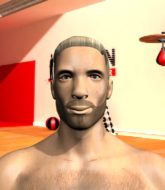
| 160 cm
39
141 lbs
38 - 16 - 1 |
|
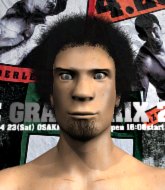
170 cm
36
135 lbs
33 - 16 - 1 |
Abu Dhabi Champ
Excellent boxer
Insanely flexible |
|
Olympic wrestler
World class MT
Good gas tank |
|
| |
|
Ladies and gentlemen. This fight is 3 rounds, in the bantamweight division.
Introducing the fighter to my left, fighting out of the red corner.
With a record of
38 - 16 - 1, fighting out of Las Vegas, Yonsil Clanger!
And introducing the fighter to my right, fighting out of the blue corner.
With a record of
33 - 16 - 1, fighting out of St Petersburg, Yoko Gushiken!
The judges for this bout are Richard Clark, James Ackerman and Sam Margolis.

The bell rings for round one and we are underway!
Clanger takes a really solid shot there but just smiles back and shrugs his shoulders.
We've been hearing reports that Clanger has been drilling takedowns in recent sessions so let's see if that has an impact on the result of this fight.
Clanger shoots in with a takedown attempt and he has Gushiken pinned against the cage. Gushiken gets the underhooks and manages to circle away.
Yoko Gushiken seems to be the more aggressive standup fighter in this bout.
Clanger throws a lazy right hand but Gushiken sees it coming a mile off and sidesteps it easily.
Gushiken needs to keep his hands up - Clanger had a free shot at his head there.
Clanger ducks under an overhand right and circles away with a smile on his face.
Clanger throws a monster uppercut resembling something out of street fighter but it doesn't land.
A big left from Gushiken misses.
Clanger throws a series of punches but Gushiken moves out of range.
Clanger looks to score with a jab to the body but Gushiken is just out of range.
We've had a slow start to the round here - hopefully the action picks up.
Gushiken moves out of range of the strikes.
Clanger looks to score with a combo but nothing lands.
Gushiken scores with a hook.
Nice defenses there by Clanger.
Gushiken throws a hook but Clanger blocks it.

That's one minute gone in the round.
A telegraphed right hand from Gushiken misses the target.
Clanger walks into a left hand.
Clanger on the wrong end of an overhand right that came out of nowhere.
Gushiken takes a swing at Clanger's ribcage but misses.
Yoko Gushiken is looking to keep the fight on the feet at all costs.
Gushiken scores with a hook to the body. Clanger takes a step back and tries to catch his breath.
Clanger throws a jab when Gushiken was well out of range.
Gushiken connects with a slap. Keep your fist closed son.
Clanger showing good head movement there, avoiding the strikes from Gushiken.
Gushiken throws a wild combination but nothing lands.
Clanger feinted with a counter takedown.
Gushiken connects with a looping right hand.
Gushiken tries to clinch up against the cage, rushing in to close the distance. Clanger manages to break the clinch and circles back to the middle of the mat.
No joy there for Clanger, who threw a few shots but didn't land.
Wooooo! Give it up for these two warriors! They are putting on a show!
Clanger takes a shot right to the liver - Bas would have been proud of that punch.

That's two minutes gone in the round.
Clanger throws a sloppy body shot
and Gushiken counters with a shot to the ribs. That looked like it hurt.
Clanger looks to score with a jab to the body but Gushiken is just out of range.
Gushiken is looking to clinch.
Gushiken swings wildly with a hook that is half blocked by Clanger.
Gushiken misses with a straight right.
Gushiken slips a straight right by Clanger.
Gushiken rushes forward with a series of wild hooks but Clanger moves out of range and avoids them all easily.
A chopping leg kick lands by Clanger.
Clanger throws an uppercut from half a mile away. Gushiken sees it coming and avoids it easily.
It seemed like Gushiken was going to counter with the hook but didn't fully commit to it.
Gushiken thows a left - swing and a miss!
Clanger changes levels looking for a counter takedown but doesn't commit.
Clanger swings for the body but Gushiken moves out of range.
Gushiken throws out a counter right but Clanger avoids it with no problem.
Jab from Gushiken.
Clanger looks to land a left hand but Gushiken moved out of range nicely.
Clanger looks shocked there as he takes a right hand to the temple.

That's three minutes gone in the round.
Gushiken stuffs the takedown attempt from Clanger. Clanger gets slowly back to his feet.
Gushiken looks to throw the jab but Clanger is out of range.
Clanger keeping a good distance there, avoiding the body shot.
Clanger feinted with a counter takedown.
Clanger scores with a hook to the body. Gushiken takes a step back and tries to catch his breath.
Clanger fails with the takedown.
That's three failed takedown attempts in the round for Yonsil Clanger. That's going to take a lot out of him.
Gushiken throws a looping overhand right but Clanger ducks down to avoid it.
Gushiken works Clanger's body with a nice hook.
Gushiken lands with a good body shot.
Clanger defending well as Gushiken loads up on a big left hand.
Clanger closes the distance and clinches up with Gushiken, looking for a takedown. Clanger pushes Gushiken against the cage but Gushiken circles to the side and manages to break the clinch.
Gushiken swings wildly with a right hand that was never going to find it's target.
Clanger appears to be looking for a counter takedown.

That's four minutes gone in the round.
Gushiken looks to throw the jab but Clanger is out of range.
Gushiken uses some good footwork to avoid the body shot by Clanger.
Gushiken throws out a loose jab but Clanger uses good head movement to avoid it.
Clanger feinted with a counter takedown.

Gushiken forces Clanger back against the cage and clinches.
Gushiken tries to land a shot to the body but it's blocked.
Gushiken blocks an uppercut.
Gushiken struggles to land a body shot inside as Clanger controls his hands.
Gushiken lands with a left to the head.
The crowd cheering loudly, showing their appreciation for the quality fight we're seeing here.
Still in the clinch, Gushiken scores with a nice short uppercut.
Clanger is trying to pull guard but being pressed up against the cage enables Gushiken to keep the fight standing.
Gushiken lands punches inside but they're not really causing much damage.
Clanger is pushing Gushiken up against the cage, for a bit of lean and pray action. Action being used the in the loosest possible sense of the word.
Gushiken keeps control of Clanger as he tries to wriggle out of the double underhooks.
Good anti-grappling being displayed by Clanger as Gushiken tries to tie him up.
Gushiken makes some space for himself and lands an uppercut.
And thats the end of the round the fighters go back to their corners.
Yoko Gushiken dominated that round.
Well, the break between rounds is over. Let's get back to the scrappin!

Clanger just misses with a punch to the body.
A telegraphed right hand from Gushiken misses the target.
Clanger on the wrong end of a decent looking cross there.
Gushiken looks to land a right hand but Clanger moved out of range.
Gushiken tries to clinch but is not successful on this occasion.
Gushiken drops his hands momentarily and Clanger takes advantage with a crisp shot to the head.
Clanger takes a big uppercut there. He seems a bit wobbly but no, he's OK.
Clanger scores with a hook.
Gushiken scores with a jab.

Clanger is rocked!
Clanger showing good head movement there, avoiding the strikes from Gushiken.
Clanger half commits to a counter takedown before pushing away, out of range.
Oh Clanger is still all over the place! His legs are completely gone! Will he be able to recover?!!
Gushiken doesn't manage to clinch there - Clanger circles away.
Clanger seems to have got his legs back now.

Clanger looking to score a takedown here. Gushiken is defending well but Clanger drives through and ends up in Gushiken's guard.
The crowd cheering loudly, showing their appreciation for the quality fight we're seeing here.
Clanger throwing strikes but missing.
That's one minute gone in the round.
Clanger throws a big elbow that misses.
Clanger prevents Gushiken from getting back to his feet.
Clanger wants to control from the top but Gushiken keeps moving.
Gushiken wants to stand but Clanger is controlling the position.
Clanger postures up in Gushiken's guard and throws a big left but Gushiken blocks it.
Gushiken keeping full guard, as Clanger tries to pass.

The referee decides to stand the fighters back up.
Gushiken loads up on a big right hand but Clanger slips the punch.
Clanger displays some good footwork, moving neatly out of range as Gushiken throws out the jab.
Clanger drops down looking for a counter takedown but Gushiken sprawls and moves away.
Gushiken has been the more effective fighter overall so far.
Nice defenses there by Gushiken.
That's two minutes gone in the round.
Neither fighter has done anything of merit for a good minute or two here and the crowd are not happy about it.
Clanger takes a shot right to the bread basket.
Clanger lands a really nice looking cross but Gushiken seems unphased.
Gushiken throws a two punch combo that lands nicely.
A looping hook to the body misses from Clanger. Gushiken does a little dance to reset his feet.
Gushiken throws a shot from downtown. Clanger moves away and avoids it.
Clanger changes levels looking for a counter takedown but doesn't commit.
Clanger avoids the body shot from Gushiken.
Gushiken wings a very wild body shot but it does the job and lands to the midsection.
Gushiken misses with a few strikes there.
Gushiken scores with the left hand. Clanger knows he should have avoided that one.
Gushiken ducks right into an uppercut from Clanger.
Clanger ducks down and throws a hook to the body but Gushiken moves away.
It seemed like Gushiken was going to counter with the hook but didn't fully commit to it.
Clanger misses with a hook
and Gushiken counters with a shot to the ribs. That looked like it hurt.
Clanger displays some good footwork, moving neatly out of range as Gushiken throws out the jab.
That's three minutes gone in the round.
Clanger misses with a shot to the body
and Gushiken counters with a quick right hand to the jaw.
Gushiken cracks Clanger with a good jab.
Clanger connects with a single shot there.
Gushiken lunges at Clanger with a hook that half lands and is half blocked by Clanger's hand.
A looping hook to the body misses from Gushiken. Clanger does a little dance to reset his feet.
Gushiken smiles there as he lands a nice right hand right on the button.
Clanger uses good head movement to avoid the hook from Gushiken.
Clanger uses some good footwork to avoid the body shot by Gushiken.
Gushiken misses with a wild body shot.
Gushiken fails with an attempt to clinch.
Gushiken fails in his attempt to clinch.
Clanger changes levels looking for a counter takedown but doesn't commit.
Decent striking displayed by Gushiken there.
A combination from Clanger does no damage.
That's four minutes gone in the round.
Fantastic stuff here - a very entertaining period of action, which has drawn cheers from the crowd.
Clanger steps to the side to avoid the strikes from Gushiken.
Gushiken looks to score with a combo but nothing lands.
A telegraphed right hand from Gushiken misses the target.
Clanger connects with the punch.
A swing and a miss from Gushiken.
Gushiken dodges the punch combination from Clanger.
Gushiken throws a hook to the side of Clanger's head but Clanger sees it coming and ducks under it beautifully.
Clanger changes levels looking for a counter takedown but doesn't commit.
Clanger with poor footwork there. He got himself in a bit of a tangle, enabling Gushiken to score with a decent uppercut.
Clanger misses with a body punch
enabling Gushiken to counter with a crisp jab.
Clanger is trying hard to land a takedown here. Gushiken sprawls well and keeps this one on the feet.
Clanger throws a jab but it's blocked by Gushiken.
Gushiken avoids a punch combination nicely.
And thats the end of the round the fighters go back to their corners.
Yoko Gushiken showed his class in that round. I'd imagine he'll take it on all the scorecards.
That's time! Back to the action! Let's hear some noise people - this is the final round!

Gushiken misses with a two punch combination.
Clanger appears to be looking for a counter takedown.
Gushiken looks shocked there as he takes a right hand to the temple.
Gushiken lunges at Clanger with a hook that half lands and is half blocked by Clanger's hand.
Clanger uses good head movement to avoid the hook from Gushiken.
Nice shot lands for Gushiken.
Gushiken throws a body shot but no joy.
Clanger tries to shoot in for a takedown. He's got hold of a leg but Gushiken swivels and escapes.
Gushiken dips to his left and cracks Clanger with an uppercut!
Gushiken closes the distance and lands a vicious right hand that drops Clanger! Gushiken dives in looking to finish! Clanger is still trying to defend himself but he's taking too many shots and the referee has no choice but to stop the fight!
Ladies and gentlemen, after 0:43 of round 3, we have a winner by way of TKO (Strikes). Yoko Gushiken!
After winning the bout, Yoko Gushiken thanked all his fans and promised he'd do even better in his next fight. The crowd seemed to love his humility.
|
|
|
|
|
|
|
|
|
|
|
|
|
|
|
|
|
|
|
|
|
|
|
| S |
C
A |
G |
S |
C
B |
G |
|
S |
C |
G |
|
energy
A | B |
|
hype
A | B |
|
pop
A | B |
|
mgr
A | B |
|
FIGHT
RATING
69% |
|
|
|
|
|
|
