|
|
PBP Commentary |
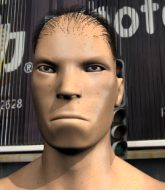
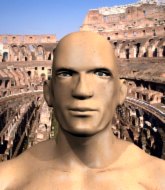
Coming up we have a featherweight MMA rules bout between Keiji Hashimoto (ranked 0 p4p, 0 weight class) and Johnny Kiedis (ranked 0 p4p, 0 weight class). Hashimoto kept the crowd waiting but all that was forgotten when his ring entrance music started. The incomparable musical genius that is Holding Out For A Hero (Japanese Version). Kiedis is bobbing his head along to his entrance song: Tupac. Both fighters look fresh as a daisy as they make their way towards the cage.
 |
|
 |
| 172 cm
43
151 lbs
49 - 23 - 4 |
|
180 cm
35
155 lbs
28 - 16 - 0 |
Great wrestler
Lethal high kicks
Insanely flexible |
|
Olympic wrestler
World class MT
Good gas tank |
|
| |
|
Ladies and gentlemen. This fight is 3 rounds, in the featherweight division.
Introducing the fighter to my left, fighting out of the red corner.
With a record of
49 - 23 - 4, fighting out of Los Angeles, Keiji Hashimoto!
And introducing the fighter to my right, fighting out of the blue corner.
With a record of
28 - 16 - 0, fighting out of Los Angeles, Johnny Kiedis!
The judges for this bout are Frank Antenori, Jack Bonds and .

The bell rings for round one and we are underway!
Hashimoto takes a solid shot to the body. That one hurt him but he's trying not to show it.
Kiedis fails with an attempt to clinch.
Hashimoto feinted with a counter takedown.
Hashimoto takes a jab on the nose. He smiles like he loves it and keeps coming.

Kiedis closes the distance and presses his opponent up against the cage.
Hashimoto misses with a punch on the inside.
Kiedis taking a breather.
Kiedis presses Hashimoto against the cage and delivers a mid-strength body shot.
We've been hearing reports that Hashimoto has been drilling takedowns in recent sessions so let's see if that has an impact on the result of this fight.

Kiedis breaks the clinch and we're back to striking at distance.
Kiedis throws a lazy head kick

and Hashimoto counters with a takedown into side control.
Kiedis is not content to let Hashimoto control the position.
Kiedis is trying to escape and get back to his feet.

That's one minute gone in the round.
Kiedis is looking to reverse the position.
Kiedis wants to get back to his feet.
Hashimoto in side control, just content to control the action for now.
Kiedis tries to work a leg under to get back to half guard but Hashimoto wriggles his own leg back out and remains in side control.
Hashimoto throws a knee to the body but it doesn't do much damage.
Kiedis takes a couple of big shots there - the referee warns him that he has to defend himself better.
Hashimoto works a knee to the body and follows up with a nice elbow to the head.
Hashimoto connects with a decent looking elbow from side control that caused Kiedis some visible discomfort.

That's two minutes gone in the round.
The strikes coming from Hashimoto are missing the target in this wave of attacks.
Kiedis takes a big shot right to the temple there but he's taken it well.
Kiedis is working hard to escape and get back to his feet. After a battle for position, Hashimoto asserts his dominance and retains side control.
The ref warns both fighters not to hold the cage as they work up against the meshing.
Hashimoto has knee on belly momentarily but Kiedis bucks him off and regains half guard.
Hashimoto is looking to take a break and control but Kiedis is keeping him honest, looking to work from the bottom.
Kiedis keeping his head moving to avoid the ground and pound.

That's three minutes gone in the round.
Hashimoto wants to control but Kiedis is keeping him busy.
Hashimoto is going to have to think about doing something other than just controlling because Kiedis is managing to avoid having the position dictated to him.
Kiedis tries to kick Hashimoto off but Hashimoto keeps his base steady and stays in half guard.
The referee is pacing around the two fighters - he looks like he's thinking about a standup.

The ref stands the fighters back up due to a lack of activity.
Johnny Kiedis seems to be the more aggressive standup fighter in this bout.
Hashimoto looks for the body kick but Kiedis saw that one coming.
Kiedis tries to close the distance and clinch but Hashimoto swats him to one side with an open hand palm strike and circles away.
Hashimoto changes levels looking for a counter takedown but doesn't commit.
A nice leg kick lands there from Kiedis.
Hashimoto gets tackled into the cage by Kiedis. Kiedis maintains the clinch.
Kiedis lands an uppercut.
With the fighters clinched against the cage, Kiedis creates a bit of distance for himself and scores with a nice uppercut.

That's four minutes gone in the round.
Kiedis pushes off and circles away, back to the middle of the mat.
A swing and a miss from Hashimoto.
Kiedis flicks out a counter leg kick but Hashimoto steps away.
Hashimoto circles away from the clinch attempt.
Hashimoto shoots in looking for a double leg takedown. Kiedis defends it nicely.
Kiedis steps to the side to avoid the strikes from Hashimoto.
Kiedis rushes Hashimoto and pushes him back against the cage in a clinch.
Kiedis breaks the clinch and we're back to striking at distance.
Kiedis looks to land a combination but Hashimoto avoids it well.
Kiedis tries to close the distance and clinch but Hashimoto swats him to one side with an open hand palm strike and circles away.
Hashimoto changes levels looking for a counter takedown but doesn't commit.
Hashimoto dodges the punch combination from Kiedis.
And thats the end of the round the fighters go back to their corners.
A close round but Johnny Kiedis will probably get the nod.
OK. That's time! The bell goes and we're back to the action.

Hashimoto moves out of range of the body kick from Kiedis.
Kiedis tries a head kick but it misses.
Kiedis will need to close the distance a bit before he attacks - that leg kick was thrown from too far away.
Kiedis tries to close the distance and clinch up against the cage but Hashimoto paws at him with a jab and circles away.
Hashimoto appears to be looking for a counter takedown.
Kiedis tries a switch kick but it misses it's target.
Hashimoto connects with a body shot.
Kiedis rushes Hashimoto and pushes him back against the cage in a clinch.
Kiedis has Hashimoto pressed against the cage, preventing Hashimoto from circling away and getting back to striking at range.
Kiedis blocks an uppercut.
We've had a slow start to the round here - hopefully the action picks up.
Kiedis breaks the clinch.
Kiedis moves into range and clinches up with Hashimoto.
The referee calls for Kiedis to work.
A nice glancing elbow lands by Hashimoto.
That's one minute gone in the round.
Kiedis lands punches inside but they're not really causing much damage.
Kiedis manages to break the clinch.
Hashimoto closes the distance, clinches up and gets a nice trip takedown into side control. Very smooth.
Hashimoto in side control, throwing shots but Kiedis defends.
Kiedis wants to escape from the position here - easier said than done!
Kiedis tries to get back to half guard but can't.
Hashimoto throws an elbow but Kiedis slips to the side and avoids it well.
Kiedis is not content to let Hashimoto control the position.
Kiedis tries to get back to half guard but can't.
That's two minutes gone in the round.
Kiedis is still trying to improve position.
Hashimoto working the ground and pound but he's contacting the mat, not the fighter.
Keiji Hashimoto overall seems to be getting the better of the ground position in the fight so far.
Kiedis is looking to get back to his feet here but Hashimoto is keeping cool and he's managed to take Kiedis's back.
Kiedis wants to get back to his feet.

Hashimoto working for a RNC but it's not happening just yet.
Hashimoto is trying to stick to Kiedis's back but Kiedis is turning into Hashimoto. He's managed to reverse the position - now he's in Hashimoto's guard. Polite applause from the crowd in appreciation of some nice Jiu Jitsu by Kiedis.
That's three minutes gone in the round.
Kiedis in full guard, throwing the ground and pound. No damage this time.
Kiedis wants to pass the guard but Hashimoto is keeping the position.
Kiedis avoids a guillotine attempt easily.
Hashimoto escapes his hips to the side and looks to be working for an armbar. Kiedis gives him a little smile and shakes his head. No chance.
Kiedis stands up over Hashimoto, holding his feet. He dives back in and lands a decent shot to the head.
Kiedis got a little sloppy there for a moment and Hashimoto has worked his way into a loose triangle - can he finish it?! No, Kiedis has managed to get both his arms back between Hashimoto's legs - danger averted.
Kiedis postures up in Hashimoto's guard and throws a big left but Hashimoto blocks it.
That's four minutes gone in the round.
The crowd are starting to boo a lack of action.
Hashimoto avoiding any damage from the ground and pound.
Kiedis postures up in Hashimoto's guard and throws a big left but Hashimoto blocks it.
Kiedis trying to control but Hashimoto is working from the bottom.
Hashimoto is throwing his legs up, looking for submissions. Kiedis is aware though and is defending well.
Hashimoto throws his legs up looking to secure a triangle. Oh, that looks pretty tight, I gotta say! Kiedis escapes and throws Hashimoto's legs to the side, diving into side control!
The fighters are pressed up against the cage, both looking to find a bit of space to work.
You can see the frustration on Hashimoto's face, being in this tough position on the bottom.
The crowd thankful this round is nearly over.
Kiedis creates some space and throws a big elbow, but Hashimoto sees it coming and moves his head just enough to avoid the strike.
Kiedis in side control, just content to control the action for now.
And thats the end of the round the fighters go back to their corners.
A close second round but Johnny Kiedis will probably get the nod - 10:9.
The fighters' corners scream their final instructions, as the referee calls time. Here we go, back to the action! This is the final round!

Kiedis throws a head kick that connects with a bit of head and a bit of hand.
Hashimoto takes a step back and watches a body kick go sailing past his mid section.
Hashimoto tries to counter with a takedown but Kiedis is quick to defend against it.
Kiedis throws a series of punches but Hashimoto moves out of range.
Hashimoto feinted with a counter takedown.
Hashimoto swats away the attempt to clinch by Kiedis.
We've had a slow start to the round here - hopefully the action picks up.
Kiedis takes a swing at Hashimoto's ribcage but misses.
Kiedis tries a head kick but it misses.
Hashimoto circles away from the clinch attempt.
Kiedis tries to clinch up against the cage, rushing in to close the distance. Hashimoto manages to break the clinch and circles back to the middle of the mat.
That's one minute gone in the round.
Kiedis gets cracked there but stands up to it.
Kiedis misses with a lunging right hand
and Hashimoto counters with a takedown into side control.
Hashimoto in side control, trying to ground and pound but not landing this time.
Kiedis takes an elbow right on the bridge of the nose and winces in pain.
Hashimoto trying to control the position but Kiedis is working away.
Kiedis manages to work his way to half guard, despite Hashimoto's best efforts.
That's two minutes gone in the round.
Kiedis is trying to stand up here but Hashimoto is controlling him well.
Hashimoto wants to work for an arm triangle but Kiedis is really keeping half guard well and defending the submission attempt.
Hashimoto landing with strikes to the body and head, softening up his opponent.
Kiedis is trying to stand up here but Hashimoto is controlling him well.
Hashimoto wants to lay and pray for a moment but Kiedis keeps working.
Kiedis is trying to stand up here but Hashimoto is controlling him well.
Kiedis taking some punishment here, with Hashimoto in his half guard.
Hashimoto is working hard to pass the guard. He's done it - he's now in full mount! Trouble for Kiedis!
That's three minutes gone in the round.
Hashimoto trying to control but Kiedis is having none of it.
Hashimoto lands an elbow that was bordering on illegal but the referee lets it go with a warning.
Johnny Kiedis has stepped it up - he knows he needs a finish here!
Hashimoto takes a little breather and maintains the position. The referee will be looking for him to stay active from such a dominant position though.
Kiedis trying desperately to get to his feet.
Hashimoto lands a big elbow.
Kiedis is squirming around, avoiding Hashimoto's attempts to control the action.
Hashimoto breaks from Kiedis's wrist control and lands an elbow.

Kiedis is rocked!
Hashimoto loads up on a couple of big shots to the head that have Kiedis scrambling to escape. He can't get free though and several more unanswered shots from Hashimoto land to the head. The referee has no choice but to stop the fight. Hashimoto stands and salutes the crowd.
Ladies and gentlemen, after 4:18 of round 3, we have a winner by way of TKO (Strikes). Keiji Hashimoto!
In his post fight interview, Keiji Hashimoto gave a big smile as he said 'I wish to thank my fans for the support and mr. Murphy for the opportunity to fight for the belt. I will continue to train hard and hope I will bring honour to the belt.'.
|
|
|
|
|
|
|
|
|
|
|
|
|
|
|
|
|
|
|
|
|
|
|
| S |
C
A |
G |
S |
C
B |
G |
|
S |
C |
G |
|
energy
A | B |
|
hype
A | B |
|
pop
A | B |
|
mgr
A | B |
|
FIGHT
RATING
49% |
|
|
|
|
|
|
