|
|
PBP Commentary |
Coming up we have a heavyweight MMA rules bout between Efe Ade (ranked 0 p4p, 0 weight class) and Dave Callaghan (ranked 0 p4p, 0 weight class). We have two fighters making their debuts here, so let's see who comes out of this one with their first professional victory.
 |
|
 |
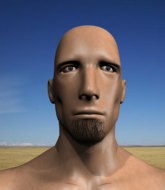
| 189 cm
18
242 lbs
0 - 0 - 0 |
|
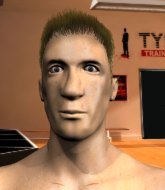
198 cm
18
279 lbs
0 - 0 - 0 |
Good wrestling
Brawler
Big right hand |
|
BJJ Purple Belt
Counter fighter
Determined |
|
| |
|
Ladies and gentlemen. This fight is 3 rounds, in the heavyweight division.
Introducing the fighter to my left, fighting out of the red corner.
With a record of
0 - 0 - 0, fighting out of London, Efe Ade!
And introducing the fighter to my right, fighting out of the blue corner.
With a record of
0 - 0 - 0, fighting out of London, Dave Callaghan!
The judges for this bout are Steven Brown, Daniel Bishop and Andrew Berry.

The bell rings for round one and we are underway!
Callaghan ducks under a wild hook from Ade.
Ade defends well against a solid takedown attempt from Callaghan.
Ade ducks down and throws a hook to the body but Callaghan moves away.
It seemed like Callaghan was going to counter with the hook but didn't fully commit to it.
Callaghan takes a hook to the side of the head. I wonder if that's got his ears ringing.

It looks like Dave Callaghan has been cut.
Callaghan shoots for a double leg takedown but Ade sprawls well. He's pushed Callaghan's face into the mat and manages to get back to his feet relatively easily.
Ade misses the shot to the body.
Callaghan fails with a rather predictable takedown attempt.
Efe Ade has stuffed three takedown attempts in the round now. That's going to take a lot out of Dave Callaghan.
Ade throws a couple of head shots and lands with the final one - a decent hook, which struck Callaghan on the side of the head.
We've had a slow start to the round here - hopefully the action picks up.
Callaghan walks into a stiff left hand from Ade.
Ade throws a right hand that misses

and Callaghan counters with a takedown into side control.
This is a great period of action - very entertaining stuff!
Callaghan is looking to take a break and control but Ade is keeping him honest, looking to work from the bottom.

That's one minute gone in the round.
Callaghan working away.
Callaghan tries to advance to mount but can't.
Ade wants to control but Callaghan postures up.
Callaghan just content to control the position.
Callaghan trying to control the action but Ade is working from the bottom.

The ref stands the fighters back up due to a lack of activity.

That's two minutes gone in the round.
There's not a lot going on here and the crowd are letting the fighters know they're not willing to tolerate a lack of action.
Ade misses with a few strikes there.
Ade avoids a lazy jab quite easily.
Ade lands with a right hand.
Nice defenses there by Ade.
Ade was looking to counter that move with a punch but didn't quite pull the trigger.
Callaghan shoots in for a takedown! He's got it and he's managed to land in side control! That's better than Callaghan was expecting from the takedown attempt, I'm sure!
A lull in the action here as Callaghan stalls from top position.
Callaghan has control of an arm but Ade manages to advance to Callaghan's back!

That's three minutes gone in the round.
Callaghan is in bad spot here.
Callaghan is keeping busy.
Callaghan trying to control the hands but Ade breaks the grip.
Callaghan rolls and manages to get back to half guard. Nicely done.

Callaghan looking to work for a kimura from the bottom.
Ade trying to mount his opponent but Callaghan defends it.
Callaghan trying to hold on to Ade's head to control him but Ade postures up.

That's four minutes gone in the round.
Ade wants to control but Callaghan is keeping him busy.
The fighters are battling for position here. Callaghan manages to regain full guard. Nice work.
Callaghan tries to land a sweep but no joy.
Ade wants to stand but Callaghan has a closed guard, so he can't escape.
Ade knows he needs to get back to his feet asap. He's simply no match for Callaghan on the ground.
There's a bit of a scramble here and now Callaghan is on top in guard.

Callaghan trying to pass the guard but can't manage it just yet.
Ade wants to get back to his feet but he's too absorbed in his own little project and Callaghan manages to pass to side control.
And thats the end of the round the fighters go back to their corners.
A close round but Dave Callaghan will probably get the nod.
The cut man is working on Dave Callaghan's cut.
That's the end of the round. The referee orders the cornermen out of the cage so we can get back down to business.

Ade scores with a hook to the body. Callaghan takes a step back and tries to catch his breath.
Ade could do with losing a few pounds - he looks very soft around the mid section, to put it politely.
Ade scores with a one two! Callaghan had his feet all tangled up there and couldn't avoid the strikes.
Callaghan fails with a takedown attempt.
Ade throws a hook to the body but it doesn't connect.
Ade lands a head shot.
We've had a slow start to the round here - hopefully the action picks up.
Callaghan steps to the side to avoid the strikes from Ade.
Callaghan keeping a good distance there, avoiding the body shot.
Callaghan swings away with a counter right hand but no contact made.
Ade misses with a looping right.
Callaghan shoots in for a takedown. He's persisting with it as Ade sprawls well. Ade wins this battle and keeps the fight standing. Callaghan gets slowly back to his feet.
That's one minute gone in the round.
Ade pushing out the jab but it's not landing.
Ade lands a nice looking body shot.
Callaghan ducks under an overhand right and circles away with a smile on his face.
Callaghan takes a shot right to the liver - Bas would have been proud of that punch.
Ade fakes a head punch and goes low to the body. Nicely done.
Ade throws a right and a left that both miss.
Callaghan looks like he wants to counter punch here.
Callaghan shoots in but no luck this time.
Efe Ade has stuffed three takedown attempts in the round now. That's going to take a lot out of Dave Callaghan.
Ade lands with a nice combination. Callaghan backs away looking to recover.
That has opened up Dave Callaghan's cut even more.
Ade swings wildly with a right hand that was never going to find it's target.
Callaghan fails with a takedown attempt.
That's two minutes gone in the round.
Ade avoids a lazy jab quite easily.
Ade misses with a wild body shot.
Ade stuffs a takedown. It's all about dictating where the fight takes place and Ade wants it to stay on the feet.
Callaghan closes the distance, clinches up and gets a nice trip takedown into side control. Very smooth.
The crowd cheering loudly, showing their appreciation for the quality fight we're seeing here.
Ade struggling a bit here.
Ade is looking for a sweep.
That's three minutes gone in the round.
Ade tries to control but Callaghan manages to take his back.
Ade just trying to survive but Callaghan is wriggling into a better position, looking to finish.
Dave Callaghan has got the better of the ground game so far.
Callaghan is working for the choke. It looks like he might have got it... has he...? Yes! Ade is tapping out! This one is all over!
Ladies and gentlemen, after 3:33 of round 2, we have a winner by way of Submission (RNC). Dave Callaghan!
A very excited looking Dave Callaghan made sure he remembered to thank all the fans both in the arena and on the internet. He said all the coolest people spend all day on MMA websites, which got a big reaction.
|
|
|
|
|
|
|
|
|
|
|
|
|
|
|
|
|
|
|
|
|
|
|
| S |
C
A |
G |
S |
C
B |
G |
|
S |
C |
G |
|
energy
A | B |
|
hype
A | B |
|
pop
A | B |
|
mgr
A | B |
|
FIGHT
RATING
45% |
|
|
|
|
|
|

