|
|
PBP Commentary |
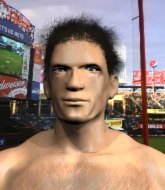
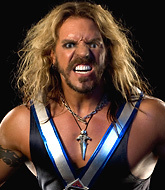
Coming up we have a lightweight MMA rules bout between Aukusitino Hafoka (ranked 0 p4p, 0 weight class) and Michael Quincy (ranked 0 p4p, 0 weight class). Michael Quincy will no doubt be trying to keep this one on the feet, where he has a distinct advantage.
 |
|
 |
| 175 cm
25
166 lbs
1 - 1 - 0 |
|
178 cm
19
164 lbs
1 - 0 - 0 |
Good takedowns
Basic striking
Intelligent |
|
Dangerous GnP
Excellent MT
Granite chin |
|
| |
|
Ladies and gentlemen. This fight is 3 rounds, in the lightweight division.
Introducing the fighter to my left, fighting out of the red corner.
With a record of
1 - 1 - 0, fighting out of London, Aukusitino Hafoka!
And introducing the fighter to my right, fighting out of the blue corner.
With a record of
1 - 0 - 0, fighting out of London, Michael Quincy!
The judges for this bout are Colin Fotheringham, Daniel Bishop and Sam Margolis.

The bell rings for round one and we are underway!
Quincy connects with a leg kick. He turned his hip over nicely there.
Hafoka shoots for a double leg takedown but Quincy sprawls well. He's pushed Hafoka's face into the mat and manages to get back to his feet relatively easily.
The fighters circling - Hafoka throws out the jab but it was never going to land.
Hafoka tries to land with a swinging hook to the body but Quincy was well out of range. Poor timing from Hafoka.
Quincy misses with a body shot. Nice footwork from Hafoka.
Quincy fails to land with a series of punches.
Quincy throws a head kick but Hafoka moves out of range.
A big left from Quincy misses.
Hafoka throws a hook but Quincy avoids it easily.
Hafoka misses with a hook. Quincy ducked under it nicely.

Hafoka closes the distance and clinches up, looking for a takedown. He shifts his weight and gets a nice trip into half guard.
Quincy wants to get back to full guard.
Quincy gets back to full guard.
Hafoka trying to control but Quincy is working from the bottom.
Quincy looking to hit a scissor sweep but Hafoka is one step ahead there.
Quincy lands a beautiful sweep and he's now moved into his opponent's guard.


That's one minute gone in the round.

Hafoka escapes his hips to the side and looks to be working for an armbar. Quincy gives him a little smile and shakes his head. No chance.
Quincy wants to control from the top but Hafoka keeps moving.
Hafoka wants to control the position but Quincy says "no thanks buddy" and passes to half guard.
Hafoka keeping his head moving to avoid the ground and pound.
Quincy is taking a breather. Hafoka says something to him but it's hard to make out. Perhaps he's telling him to get on with it and actually do something.
Quincy thows a wild elbow that connects with the canvas.
Hafoka works his way to full guard. Good work.

That's two minutes gone in the round.
Quincy stands up over Hafoka, holding his feet. He dives back in and lands a decent shot to the head.
Quincy preventing the sweep.
Quincy pressing down on his opponent's thigh, looking to pass guard. Hafoka is keeping the position for now.
Quincy wants to control from the top but Hafoka keeps moving.
Hafoka is working the butterfly guard. He manages to land a nice scissor sweep and is now in half guard on the top. Nice move.

Quincy is looking for a sweep. Hafoka is wise to his cunning plan and keeps the top position.
Hafoka is trying to work for a kimura but Quincy is defending well.
Hafoka is looking for a kimura here.

That's three minutes gone in the round.
Hafoka trying to control from half guard but Quincy is working away.
Quincy wants to get back to his feet.
Hafoka trying to control from half guard but Quincy is working away.
Quincy gets full guard.
Hafoka passes easily into side control. Nice work.
Quincy tries to bench press Hafoka off him but Hafoka keeps the position.

That's four minutes gone in the round.
The crowd are hurling abuse towards the fighters... You can hardly blame them though because there isn't a lot going on in the fight.
Hafoka is looking for a kimura. He might have it! No, Quincy has escaped the position, nice work there.
Quincy wants to get back to his feet.
The ref warns both fighters not to hold the cage as they work up against the meshing.
You can see the frustration on Quincy's face, being in this tough position on the bottom.
Hafoka sitting in side control, looking to soften his opponent up with elbows and hammerfists but Quincy is avoiding damage well and looking to escape the position.
Hafoka working hard here to secure a kimura but he's not really in the right position for it.
The crowd thankful this round is nearly over.
Quincy gets back to half guard.
And thats the end of the round the fighters go back to their corners.
Aukusitino Hafoka dominated that round.
The fighters' corners scream their final instructions, as the referee calls time. Here we go, back to the action!

A jab from Quincy misses.
Quincy ducks under a wild hook from Hafoka.
Quincy looks for the body kick but Hafoka saw that one coming.
Hafoka half commits to a counter takedown before pushing away, out of range.
Quincy looks to throw the jab but Hafoka is out of range.
Hafoka swung with a counter right hand that didn't connect.
Ooooh, nice body kick lands from Quincy. Hafoka shrugs it off though.
Hafoka takes a head kick and shrugs it off.
Hafoka keeping a good distance there, avoiding the body shot.
Quincy has been working on his striking defense in training and it's paying off as Hafoka is landing a low percentage of strikes.
Hafoka closes this distance looking for a takedown but Quincy circles away.
Hafoka misses with a jab and misses with a cross straight after too.
Hafoka looks to land a right hand but Quincy moved out of range.
Quincy cracks Hafoka with a good jab.
A cross from Quincy lands.
Hafoka goes for a double leg but Quincy avoids the attempt and the two fighters end up clinched against the cage as Quincy continues to drive forward.
Quincy thuds his shin into the meat of Hafoka's side.
This has been an exciting period of action!
Quincy uses some good footwork to avoid the body shot by Hafoka.
Quincy cracks Hafoka with an open hand slap.
Quincy blocks a jab.
Quincy scores with a decent looking hook.
Michael Quincy seems to be getting the better of the standup.
That's one minute gone in the round.
Quincy throws a head kick that connects with a bit of head and a bit of hand.
Quincy's corner calls for a 1-2. Quincy obliges with the 1 part as he scores the single shot and moves back out of range.
Quincy throws a leg kick but Hafoka checks it.
Hafoka fakes high and swings low for a body shot but Quincy manages to avoid it.
Quincy misses with a head kick.
Quincy loads up on a big right hand but Hafoka slips the punch.
Michael Quincy is looking to keep the fight on the feet at all costs.
Quincy lands a vicious shot with the stealth of a sniper and the strength of a viper. Are vipers that strong? I can think of lots of things that are stronger than a viper - not many rhyme with sniper though.
Quincy lands with a kick to the ribs.
Hafoka misses with a straight right.
Quincy closes the distance and lands a one-two.
A telegraphed right hand from Hafoka misses the target.
Hafoka fakes a head shot and lands one to the body.
The crowd cheering loudly, showing their appreciation for the quality fight we're seeing here.
Hafoka swings and misses with a hook to the body.
Quincy misses with a looping right.
A slow jab from Quincy misses its intended target.
Good leg kick by Quincy there. It's the ones that make that thud noise that hurt and that was an almighty thud.
That's two minutes gone in the round.
Hafoka defending well as Quincy loads up on a big left hand.
Hafoka half commits to a counter takedown before pushing away, out of range.
Hafoka throws a body punch but Quincy moves out of range.
Hafoka throws a hook to the body but it doesn't connect.
Hafoka shoots in for a takedown from distance. He catches Quincy napping and manages to drive through into side control!
Quincy is trying to control Hafoka's posture but Hafoka avoids it.
Hafoka is trying to land an Americana. He has the arm isolated but Quincy is keeping cool and he's avoided the danger for now.
Quincy is looking to regain half guard here but Hafoka keeps moving and retains side control.
Hafoka working away.
Quincy tries to work a leg under to get back to half guard but Hafoka wriggles his own leg back out and remains in side control.
Quincy is still trying to improve position.
That's three minutes gone in the round.
Quincy keeps trying to improve his position.
Hafoka moves into full mount!
Hafoka is going oldschool here, as he tries to force Quincy to tap using a forearm choke. This isn't 1993 though, so Quincy shrugs it off.
Hafoka moves to take his opponent's back.
Quincy is displaying good submission defense - not really looking in danger of submitting to the rear naked choke at the moment. That could change in an instant of course if Hafoka gets his way!
Quincy rolls, trying to escape but Hafoka keeps control of the position.
Hafoka is looking for the choke from the back position but Quincy is controlling his hands well.
Hafoka missing with strikes from the back.
Aukusitino Hafoka overall seems to be getting the better of the ground position in the fight so far.
That's four minutes gone in the round.
Hafoka looking for the rear naked choke. And he's got it! Quincy taps!
Ladies and gentlemen, after 4:21 of round 2, we have a winner by way of Submission (RNC). Aukusitino Hafoka!
Aukusitino Hafoka gave a mention to Mohito Fightwear in his post fight interview. That will please them (and hopefully generate some sales).
|
|
|
|
|
|
|
|
|
|
|
|
|
|
|
|
|
|
|
|
|
|
|
| S |
C
A |
G |
S |
C
B |
G |
|
S |
C |
G |
|
energy
A | B |
|
hype
A | B |
|
pop
A | B |
|
mgr
A | B |
|
FIGHT
RATING
53% |
|
|
|
|
|
|

