|
|
PBP Commentary |
Coming up we have a super heavyweight MMA rules bout between Bradley Work (ranked 0 p4p, 0 weight class) and Bradley Work (ranked 0 p4p, 0 weight class). Both these guys have solid standup skills and neither is particularly fantastic on the ground, so let's hope for a nice standup war!
 |
|
 |
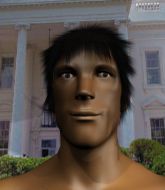
| 175 cm
25
300 lbs
1 - 0 - 0 |
|
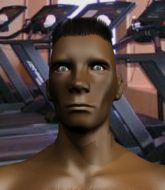
200 cm
25
300 lbs
0 - 1 - 0 |
BJJ Blue Belt
Solid boxing
Self confident |
|
BJJ Blue Belt
Decent boxing
Granite chin |
|
| |
|
Ladies and gentlemen. This fight is 3 rounds, in the super heavyweight division.
Introducing the fighter to my left, fighting out of the red corner.
With a record of
1 - 0 - 0, fighting out of New York, Bradley Work!
And introducing the fighter to my right, fighting out of the blue corner.
With a record of
0 - 1 - 0, fighting out of New York, Bradley Work!
The judges for this bout are Eddie Farnsworth, John Kavanagh and Columbo Gatti.

The bell rings for round one and we are underway!
Bradley Work wants to clinch up but Bradley Work keeps it at a distance.
Bradley Work throws a body kick but he was well out of range there.
Bradley Work closes this distance looking for a takedown but Bradley Work circles away.
Bradley Work tries a head kick but it misses.

Bradley Work pushes Bradley Work up against the cage in a clinch.

Bradley Work escapes the clinch and we're back to striking.
Bradley Work shoots in for a takedown but doesn't get it.
Bradley Work tries to shoot in for a takedown. He's got hold of a leg but Bradley Work swivels and escapes.
Bradley Work looks winded!
Bradley Work closes the distance and clinches.

Bradley Work pushes off and circles away, back to the middle of the mat.
We've had a slow start to the round here - hopefully the action picks up.
Bradley Work shoots in with a takedown attempt and he has Bradley Work pinned against the cage. Bradley Work gets the underhooks and manages to circle away.
Bradley Work checks the leg kick.

That's one minute gone in the round.
Bradley Work tries a head kick but it misses.
A really sloppy takedown attempt there from Bradley Work.
That's three failed takedown attempts in the round for Bradley Work. That's going to take a lot out of him.
Bradley Work fails with a takedown attempt.
Bradley Work tries to shoot in for a takedown. He's got hold of a leg but Bradley Work swivels and escapes.
Bradley Work is clearly trying to counter these attacks from Bradley Work with a body shot.
Bradley Work moves into the clinch.
Bradley Work fails to pull the fight into his guard.

Bradley Work jumps into guard, dragging Bradley Work to the mat.
Bradley Work wants to sweep but no luck.
Bradley Work is trying to control the position but Bradley Work postures up.
The fighters are pressed up against the cage, both looking to find a bit of space to work.
Bradley Work tries to land a sweep but no joy.

That's two minutes gone in the round.
Bradley Work wants to pass the guard but Bradley Work is keeping the position.

Bradley Work looking for submissions off his back, moving his hips, looking for an opening.
Bradley Work working a defensive guard here.
Bradley Work seems keen to control Bradley Work's posture.

The ref stands the fighters back up due to a lack of activity.
The fight stays on the outside here - Bradley Work looks like he's thinking about clinching though.
Bradley Work drops down looking to force a counter takedown but Bradley Work defends it well.
Bradley Work pulls out of a head kick attempt.
Bradley Work shoots in for a takedown - he's clinched up with Bradley Work but Bradley Work pushes him off and we're back to square one.

That's three minutes gone in the round.
Bradley Work tries to clinch but Bradley Work moves out of range.
Bradley Work misses with a takedown attempt - Bradley Work sprawls well and throws a nice strike on the way out which just misses.
Bradley Work displays good takedown defense there as he swats away a double leg from Bradley Work.
Bradley Work throws a counter combo.
Bradley Work rushes Bradley Work and pushes him back against the cage in a clinch.
Bradley Work breaks the clinch and we return to the middle of the mat.
Bradley Work shoots in looking for a takedown but Bradley Work manages to keep the fight standing, pushing Bradley Work's face into the canvas for good measure before circling away.
Bradley Work defends well against a solid takedown attempt from Bradley Work.
Bradley Work quickly followed up with a counter body kick but doesn't connect.

That's four minutes gone in the round.
No luck with that takedown attempt from Bradley Work.
Bradley Work blocks a head kick by Bradley Work.
Nice takedown defense from Bradley Work. No joy for Bradley Work on that attempt.
Bradley Work shoots in for a takedown. He's persisting with it as Bradley Work sprawls well. Bradley Work wins this battle and keeps the fight standing. Bradley Work gets slowly back to his feet.
Bradley Work fails miserably with a takedown attempt.
Bradley Work unleashes a big counter combination but Bradley Work bobs and weaves and avoids any damage.
The crowd thankful this round is nearly over.
Bradley Work tries for a takedown but Bradley Work sees it coming a mile off and avoids it easily.
Bradley Work stuffs the takedown attempt from Bradley Work. Bradley Work gets slowly back to his feet.
And thats the end of the round the fighters go back to their corners.
Bradley Work dominated that round.
The fighters get back to their feet, the hooter sounds and we're back to the action!

Bradley Work tries to shoot in for a takedown. He's got hold of a leg but Bradley Work swivels and escapes.
Bradley Work looks to land a combination but Bradley Work avoids it well.
Bradley Work unleashes a big counter combination but Bradley Work bobs and weaves and avoids any damage.
Bradley Work moves out of range of the body kick.
Bradley Work misses with a takedown attempt
and Bradley Work counters with a nice body shot.
Bradley Work slaps away a takedown attempt from Bradley Work, before circling back to the center of the mat.
Bradley Work connects with a body shot that sends Bradley Work's belly button to the back.
We've had a slow start to the round here - hopefully the action picks up.
Bradley Work looking to land some kicks to the body here.
Bradley Work is breathing heavily.
Bradley Work checks a low kick from Bradley Work.
The fight moves into the clinch position.
Bradley Work manages to break the clinch.
That's one minute gone in the round.
Bradley Work has a takedown stuffed.
Bradley Work moves into the clinch successfully.
Bradley Work breaks the clinch.
No luck with that takedown attempt from Bradley Work.
That's three failed takedown attempts in the round for Bradley Work. That's going to take a lot out of him.
Bradley Work goes for a double leg but Bradley Work avoids the attempt and the two fighters end up clinched against the cage as Bradley Work continues to drive forward.
Bradley Work is looking for a counter combo.
Bradley Work shoots in for a takedown. "I don't think so" says Bradley Work as he avoids it easily.
Bradley Work unleashes a big counter combination but Bradley Work bobs and weaves and avoids any damage.
Bradley Work is winning the standup battle so far.
Bradley Work gets tackled into the cage by Bradley Work. Bradley Work maintains the clinch.
Bradley Work breaks the clinch and we return to the middle of the mat.
That's two minutes gone in the round.
Bradley Work doesn't succeed with the takedown
and Bradley Work counters with a left and a right that stings Bradley Work.
Bradley Work shoots for a double leg takedown but Bradley Work sprawls well. He's pushed Bradley Work's face into the mat and manages to get back to his feet relatively easily.
Bradley Work stuffs a takedown. It's all about dictating where the fight takes place and Bradley Work wants it to stay on the feet.
Bradley Work throws a low kick, looking for Bradley Work's leg but Bradley Work calmly moves out of range.
No luck for Bradley Work with that takedown attempt.
Bradley Work unleashes a big counter combination but Bradley Work bobs and weaves and avoids any damage.
Nice takedown defense from Bradley Work. No joy for Bradley Work on that attempt.
Bradley Work gets a clinch.
The crowd cheering loudly, showing their appreciation for the quality fight we're seeing here.
Bradley Work decides to pull guard.
That's three minutes gone in the round.
Bradley Work pulls Bradley Work in close to prevent any damage.
Bradley Work stands up and looks to throw the legs aside to pass to side control. Bradley Work swivels though and keeps the full guard.

Bradley Work kicks Bradley Work off and gets to his feet.
Bradley Work fails with a takedown attempt.
Bradley Work doesn't succeed with the takedown
and Bradley Work counters with a crisp hook to the side of the head.
That's four minutes gone in the round.
Bradley Work fails with an attempt to clinch.
Bradley Work tries for a takedown but Bradley Work sees it coming a mile off and avoids it easily.
Bradley Work will have to do better than that with his takedown attempts.
Bradley Work pulls out of a head kick attempt.
Bradley Work tries to close the distance and clinch but Bradley Work swats him to one side with an open hand palm strike and circles away.
Bradley Work throws a looping left and ducks down for a takedown. He's got his arms around Bradley Work's waist but Bradley Work gets an underhook and avoids the takedown by throwing Bradley Work off to one side.
Bradley Work will have to do better than that with his takedown attempts.
No luck for Bradley Work with that takedown attempt.
Bradley Work is looking to take this fight into the clinch.
And thats the end of the round the fighters go back to their corners.
Bradley Work dominated that second round.
That's the end of the interval. I'm sure that seemed a lot quicker than a minute for our two fighters! Back to the action. Let's get this one finished - here comes the final round!

Bradley Work has his takedown stuffed
and Bradley Work counters with a two punch combo.
Bradley Work dives in and grabs Bradley Work's left leg, looking for a takedown. Bradley Work pushes down on Bradley Work's head and hops out.
Bradley Work tries to clinch but Bradley Work moves out of range.
Bradley Work shoots in for a takedown. He's persisting with it as Bradley Work sprawls well. Bradley Work wins this battle and keeps the fight standing. Bradley Work gets slowly back to his feet.
That's three failed takedown attempts in the round for Bradley Work. That's going to take a lot out of him.
Bradley Work tries to bum rush Bradley Work with a series of wild strikes but Bradley Work uses good footwork to avoid the assault.
Both fighters are breathing heavily.
We've had a slow start to the round here - hopefully the action picks up.
Bradley Work has his takedown stuffed
and Bradley Work holds on and brings the fighters into a clinch.
Bradley Work jumps guard but Bradley Work turns him against the cage and keeps the fight standing.
Bradley Work's corner calls for him to break the clinch, which he does.
That's one minute gone in the round.

Bradley Work moves into range and clinches up with Bradley Work.
Bradley Work tries to land knees in the clinch but Bradley Work avoids the damage to the body.
Bradley Work jumps guard but Bradley Work turns him against the cage and keeps the fight standing.
Bradley Work wants to break the clinch but can't.
Bradley Work's corner calls for him to break the clinch, which he does.
Bradley Work moves to clinch but Bradley Work breaks away
and Bradley Work counters with a left and a right that stings Bradley Work.
Bradley Work fails to land the takedown.
Bradley Work tries to bum rush Bradley Work with a series of wild strikes but Bradley Work uses good footwork to avoid the assault.
That's two minutes gone in the round.
Bradley Work shoots in looking for a takedown. Bradley Work tries to sprawl out of it but Bradley Work keeps driving through. The fighters are pinned against the cage. Bradley Work manages to get underhooks and after a bit of a struggle, circles away and we're back to standing.
As Bradley Work backs off Bradley Work throws a huge counter combo but Bradley Work manages to avoid it all.
Bradley Work closes the distance and pushes Bradley Work back into the cage.
Bradley Work tries to pull guard but Bradley Work holds him up against the cage and eventually Bradley Work drops back down to his feet.
Bradley Work is trying to pull guard but Bradley Work turns him against the cage and we stay in the clinch.
Bradley Work is trying to stall.
Bradley Work pushes off and circles away, back to the middle of the mat.
That's three minutes gone in the round.
Bradley Work tries to close the distance and clinch up against the cage but Bradley Work paws at him with a jab and circles away.
Bradley Work throws a hard body shot but it just misses.
Bradley Work tries to counter with a clinch but Bradley Work shakes him off and moves away.
Bradley Work is looking to take this fight into the clinch.
Bradley Work goes for a double leg but Bradley Work avoids the attempt and the two fighters end up clinched against the cage as Bradley Work continues to drive forward.
Bradley Work is trying hard to land a takedown here. Bradley Work sprawls well and keeps this one on the feet.
Bradley Work is looking for a counter combo.
Bradley Work stuffs the takedown.
Bradley Work shoots in for a takedown - he's clinched up with Bradley Work but Bradley Work pushes him off and we're back to square one.
Bradley Work shoots in but no luck this time.
That's four minutes gone in the round.
Bradley Work throws a head kick that misses and slips in the process. He scrambles back to his feet and the fighters circle.
A telegraphed takedown attempt from Bradley Work is defended easily by Bradley Work.
Bradley Work shoots for a double leg takedown but Bradley Work sprawls well. He's pushed Bradley Work's face into the mat and manages to get back to his feet relatively easily.
Bradley Work is looking for a counter combo.
A really sloppy takedown attempt there from Bradley Work.
Bradley Work is looking to take this fight into the clinch.
Bradley Work has stepped it up - he knows he needs a finish here!
Bradley Work is fighting for a decision here - he's started to take the cautious approach.
Boooooooooooooooooooo!!! God, this has been a terrible round. Come on you two, sort yourselves out!
Bradley Work throws a wild combination but nothing lands.
And that's the end of the fight!
Bradley Work comfortably won the final round on my scorecard.
I think Bradley Work has won this one but let's see what the judges have to say. Over to the ring announcer for the scorecards.
Ladies and gentlemen, after 3 rounds of action, we go to the scorecards for a decision.
Judge Eddie Farnsworth scores the fight 29:28
Judge John Kavanagh scores the fight 29:28
Judge Columbo Gatti scores the fight 29:28
In favor of your winner, by unanimous decision... Bradley Work!
|
|
|
|
|
|
|
|
|
|
|
|
|
|
|
|
|
|
|
|
|
|
|
| S |
C
A |
G |
S |
C
B |
G |
|
S |
C |
G |
|
energy
A | B |
|
hype
A | B |
|
pop
A | B |
|
mgr
A | B |
|
FIGHT
RATING
32% |
|
|
|
|
|
|
