|
|
PBP Commentary |
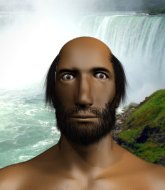
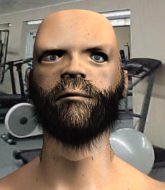
Coming up we have a super heavyweight MMA rules bout between Kenji Aoki (ranked 0 p4p, 0 weight class) and Moff Brighton (ranked 0 p4p, 0 weight class). Moff Brighton is staring across the cage at his opponent, tweaking his nipples.
 |
|
 |
| 202 cm
27
300 lbs
2 - 3 - 0 |
|
225 cm
20
292 lbs
5 - 2 - 0 |
BJJ Brown Belt
Brawler
Cuts easily |
|
BJJ Blue Belt
Counter fighter
Determined |
|
| |
|
Ladies and gentlemen. This fight is 3 rounds, in the super heavyweight division.
Introducing the fighter to my left, fighting out of the red corner.
With a record of
2 - 3 - 0, fighting out of Tokyo, Kenji Aoki!
And introducing the fighter to my right, fighting out of the blue corner.
With a record of
5 - 2 - 0, fighting out of Tokyo, Moff Brighton!
The judges for this bout are Hirohito Nitta, Tatsuya Matsuyama and Yukihiro Yamamoto.

The bell rings for round one and we are underway!
Aoki tries a head kick but it misses.
Aoki could do with losing a few pounds - he looks very soft around the mid section, to put it politely.
Aoki lands with a nice combination. Brighton backs away looking to recover.
Kenji Aoki seems to be the more aggressive standup fighter in this bout.
Brighton misses with a half-hearted attempt at a head kick.
Aoki shoots in and drives through. Brighton sprawls well.

Brighton has managed to clinch.
Brighton is pushing Aoki up against the cage, for a bit of lean and pray action. Action being used the in the loosest possible sense of the word.
Brighton controlling the action here for a moment.
We've had a slow start to the round here - hopefully the action picks up.
Brighton just leaning against Aoki, taking a breather.

That's one minute gone in the round.
Brighton scores with a nice hook to the head.

It looks like Kenji Aoki has been cut.
Brighton tries to throw a body punch but Aoki avoids it by throwing Brighton back against the cage.
Brighton lands a right uppercut that snaps the head of Aoki backwards.
Brighton can't find room to land a body shot as Aoki controls the action.
Aoki tries to pull guard but can't drag his opponent to the mat. Brighton just stands there and leans against the cage.
Aoki tries to work over Brighton's body with a swooping hook but it only glances the target.
Brighton is working on a leg, looking for a takedown but Aoki is defending well.

Aoki breaks the clinch.

Aoki drops down and drives through with a powerful takedown into guard.
Brighton is trying to control the position from the bottom.
Brighton wants to stand up but Aoki is controlling him.

That's two minutes gone in the round.

Brighton working for submissions but it's allowed Aoki to get to half guard.
Brighton has hold of Aoki's hands but Aoki slips his arm to the side and lands an elbow.
Brighton tries to kick Aoki off but Aoki keeps his base steady and stays in half guard.
Brighton keeping his head moving to avoid the ground and pound.
Neither fighter is being very active at the moment, with Aoki in particular looking to stall.
Brighton is trying to stand.
Brighton keeping control of the leg, stopping his opponent passing to mount.

That's three minutes gone in the round.

Aoki is looking for an arm triangle, whilst trying to pass to side control. Brighton doesn't seem that keen to cooperate though. No luck this time Aoki.
Brighton has no desire to be mounted, so is trying to control. Aoki is working away from the top position though.
We get told so often about how wrestlers don't like to be on their backs. Let's see if Brighton can do anything to dispel that myth.
Brighton is trying to get back to full guard.
Aoki is trying to work for a kimura. This could be trouble! No, Brighton has managed to free his arm - good work.
Brighton tries to kick Aoki off in order to stand up. Aoki Avoids the leg push though and dives into side control.
Brighton looks more muscular than last time we saw him. He must have been on the weights.
The ref warns both fighters not to hold the cage as they work up against the meshing.

That's four minutes gone in the round.
Neither fighter has done anything of merit for a good minute or two here and the crowd are not happy about it.
Brighton struggling a bit here.
Aoki misses with the ground and pound.
Brighton can't do much from the bottom here.
The fighters are pressed up against the cage, both looking to find a bit of space to work.
Aoki working hard here to secure a kimura but he's not really in the right position for it.
Boooooooooooooooooooo!!! God, this has been a terrible round. Come on you two, sort yourselves out!
Brighton is putting a lot of effort into getting back to his feet here.
And thats the end of the round the fighters go back to their corners.
Kenji Aoki dominated that round.
The cut man is working on Kenji Aoki's cut.
The referee calls time. The cornermen exit stage left and we're back to business.

Brighton instigates a clinch.
Aoki can't break the clinch.
Brighton lands a right hand that snaps the head of Aoki backwards.
Aoki being controlled against the cage.
Brighton has Aoki pushed against the cage.
Brighton receives a warning from the referee for stalling.
We've had a slow start to the round here - hopefully the action picks up.
Aoki struggles to land a body shot inside as Brighton controls his hands.
Aoki is trying to force a seperation but Brighton has the dominant position.
Aoki wants to strike at distance but he can't break free of the clinch.
That's one minute gone in the round.
Aoki is trying to pull guard but Brighton turns him against the cage and we stay in the clinch.
Aoki tries to pull guard but can't drag his opponent to the mat. Brighton just stands there and leans against the cage.
Brighton with a knee to the head.
Some stalling of biblical proportions here from Brighton.
Brighton stalls.
Brighton tries for a takedown but Aoki manages to get underhooks.
Aoki is looking to score with knees to the body. Maybe he'll change it up and go body then head. Brighton is defending well for now.
Aoki working aggressively here.
Brighton leaning his opponent against the cage.
That's two minutes gone in the round.
Brighton just leaning against Aoki, taking a breather.
Aoki jumps guard but Brighton turns him against the cage and keeps the fight standing.
That's three failed takedown attempts in the round for Kenji Aoki. That's going to take a lot out of him.
Brighton is struggling to control the position.

Brighton breaks from the clinch.
Aoki is looking to land body kicks.
Aoki loads up on a big right hand but Brighton slips the punch.
Brighton is trying to counter with his kicks.

Aoki instigates a clinch.
Aoki fails to pull the fight into his guard.
That's three minutes gone in the round.
A battle for position here, against the cage.
Aoki's corner calls for him to break the clinch, which he does.
Brighton is trying hard to land a takedown here. Aoki sprawls well and keeps this one on the feet.

Brighton feints and as Aoki raises his hands in defense, Brighton changes levels and drives through with a takedown into guard.
Aoki has thrown up a leg looking for a triangle. Brighton doesn't defend quickly enough and Aoki has managed to lock this one up! Can Brighton escape?! NO! He's tapping out! Damn, that was a quick submission - congrats to Aoki on a fantastic submission victory.
Ladies and gentlemen, after 3:50 of round 2, we have a winner by way of Submission (Triangle). Kenji Aoki!
|
|
|
|
|
|
|
|
|
|
|
|
|
|
|
|
|
|
|
|
|
|
|
| S |
C
A |
G |
S |
C
B |
G |
|
S |
C |
G |
|
energy
A | B |
|
hype
A | B |
|
pop
A | B |
|
mgr
A | B |
|
FIGHT
RATING
30% |
|
|
|
|
|
|
