|
|
PBP Commentary |
Coming up we have a heavyweight MMA rules bout between Yoshi Hiroshima (ranked 0 p4p, 0 weight class) and Korax Tarum (ranked 0 p4p, 0 weight class). Korax Tarum has the eye of the tiger tonight.
 |
|
 |
| 200 cm
18
250 lbs
1 - 2 - 0 |
|
185 cm
25
265 lbs
0 - 0 - 0 |
BJJ Blue Belt
Brawler
Granite chin |
|
Decent wrestler
Decent boxing
Heavy handed |
|
| |
|
Ladies and gentlemen. This fight is 3 rounds, in the heavyweight division.
Introducing the fighter to my left, fighting out of the red corner.
With a record of
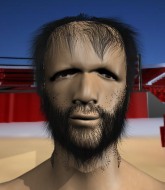
1 - 2 - 0, fighting out of Tokyo, Yoshi Hiroshima!
And introducing the fighter to my right, fighting out of the blue corner.
With a record of
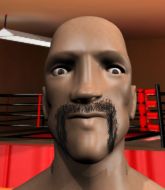
0 - 0 - 0, fighting out of Tokyo, Korax Tarum!
The judges for this bout are Tatsuya Matsuyama, Hirohito Nitta and Shigeki Fujiwara.

The bell rings for round one and we are underway!
Tarum pivots as if he's going to throw a leg kick but stops half way.
Hiroshima gets his takedown attempt stuffed easily
letting Tarum counter with a right hand.

Tarum drives through with a takedown into Hiroshima's guard. Let's see what he can do from the top position.
Tarum's corner is telling him to maintain position.
Hiroshima keeping moving, preventing Tarum from controlling successfully.
Hiroshima on his back here. We all know that wrestlers don't like being on their back so let's see if Hiroshima tries to get out of the position.
Tarum postures up.
Tarum really doesn't want to stay on the ground with Hiroshima. If he can't get it back to his feet, it's only a matter of time before he'll be tapping out.
Hiroshima pulls Tarum in close to his closed guard and prevents Tarum from doing any damage or advancing position.
We've had a slow start to the round here - hopefully the action picks up.
Tarum engaging in some classic timewasting tactics.

That's one minute gone in the round.

Hiroshima is looking for a guillotine. You can't force these things though and Tarum defends well.
Hiroshima is breathing heavily.
Tarum engaging in some classic timewasting tactics.

Tarum has gone for a leg lock! Hiroshima slips out almost immediately though and dives into Tarum's guard.
Tarum is working actively off his back, looking to secure an arm or perhaps work for a triangle.

That's two minutes gone in the round.
The crowd are hurling abuse towards the fighters... You can hardly blame them though because there isn't a lot going on in the fight.
Hiroshima wants to control from the top but Tarum keeps moving.
Tarum wants to sweep but no luck.
Hiroshima will need to keep those long limbs tucked in whilst he's on the ground, to prevent any submissions.
Hiroshima throws a big elbow that misses.

The referee has decided to stand the fighters back up, so we'll restart on the feet.
Hiroshima is looking to land body kicks.
Tarum closes the distance and clinches up with Hiroshima, looking for a takedown. Tarum pushes Hiroshima against the cage but Hiroshima circles to the side and manages to break the clinch.
Hiroshima lifts his leg as if looking to counter with a high kick.

Tarum forces Hiroshima back against the cage and clinches.

Hiroshima ties up his opponent against the cage and manages to drag the fight down to the ground. Hiroshima no doubt will be looking to work submissions from his guard.
The fighters are pressed up against the cage, both looking to find a bit of space to work.

That's three minutes gone in the round.
Hiroshima is trying to stand up but he's not managed so far.
Tarum pressing down on his opponent's thigh, looking to pass guard. Hiroshima is keeping the position for now.
Hiroshima not looking particularly offensive just at the moment.
Tarum must be cautious of submissions here, given that his opponent has the superior Jiu Jitsu.
Tarum engaging in some classic timewasting tactics.

Tarum gets to his feet and steps away from his opponent.
Tarum clinches up with Hiroshima and pushes him back against the cage.

That's four minutes gone in the round.
The crowd are hurling abuse towards the fighters... You can hardly blame them though because there isn't a lot going on in the fight.
Tarum lands punches inside but they're not really causing much damage.
Tarum is trying to break free.
Tarum drops down for a takedown but doesn't get it.
Tarum decides to pull guard.
Hiroshima is trying to work a guillotine from the top, or something like that? Don't know how he thinks he's going to get a finish from there.
Hiroshima trying to control the position from guard on top but Tarum is wriggling around, looking for whatever he can.
And thats the end of the round the fighters go back to their corners.
Korax Tarum dominated that round.
The fighters' corners scream their final instructions, as the referee calls time. Here we go, back to the action!

Hiroshima shoots in for a takedown but Tarum shows good takedown defense.
Hiroshima slaps away a takedown attempt from Tarum, before circling back to the center of the mat.
Tarum tries to drive through with a takedown attempt but Hiroshima defends well and Tarum ends up having to push Hiroshima into the cage where they will battle it out in the clinch.
Hiroshima looks to throw the jab but Tarum is out of range.
Tarum goes for a double leg but Hiroshima avoids the attempt and the two fighters end up clinched against the cage as Hiroshima continues to drive forward.
Yoshi Hiroshima has stuffed three takedown attempts in the round now. That's going to take a lot out of Korax Tarum.
Tarum punishes Hiroshima's body with a nice straight punch.
A shot to the liver by Tarum. Beautiful body shot.
Yoshi Hiroshima is looking to throw some combinations by the looks of things.
We've had a slow start to the round here - hopefully the action picks up.
Hiroshima fails with a rather predictable takedown attempt.
Both fighters are absolutely exhausted here.
Tarum shoots in looking for a takedown but Hiroshima manages to keep the fight standing, pushing Tarum's face into the canvas for good measure before circling away.
Tarum closes the distance and clinches.
That's one minute gone in the round.
Tarum is working for takedown but Hiroshima is calmly controlling the position for now.
Both fighters working to control the clinch.

Hiroshima breaks the clinch.
Hiroshima shoots in for a takedown - he's clinched up with Tarum but Tarum pushes him off and we're back to square one.
Tarum clinches with his opponent.
Hiroshima lands a glancing elbow in the clinch.
Hiroshima pulls guard effortlessly.
Hiroshima working for a triangle but Tarum defends it easily.
Tarum in full guard, throwing the ground and pound. No damage this time.
That's two minutes gone in the round.
Tarum wants to control from the top but Hiroshima keeps moving.
Tarum gets to his feet - Hiroshima follows without any prompting.
Hiroshima avoids the head kick by Tarum.
Hiroshima moves in looking to clinch but Tarum pushes him off.
Tarum shoots in looking for a takedown. Hiroshima tries to sprawl out of it but Tarum keeps driving through. The fighters are pinned against the cage. Hiroshima manages to get underhooks and after a bit of a struggle, circles away and we're back to standing.
That's three minutes gone in the round.
Hiroshima shoots in looking for a takedown. Tarum tries to sprawl out of it but Hiroshima keeps driving through. The fighters are pinned against the cage. Tarum manages to get underhooks and after a bit of a struggle, circles away and we're back to standing.
Despite the aggression on Tarum's face he doesn't fully commit to the counter.
Hiroshima swings away but doesn't land with a series of punches.
No luck for Hiroshima with that takedown attempt.
Tarum throws a looping left and ducks down for a takedown. He's got his arms around Hiroshima's waist but Hiroshima gets an underhook and avoids the takedown by throwing Tarum off to one side.

Hiroshima has managed to clinch.
Hiroshima pulls guard.
That's four minutes gone in the round.
Hiroshima utilising some decent striking defenses from the guard, preventing the ground and pound.
Hiroshima controls Tarum momentarily but Tarum frees himself.
Tarum trying to control but Hiroshima is working from the bottom.
Hiroshima bucks up whilst keeping hold of a body lock, managing to reverse the position. Now he's in top in Tarum's guard.

The crowd thankful this round is nearly over.
Tarum will have to put a bit more behind his punches if he's going to do any damage from this position.
The ref warns both fighters not to hold the cage as they work up against the meshing.
Tarum wants to control the position but Hiroshima says "no thanks buddy" and passes to half guard.
And thats the end of the round the fighters go back to their corners.
Yoshi Hiroshima dominated that second round.
Well, the break between rounds is over. Let's get back to the scrappin! This is the final round!

Hiroshima fails with the takedown.
Hiroshima with a poor takedown
and Tarum counters with a left and a right that stings Hiroshima.
We're hearing some news coming in from back stage. It's official - Tarum has eaten all the pies!
Tarum shoots in for a takedown but Hiroshima shows good takedown defense there and keeps this one on the feet.
Hiroshima was looking to counter that move with a punch but didn't quite pull the trigger.
Tarum clinches up with Hiroshima and pushes him back against the cage.
Tarum keeps the fight in the clinch, despite Hiroshima's efforts to push away.
Tarum is trying to break free.
We've had a slow start to the round here - hopefully the action picks up.
Tarum manages to pull guard.
Tarum looking for a sweep. Not yet Tarum, not yet.
Tarum is trying to keep Hiroshima in close.
Both fighters are breathing heavily.
That's one minute gone in the round.
Tarum keeping moving, preventing Hiroshima from controlling successfully.
Hiroshima wants to pass the guard but Tarum is keeping the position.
Hiroshima trying to control but Tarum is working from the bottom.

Tarum manages to escape and get back to his feet.
That's two minutes gone in the round.
Tarum clinches with his opponent.
Some stalling of biblical proportions here from Tarum.
Hiroshima leaning his opponent against the cage.
Tarum trying to land knees to the body.
Tarum gets control of Hiroshima's arms and successfully pulls guard. Tarum will no doubt be looking for submissions off his back.
Hiroshima is stalling in the full guard.
That's three minutes gone in the round.
Tarum pulls Hiroshima in to control the position.
Hiroshima controlling from the guard. I say controlling but really, he's stalling.
Tarum is working from a closed guard but he's struggling to control his opponent.
Tarum wants to improve his position here. There's a bit of a scramble and Hiroshima has taken Tarum's back! He's locked on a rear naked choke here and Tarum has been forced to tap!
Ladies and gentlemen, after 4:57 of round 3, we have a winner by way of Submission (RNC). Yoshi Hiroshima!
|
|
|
|
|
|
|
|
|
|
|
|
|
|
|
|
|
|
|
|
|
|
|
| S |
C
A |
G |
S |
C
B |
G |
|
S |
C |
G |
|
energy
A | B |
|
hype
A | B |
|
pop
A | B |
|
mgr
A | B |
|
FIGHT
RATING
35% |
|
|
|
|
|
|
