|
|
PBP Commentary |
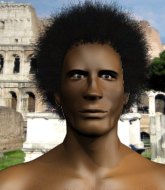
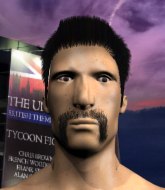
Coming up we have a welterweight MMA rules bout between Dijoban Totohami (ranked 0 p4p, 0 weight class) and Hugo Sato (ranked 0 p4p, 0 weight class). Man, I cannot wait for this one!
 |
|
 |
| 160 cm
25
168 lbs
1 - 0 - 0 |
|
179 cm
18
170 lbs
0 - 0 - 0 |
BJJ Blue Belt
Good kicks
Granite chin |
|
BJJ Purple Belt
Brawler
Granite chin |
|
| |
|
Ladies and gentlemen. This fight is 3 rounds, in the welterweight division.
Introducing the fighter to my left, fighting out of the red corner.
With a record of
1 - 0 - 0, fighting out of Tokyo, Dijoban Totohami!
And introducing the fighter to my right, fighting out of the blue corner.
With a record of
0 - 0 - 0, fighting out of Tokyo, Hugo Sato!
The judges for this bout are Ren Mimura, Yukihiro Yamamoto and Yukihiro Shimada.

The bell rings for round one and we are underway!
Totohami tries a head kick but it misses.
Totohami lands a high kick!
Sato tries to close the distance and clinch up but Totohami swats him away and circles back towards the center.
Totohami wings a very wild body shot but it does the job and lands to the midsection.
Totohami keeps Sato at a distance using the push kick.
Totohami comes forward and lands a shot to the body, then darts back out of range.
Totohami feints with a shoulder and throws a nice leg kick to Sato's calf.
Totohami is moving around nicely and scores here with a single head shot.
Totohami with a jab.
Totohami connects with a jab.
The crowd are loving this. Great action here.
Totohami throws a sloppy head kick and Sato moves out of range easily.
Totohami throws a head kick that half lands.
Totohami with a hook.
Sato takes a solid shot to the body. That one hurt him but he's trying not to show it.
Totohami scores with a kick to the body.
Totohami fails to land with a series of punches.
Totohami pulls out of a head kick attempt.
Sato swings away with a counter right hand but no contact made.

That's one minute gone in the round.
Totohami pulls out of a head kick attempt.

Totohami rushes Sato and presses him up against the cage.
Sato misses with the head strike.
Nice body punch from Totohami.
Totohami slows down the pace here.
Sato working hard to break the clinch.
Totohami tries for a takedown. No joy.
A bit of stalling here from Sato.

That's two minutes gone in the round.
Sato is working for a takedown up against the cage. He can't get it on this occasion though.
Sato wants to break the clinch but can't.

Totohami manages to break the clinch.
Totohami connects with a slap. Keep your fist closed son.
Dijoban Totohami seems to be the more aggressive standup fighter in this bout.
Sato tries to clinch up but Totohami circles away and keeps his distance.
Totohami throws a quick head kick that skims the top of Sato's head.
Totohami is breathing heavily.
A head kick misses from Totohami.
Nice jab there from Totohami.
Sato chopped to the floor by a nice leg kick but he springs right back up before Totohami can pounce on him.
Sato throws a right and a left that both miss.
Sato tries to score a power double leg takedown but Totohami sees that one coming and sprawls well. That will dishearten Sato somewhat.

That's three minutes gone in the round.
Totohami tries a head kick but it misses.
Sato fakes high and shoots in for a takedown but Totohami avoids it really well and circles away.
Totohami fires out a quick counter leg kick but Sato just manages to avoid it.
Dijoban Totohami has stuffed three takedown attempts in the round now. That's going to take a lot out of Hugo Sato.
Totohami closes the distance and clinches.
Totohami avoids the elbow strike from Sato, against the cage.
Sato holding his opponent close, against the cage.
Sato swings away with an uppercut that misses.

That's four minutes gone in the round.
Sato is looking for a takedown.
Totohami lands a body punch - he's looking to wear down Sato.
Totohami pushes off and circles away, back to the middle of the mat.
Totohami plants his feet and lands a nice head kick!
Totohami throws a quick head kick that skims the top of Sato's head.
Totohami throws a right high kick that is partially blocked by Sato.
The fight moves into the clinch position.
Sato tries to pull guard but Totohami won't allow it.
Sato is trying to drag Totohami to the mat but Totohami just about manages to keep his footing. He used the cage to his advantage there.
And thats the end of the round the fighters go back to their corners.
Dijoban Totohami dominated that round.
That's the end of the interval. I'm sure that seemed a lot quicker than a minute for our two fighters! Back to the action.

Totohami lands with a slapping head kick.
Totohami lands with a head kick! That's gotta hurt.
Sato finds nothing but air with that leg kick attempt.
Dijoban Totohami is looking to throw some combinations by the looks of things.
A head kick misses from Totohami.
Totohami moves into range and clinches up with Sato.
Sato tries to pull guard but Totohami won't allow it.
Totohami scores with a knee to the head.
We've had a slow start to the round here - hopefully the action picks up.
Sato has had enough of the clinch but Totohami keeps him there for the moment.
Sato takes an elbow to the temple.
Sato wants to take the fight to the mat but Totohami manages to get underhooks and keep the fight in the clinch.
That's one minute gone in the round.

Totohami has picked Sato up - he's going for a ride! Totohami dumps his opponent to the mat with a thud and settles into half guard.

Sato has managed to escape just enough to sneak back to his feet but Totohami is on him like a limpet, forcing Sato back against the cage.
Sato is breathing heavily.
Sato jumps guard but Totohami stands there with Sato around his waist. Sato gives up and drops back to his feet. We remain in the clinch.
Dijoban Totohami has stuffed three takedown attempts in the round now. That's going to take a lot out of Hugo Sato.
Sato prevents a body shot from Totohami.
Sato missing with knees to the body.
Sato jumps guard but Totohami turns him against the cage and keeps the fight standing.
Sato is trying to maintain a safe position but Totohami gets an underhook and turns Sato into the cage.
Totohami is really dominating this fight. Is there anything that Sato can do to turn this around?
Sato wants to break the clinch but can't.
That's two minutes gone in the round.
Totohami creates a bit of space for himself and sneaks an elbow through Sato's defenses.
Nice body punch from Totohami.
Sato trying to stall but Totohami improves his position.
Sato being controlled against the cage.
Totohami manages to break the clinch.
Totohami pushes Sato up against the cage in a clinch.
Totohami lands a body punch.
That's three minutes gone in the round.
Sato jumps guard but his hands slip and he falls flat on his back. Well, he's made himself look a right mug there, as Totohami walks away with a smile on his face. Sato gets slowly back to his feet and shakes his head.
Totohami works his jab well there, keeping his opponent at a distance.
Totohami lands with a head kick! That's gotta hurt.
Totohami throws a nice inside leg kick.
Sato blocks a head kick by Totohami.
Totohami with a jab.
Totohami clinches up with Sato and pushes him back against the cage.
Sato's head jolts backwards as he takes an uppercut right on the button!
Totohami makes some space for himself and lands an uppercut.
Totohami escapes the clinch and we're back to striking.
Totohami uses good footwork to get in and out and land a nice right hand before Sato has time to react.
Totohami scores with a slapping inside leg kick.
That's four minutes gone in the round.
This is a great period of action - very entertaining stuff!
Sato throws a looping left and ducks down for a takedown. He's got his arms around Totohami's waist but Totohami gets an underhook and avoids the takedown by throwing Sato off to one side.
Totohami tries to counter by clinching up but Sato breaks away and moves out of range.
Totohami moves into range and lands a nice body kick.
Totohami throws a head kick that misses.
Sato drops his hands and takes a jab to the jaw for his troubles.
Totohami lands a nice hook to Sato's body. Sato takes it in his stride and looks to land his own strikes.
Totohami moves into the clinch.
Sato takes an elbow to the forehead.
Totohami's corner calls for him to break the clinch, which he does.
Sato shoots in for a takedown - he's clinched up with Totohami but Totohami pushes him off and we're back to square one.
Totohami swung with a counter right hand that didn't connect.
Totohami bobs and weaves and unloads with a good uppercut.
And thats the end of the round the fighters go back to their corners.
Dijoban Totohami dominated that second round.
The corners get their ten second warning. Both fighters stand from their stools and stare eachother down, ready to get back to the action. And we move into the final round!

Sato has his takedown stuffed
and Totohami counters with a quick right hand to the jaw.
Totohami lands a head kick. Sato smiles back at him and beckons him forward.
Totohami moves into range and lands a nice leg kick.
Sato fails miserably with a takedown attempt.
Totohami throws a head kick but Sato moves out of range.
Totohami throws a head kick that connects with a bit of head and a bit of hand.
Totohami pulls out of a head kick attempt.
Totohami misses with a head kick.
We've had a slow start to the round here - hopefully the action picks up.
Totohami clinches up with Sato and pushes him back against the cage.
Totohami just leaning against Sato, taking a breather.
Sato fails to pull guard.
Dijoban Totohami has stuffed three takedown attempts in the round now. That's going to take a lot out of Hugo Sato.
Both fighters are breathing heavily.
That's one minute gone in the round.
Sato is working on a leg, looking for a takedown but Totohami is defending well.
Totohami blocking some punches.
Totohami pushes off and circles away, back to the middle of the mat.
Totohami throws a leg kick which misses Sato's front leg but catches the back leg as Sato tries to avoid it.
Sato fakes high and shoots in for a takedown but Totohami avoids it really well and circles away.
Good standup being displayed there by Totohami as he connects with a hook.
Totohami scores with a head kick.
Sato tries to clinch up against the cage, rushing in to close the distance. Totohami manages to break the clinch and circles back to the middle of the mat.
Dijoban Totohami is winning the standup battle so far.
That's two minutes gone in the round.
Donk. Totohami catches Sato right on the button with a cross.
Sato avoids the head kick by Totohami.
Totohami with a nice looking leg kick. You could hear that one land in a back row.
Sato avoids the head kick by Totohami.
Sato is trying desperately to land a takedown but Totohami is having absolutely none of it. This is turning into a bit of a nightmare for Sato.
Totohami misses with a head kick.
Sato tries to keep at a distance but Totohami has taken the fight into the clinch.
Sato jumps guard but his hands slip and he falls flat on his back. Well, he's made himself look a right mug there, as Totohami walks away with a smile on his face. Sato gets slowly back to his feet and shakes his head.
Totohami throws a quick inside leg kick.
Wooooo! Give it up for these two warriors! They are putting on a show!
Sato avoids the head kick by Totohami.
A punch lands to the side of Sato 's head but he takes it in his stride.
Totohami avoids a kick to the body.
That's three minutes gone in the round.
Sato takes a head kick and shrugs it off.
Totohami rushes Sato and presses him up against the cage.
Sato is trying to break free.
Sato is trying to drag Totohami to the mat but Totohami just about manages to keep his footing. He used the cage to his advantage there.
Totohami will no doubt start fighting again in a minute but for now he's just having a little rest, leaning Sato up against the cage.
Sato pushes off and fires off an elbow that misses, before clinching up again, against the cage.
That's four minutes gone in the round.
Sato jumps guard but his hands slip and he falls flat on his back. Well, he's made himself look a right mug there, as Totohami walks away with a smile on his face. Sato gets slowly back to his feet and shakes his head.
Sato blocks a head kick by Totohami.
Totohami tries a switch kick but it misses it's target.
No luck for Sato with that takedown attempt.
Totohami connects with a hook to the side of his opponent's head.
Totohami rushes Sato and pushes him back against the cage in a clinch.
Sato jumps guard but his hands slip and he falls flat on his back. Well, he's made himself look a right mug there, as Totohami walks away with a smile on his face. Sato gets slowly back to his feet and shakes his head.
Hugo Sato has stepped it up - he knows he needs a finish here!
Dijoban Totohami is fighting for a decision here - he's started to take the cautious approach.
Sato's leg has a nasty welt from taking a succession of leg kicks. That must be slowing him down.
Totohami throws a head kick that Sato semi-blocks.
And that's the end of the fight!
Dijoban Totohami showed his dominance in that final round.
Well I reckon that's a shut out for Totohami, winning every round. Will the judges agree? They are the ones who matter, even if they are often depressingly incompetent. Over to the ring announcer for the scorecards.
Ladies and gentlemen, after 3 rounds of action, we go to the scorecards for a decision.
Judge Ren Mimura scores the fight 30:25
Judge Yukihiro Yamamoto scores the fight 30:24
Judge Yukihiro Shimada scores the fight 30:25
In favor of your winner, by unanimous decision... Dijoban Totohami!
|
|
|
|
|
|
|
|
|
|
|
|
|
|
|
|
|
|
|
|
|
|
|
| S |
C
A |
G |
S |
C
B |
G |
|
S |
C |
G |
|
energy
A | B |
|
hype
A | B |
|
pop
A | B |
|
mgr
A | B |
|
FIGHT
RATING
50% |
|
|
|
|
|
|
