|
|
PBP Commentary |
Coming up we have a welterweight MMA rules bout between Tyson Driffin (ranked 0 p4p, 0 weight class) and Kazuo Takeda (ranked 0 p4p, 0 weight class). Over to our ring announcer for the fighter introductions!
 |
|
 |
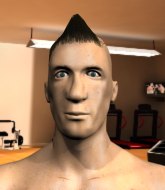
| 177 cm
22
180 lbs
1 - 1 - 0 |
|
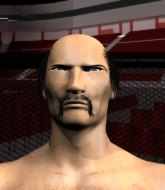
180 cm
19
177 lbs
2 - 2 - 0 |
BJJ Brown Belt
Counter striker
Cuts easily |
|
Good takedowns
Counter striker
Solid chin |
|
| |
|
Ladies and gentlemen. This fight is 3 rounds, in the welterweight division.
Introducing the fighter to my left, fighting out of the red corner.
With a record of
1 - 1 - 0, fighting out of New York, Tyson Driffin!
And introducing the fighter to my right, fighting out of the blue corner.
With a record of
2 - 2 - 0, fighting out of New York, Kazuo Takeda!
The judges for this bout are David Schapiro, Franklyn Lucas and Lou da Vinci.

The bell rings for round one and we are underway!
Driffin lands a nice looking body shot.
Takeda changes levels and looks for a double leg takedown. Driffin tries to avoid it but Takeda manages to keep hold of a leg and drag Driffin to the ground. Driffin escapes though and pops straight back up to his feet.
Driffin staying out of range there.
Takeda throws a right and a left that both miss.
Takeda throws a predictable looking body shot

and Driffin counters with a nice double leg into side control. Takeda won't be happy with that.

Driffin is trying to get an arm triangle but Takeda is defending well.
The fighters are pressed up against the cage, both looking to find a bit of space to work.
Driffin wants to lay and pray for a moment but Takeda keeps working.
Takeda is trying to get back to half guard.
Takeda wants to control but Driffin postures up.
Driffin is looking to take a break and control but Takeda is keeping him honest, looking to work from the bottom.

That's one minute gone in the round.
A lull in the action here as Driffin stalls from top position.

Neither fighter is doing enough for the referee's liking and he's decided to stand them back up.
Takeda feints and then dives in with a takedown. That was a long way out but the feint bought him enough time to close the distance and complete the takedown. Now we'll play guard for a bit and see who can get the better of that position.
The ref warns both fighters not to hold the cage as they work up against the meshing.
Takeda trying to control the position from guard on top but Driffin is wriggling around, looking for whatever he can.

That's two minutes gone in the round.
Driffin preventing the ground and pound from doing any damage.
Driffin looking for subs off his back but Takeda has passed one foot through into half guard.
Driffin is trying to get back to full guard.
Driffin is working hard here to advance position.
Takeda seems content to maintain position for now, rather than mounting any offense.
Takeda seems very keen to just sit and control from half guard but Driffin does not like that idea so much and is remaining active off his back.

That's three minutes gone in the round.
Takeda keeping composed on the top, looking to control the action.
Takeda thumps the canvas. Not on purpose obviously - he just missed Driffin's head.
Driffin connecting with a few gentle strikes.
The referee decides to stand the fighters back up.
Takeda looks to clinch
and Driffin counters with a nice double leg into guard.
Driffin trying to control the position from guard on top but Takeda is wriggling around, looking for whatever he can.
Driffin tries to free his leg and advance position but Takeda is retaining full guard.
Takeda keeping moving, preventing Driffin from controlling successfully.
Takeda is looking for a triangle but Driffin pushes his legs off easily.
Takeda working for a triangle but Driffin defends it easily.
Takeda looking to sweep here. No luck so far.

That's four minutes gone in the round.
Takeda looking for a guillotine here but Driffin defends easily.
Takeda trying to control the position.
Takeda looking for submissions from the bottom here. Moving his hips around, possibly looking for an armbar.
Takeda looks gassed!
Takeda has momentary wrist control but Driffin slips an elbow through the middle.
And thats the end of the round the fighters go back to their corners.
Tyson Driffin dominated that round.
The corners get their ten second warning. Both fighters stand from their stools and stare eachother down, ready to get back to the action.

Takeda looks to land a left hand but Driffin moved out of range nicely.
Driffin has his takedown stuffed
and Takeda connects with a straight left hand counter down the middle.

It looks like Tyson Driffin has been cut.
Takeda goes for a spinning back kick but it misses.
Driffin ducks under an overhand right and circles away with a smile on his face.
Driffin changes levels and drives through with a really nice takedown into side control. Takeda looks really pissed at himself for not defending that better.
The referee tells the fighters to keep busy.
Takeda is not content to let Driffin control the position.
Takeda can't do much from the bottom here.
That's one minute gone in the round.
Takeda is trying to buck Driffin off.
You can see the frustration on Takeda's face, being in this tough position on the bottom.
Takeda avoids any damage from the ground and pound of Driffin.
Takeda is trying to control Driffin's posture but Driffin avoids it.
Takeda gets back to half guard.
Driffin seems to be working for a kimura but Takeda defends the submission attempt.
Both fighters are absolutely exhausted here.
That's two minutes gone in the round.
A few boos can be heard. I'm sure they will multiply if the fighters don't pick up the pace.
The referee decides to stand the fighters back up.
Takeda tries to land a leg kick but Driffin saw it coming and moves away.
Takeda throws a predictable looking body shot
and Driffin counters with a shoot takedown into half guard.
Takeda keeping control of the position.
Driffin seems very keen to just sit and control from half guard but Takeda does not like that idea so much and is remaining active off his back.
Takeda is looking to improve his position.
That's three minutes gone in the round.
Takeda is working for an escape here. He's hooked one of Driffin's legs and he's managed to sneak out and take Driffin's back!
So, who will make the next big move? In this position it could be crucial.
Takeda missing with strikes from the back.
Driffin covering up well under a barage of strikes.
Takeda misses with punches from the back.
Takeda missing with punches from the back.
Takeda misses with punches from the back.
Takeda has his hand under the chin of his opponent looking for the choke. He's nearly got it! This one could be all over! But no, Driffin has freed his hand and lives to survive another
well, another couple of seconds at least!
Takeda throwing wild punches that miss their target.
That's four minutes gone in the round.
A few boos can be heard. I'm sure they will multiply if the fighters don't pick up the pace.
Driffin has his hands over his head blocking the strikes from Takeda.
Takeda struggling to land strikes to the head as Driffin covers up.
Driffin just trying to survive but Takeda is wriggling into a better position, looking to finish.
Takeda throwing sloppy strikes.
Takeda avoiding Driffin 's attempts to control his hands.
Driffin tries to break free.
Takeda missing with strikes from the back.
Takeda is controlling the position but Driffin somehow manages to roll and ends up with half guard.
It looks like we're going to have a standup here. Neither fighter is doing enough on the ground.
Takeda closes the distance but Driffin moves to the side
and Driffin counters with a nice double leg into guard.
And thats the end of the round the fighters go back to their corners.
Tyson Driffin dominated that second round.
The cut man is working on Tyson Driffin's cut.
The fighters get back to their feet, the hooter sounds and we're back to the action! Let's get this one finished - here comes the final round!

Takeda throws a jab when Driffin was well out of range.
A shot to the body from Takeda misses
and Driffin counters with a nice double leg into guard.
Tyson Driffin overall seems to be getting the better of the ground position in the fight so far.
Driffin wants to pass the guard but Takeda is keeping the position.
A real slowdown in the pace of the fight for a moment, as Takeda holds on and takes a little breather.
Takeda is trying to control the position from the bottom.
Driffin trying to control but Takeda is working from the bottom.
Driffin stopping the sweep attempt from Takeda.
Takeda looks to be working for a triangle here. Oh, it looks like he might have it! Driffin has picked Takeda up and slammed him! Takeda can't keep hold of the triangle and Driffin manages to pass to side control!
That's one minute gone in the round.
Driffin goes for an armbar here - this could be all over! But no, Takeda has escaped beautifully and is now on top in side control! Oh, that's unlucky for Driffin but great work by Takeda.
Both fighters are breathing heavily.
You can see the frustration on Driffin's face, being in this tough position on the bottom.
Takeda trying to control the position but Driffin is working away.
Takeda lands a knee to the body and a forearm to the face.
Takeda advances to full mount.
Takeda tries to control but Driffin wriggling away.
Driffin is desperately trying to improve his position but Takeda has a good base and remains in mount.
Takeda looking to control but Driffin is working nicely, looking to advance position himself.
That's two minutes gone in the round.
Takeda controlling the position easily from mount.
Takeda has the superior BJJ but he's also working some ground strikes into his gameplan.
Driffin is writhing around trying to get back to his feet.
Takeda throws an elbow from mount that misses. Lucky escape for Driffin because Takeda loaded up on that one.
Driffin is working to get back to half guard.
A nice elbow there by Takeda.
Takeda controlling from the full mount.
Takeda trying to control but he's not successful this time.
That's three minutes gone in the round.
Takeda working away from the top, dropping strikes.
Takeda thowing strikes but they're hitting the gloves, not doing any damage.
Takeda trying to control but Driffin is having none of it.
Takeda landing strikes from the mount.
Driffin is looking to get to half guard.
Takeda working for a submission but Driffin is keeping him at bay.
Driffin holding onto his opponent's waist for dear life, as Takeda tries to land some strikes to get him to release his grip.
That's four minutes gone in the round.
Takeda is in full mount, looking to secure a guillotine but Driffin is surviving well by controlling Takeda's body position as best he can.
Takeda lands a couple of nice shots there from mount.
Driffin avoids a series of strikes thrown by Takeda.
Takeda is thinking about an arm triangle here, looking to tighten it up before moving to side control. Driffin can see it coming though and defends well with a couple of strikes to the head and some good arm positioning.
Driffin wants to control but Takeda is having none of it.
Takeda looking to ground and pound but Driffin is blocking nicely.
And that's the end of the fight!
Kazuo Takeda comfortably won the final round on my scorecard.
I think Driffin has won this one but let's see what the judges have to say. Over to the ring announcer for the scorecards.
Ladies and gentlemen, after 3 rounds of action, we go to the scorecards for a decision.
Judge David Schapiro scores the fight for Tyson Driffin!
Judge Franklyn Lucas scores the fight for Tyson Driffin!
Judge Lou da Vinci scores the fight for Tyson Driffin!
Tyson Driffin wins by unanimous decision!
|
|
|
|
|
|
|
|
|
|
|
|
|
|
|
|
|
|
|
|
|
|
|
| S |
C
A |
G |
S |
C
B |
G |
|
S |
C |
G |
|
energy
A | B |
|
hype
A | B |
|
pop
A | B |
|
mgr
A | B |
|
FIGHT
RATING
37% |
|
|
|
|
|
|
