|
|
PBP Commentary |
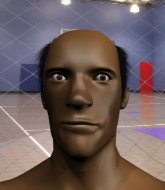
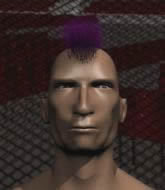
Coming up we have a super heavyweight MMA rules bout between Feyd Loyd (ranked 0 p4p, 0 weight class) and Zipper Bunga (ranked 0 p4p, 0 weight class). We have two fighters making their debuts here, so let's see who comes out of this one with their first professional victory.
 |
|
 |
| 200 cm
20
300 lbs
0 - 0 - 0 |
|
225 cm
18
300 lbs
0 - 0 - 0 |
BJJ Blue Belt
Brawler
Granite chin |
|
Good wrestler
Brawler
Solid chin |
|
| |
|
Ladies and gentlemen. This fight is 3 rounds, in the super heavyweight division.
Introducing the fighter to my left, fighting out of the red corner.
With a record of
0 - 0 - 0, fighting out of Sydney, Feyd Loyd!
And introducing the fighter to my right, fighting out of the blue corner.
With a record of
0 - 0 - 0, fighting out of Sydney, Zipper Bunga!
The judges for this bout are Ron Honeybunn, Bruno Hogan and Steve Erwin.

The bell rings for round one and we are underway!
Loyd looks for a takedown but Bunga sprawls well.
Loyd shoots in but Bunga avoids the takedown attempt easily.

Bunga is looking for a takedown here. He's shot in and has managed to get it, finishing up in Loyd's half guard.
Loyd is looking to escape.
Loyd is refusing to be controlled, as Bunga sits in half guard.
We've had a slow start to the round here - hopefully the action picks up.
Loyd is trying to control but can't.
Bunga wants to stand up but Loyd has a hold of him and won't allow it.
Bunga throwing shots but they're hitting the canvas more than the man.

That's one minute gone in the round.
Bunga throwing shots but they're hitting the canvas more than the man.
Bunga really doesn't want to stay on the ground with Loyd. If he can't get it back to his feet, it's only a matter of time before he'll be tapping out.
Loyd wants to get back to his feet.
Loyd is staying active underneath Bunga, who seems content to just control the action from this position.
Bunga looks to land a strike but Loyd avoids it nicely and regains full guard.
Bunga won't allow Loyd to sweep him here.
Bunga is taking a break and basically stalling. The referee will not allow him to do that for long.
The referee must be thinking about standing these guys back up.

Loyd uses the cage to get back to his feet.
Bunga gets the takedown into side control.

That's two minutes gone in the round.
Loyd is not content to let Bunga control the position.
Loyd wants to get back to his feet but Bunga drags him back down.
Bunga tries to advance to mount but Loyd denies him.
Loyd is looking to reverse the position.

Bunga goes for an armbar! This could be all over! Wait, no, Loyd rolls with the submission and now he's on top in Bunga's guard! Nice work there by Loyd!
Bunga wants to sweep but no luck.
Bunga looks winded!

That's three minutes gone in the round.
Loyd sitting in guard here, content to control.

The referee decides to stand the fighters back up.
Bunga shoots in with a lovely double leg takedown. Loyd manages to land in full guard to minimise the damage.
Loyd might be looking to lock onto one of his opponent's long limbs for a submission, whilst we're on the ground.
Loyd controlling the position.
Loyd could do with losing a few pounds - he looks very soft around the mid section, to put it politely.

Loyd had isolated an arm as going for a kimura. Bunga defends it easily.
Loyd scrambles and gets back to his feet.

That's four minutes gone in the round.
Loyd gets taken down but at least he's managed to land in guard.
Loyd pushes Bunga off and scrambles back to his feet.
No luck for Bunga with that takedown attempt.
Loyd appears to be looking for a counter takedown.
Loyd closes the distance and clinches up with Bunga, looking for a takedown. Loyd pushes Bunga against the cage but Bunga circles to the side and manages to break the clinch.
That's three failed takedown attempts in the round for Feyd Loyd. That's going to take a lot out of him.
Bunga slaps away a takedown attempt from Loyd, before circling back to the center of the mat.
This is a great period of action - very entertaining stuff!
The crowd thankful this round is nearly over.
Loyd misses with a takedown attempt. He shot from a bit too far out.
Bunga is trying to avoid his opponent's strikes and get into the clinch.
And thats the end of the round the fighters go back to their corners.
A close round but Zipper Bunga will probably get the nod.
The fighters' corners scream their final instructions, as the referee calls time. Here we go, back to the action!

Bunga throws a nice looking combination but Loyd bobs and weaves to avoid any damage.

Oooooh!!! Loyd has knocked Bunga down with a huge combo! Loyd steps away and waves a wobbly Bunga back to his feet! This one might not go much longer!

It looks like Zipper Bunga has been cut.

Loyd pushes Bunga up against the cage in a clinch.
Loyd wants to take the fight to the mat but Bunga manages to get underhooks and keep the fight in the clinch.
A quick uppercut on the inside from Loyd.
Loyd changes levels and goes for a takedown here. Bunga fights it off and pushes away nicely.
Loyd closes the distance and presses his opponent up against the cage.
We've seen a great period of action over the last minute or so - credit to both fighters for going all out!
Bunga wants to break free. God knows he wants to breaaaak freeee.

Loyd manages to break the clinch.
Bunga is breathing heavily.
Loyd lunges in with swinging rights and lefts but Bunga circles away quickly and effectively.
That's one minute gone in the round.
Loyd tries to close the distance and clinch up but Bunga swats him away and circles back towards the center.
Loyd gets his takedown attempt stuffed easily
and Bunga counters with a nice double leg into side control. Loyd won't be happy with that.
Loyd throws his opponent off and manages to get back to his feet! Nicely done!
That's three failed takedown attempts in the round for Feyd Loyd. That's going to take a lot out of him.
Bunga staying out of range there.
Bunga leaves Loyd with his face pressed against the mat as he sprawls beautifully, defending against a solid takedown attempt.
Bunga leaves Loyd with his face pressed against the mat as he sprawls beautifully, defending against a solid takedown attempt.
Loyd blocks a jab.
Loyd looks to land a left hand but Bunga moved out of range nicely.
That's two minutes gone in the round.
Bunga misses with a takedown attempt. He shot from a bit too far out.
Loyd misses with a takedown attempt. He shot from a bit too far out.
Loyd wants to clinch up but Bunga keeps it at a distance.
Loyd fails with an attempt to clinch.
Bunga is definitely looking for the counter takedowns here.
Bunga avoids the clinch attempt nicely.
Loyd closes this distance looking for a takedown but Bunga circles away.
Bunga drives through with a takedown into Loyd's guard. Let's see what he can do from the top position.
Loyd pushes Bunga off and gets back to his feet.
That's three minutes gone in the round.
Loyd has Bunga up against the cage in a clinch.
Bunga is looking for a takedown up against the cage. Loyd gets underhooks though and prevents the takedown attempt.
The pace slowing considerably in the clinch, as Loyd takes a break from that fighting nonsense to think about the finer things in life.
Bunga looking to stall.
Loyd breaks from the clinch.
Nice takedown defense from Bunga. No joy for Loyd on that attempt.
That's four minutes gone in the round.
Loyd tries to land with a swinging hook to the body but Bunga was well out of range. Poor timing from Loyd.
Bunga steps in looking to clinch after the strikes miss from Loyd.
A telegraphed takedown attempt from Loyd is defended easily by Bunga.
A momentary lapse in concentration from Loyd enables Bunga to shoot in and score with a neat double leg. Loyd manages to secure a closed guard as the fighters hit the mat.
Loyd is edging up against the cage. He's using the cage to get back to his feet. Nice work there - the fighters are clinched.
Bunga is pressed up against the cage. Loyd has hold of a leg and is looking to drag Bunga down to the mat. Bunga avoids the attempt though and has circled away. We're back to striking at a distance.
And thats the end of the round the fighters go back to their corners.
Feyd Loyd dominated that second round.
The cut man is working on Zipper Bunga's cut.
That's time! Loyd's corner gives him a slap on the ass as he gets ready to fight. Let's get this one finished - here comes the final round!

A telegraphed takedown attempt from Loyd is defended easily by Bunga.
Bunga closes the distance and after a bit of a stuggle, scores a takedown into Loyd's guard.
Loyd manages to escape and get back to his feet.
Loyd moves in looking to clinch but Bunga pushes him off.
We've had a slow start to the round here - hopefully the action picks up.
Loyd doesn't manage to clinch there - Bunga circles away.
Bunga just misses with a punch to the body.
Loyd misses with a head kick.
Both fighters are breathing heavily.
That's one minute gone in the round.

Bunga closes the distance and pushes Loyd back into the cage.
Loyd slows down the pace here.
Bunga tries to pull guard but can't drag his opponent to the mat. Loyd just stands there and leans against the cage.
Loyd digs a right hand into Bunga's ribs. Those have got to be taking their toll on Bunga's gas tank.
Bunga takes a knee to the side of the body.
Loyd breaks the clinch and we're back to striking at distance.
Loyd swinging wildly here.
Loyd lunges in with swinging rights and lefts but Bunga circles away quickly and effectively.
That's two minutes gone in the round.
Loyd fakes high and shoots in for a takedown but Bunga avoids it really well and circles away.
Loyd darts in looking for a takedown but Bunga gets double underhooks and turns Loyd into the cage.
That's three failed takedown attempts in the round for Feyd Loyd. That's going to take a lot out of him.
Bunga throws a looping left and ducks down for a takedown. He's got his arms around Loyd's waist but Loyd gets an underhook and avoids the takedown by throwing Bunga off to one side.
Bunga closes the distance but Loyd moves to the side
and Loyd counters with a crisp hook to the side of the head.
Loyd darts in and clinches Bunga up against the cage.
Loyd drops down for a takedown but doesn't get it.
Loyd breaks the clinch and we're back to striking at distance.
That's three minutes gone in the round.
Loyd fails to land the takedown.
Bunga tries to counter by closing the distance.
Loyd goes for a double leg but Bunga avoids the attempt and the two fighters end up clinched against the cage as Bunga continues to drive forward.
Loyd is looking to clinch.
Bunga drives through with a takedown into Loyd's guard. Let's see what he can do from the top position.
Loyd has butterfly guard. He's looking to stand up here. He pushes Bunga off him and springs to his feet nicely. The crowd applauds.
A really sloppy takedown attempt there from Loyd.
Loyd throws a sloppy head kick and Bunga moves out of range easily.
Bunga tries to counter by closing the distance.
That's four minutes gone in the round.
Loyd throws a sloppy head kick and Bunga moves out of range easily.
No luck for Loyd with that takedown attempt.
Bunga tries to counter with a clinch but Loyd shakes him off and moves away.
An inside leg kick lands from Loyd.
No luck for Loyd with that takedown attempt.
Feyd Loyd is looking to throw some combinations by the looks of things.
Bunga tries to land a leg kick but Loyd saw it coming and moves away.
The crowd thankful this round is nearly over.
Bunga fails with a rather predictable takedown attempt.
Nice sprawl there from Bunga as Loyd shoots in.
And that's the end of the fight!
Feyd Loyd showed his dominance in that final round.
Well Loyd has outscored his opponent in every aspect of the fight today. Only a scarily incompetent judge or two will keep him from a well deserved win... Over to the ring announcer for the scorecards.
Ladies and gentlemen, after 3 rounds of action, we go to the scorecards for a decision.
Judge Ron Honeybunn scores the fight 29:28
Judge Bruno Hogan scores the fight 29:28
Judge Steve Erwin scores the fight 29:28
In favor of your winner, by unanimous decision... Feyd Loyd!
|
|
|
|
|
|
|
|
|
|
|
|
|
|
|
|
|
|
|
|
|
|
|
| S |
C
A |
G |
S |
C
B |
G |
|
S |
C |
G |
|
energy
A | B |
|
hype
A | B |
|
pop
A | B |
|
mgr
A | B |
|
FIGHT
RATING
39% |
|
|
|
|
|
|
