|
|
PBP Commentary |
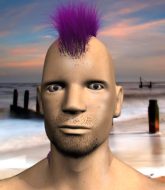
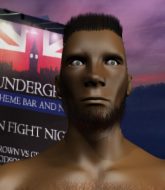
Coming up we have a heavyweight MMA rules bout between Jessie Bregenzer (ranked 0 p4p, 0 weight class) and Tonko Beissmann (ranked 0 p4p, 0 weight class). Jessie Bregenzer has a significant reach advantage - let's see if he can make it count.
 |
|
 |
| 210 cm
25
275 lbs
3 - 0 - 0 |
|
185 cm
18
285 lbs
1 - 0 - 0 |
Good wrestling
Counter fighter
Granite chin |
|
Good wrestler
Counter fighter
Good gas tank |
|
| |
|
Ladies and gentlemen. This fight is 3 rounds, in the heavyweight division.
Introducing the fighter to my left, fighting out of the red corner.
With a record of
3 - 0 - 0, fighting out of New York, Jessie Bregenzer!
And introducing the fighter to my right, fighting out of the blue corner.
With a record of
1 - 0 - 0, fighting out of New York, Tonko Beissmann!
The judges for this bout are Columbo Gatti, Franklyn Lucas and John Kavanagh.

The bell rings for round one and we are underway!
We've got one fighter who appears to only be looking to counter and the other not looking particularly aggressive either, so we could be in for a dull fight.
Beissmann misses with a takedown attempt - Bregenzer sprawls well and throws a nice strike on the way out which just misses.
Bregenzer feinted with a counter takedown.
Nice sprawl there from Bregenzer as Beissmann shoots in.
Bregenzer looks frustrated there after his takedown attempt is stuffed easily.
And Beissmann tries to counter it with a takedown but Bregenzer pushes his down on his head and steps out.
We've had a slow start to the round here - hopefully the action picks up.
Nice takedown defense from Beissmann. No joy for Bregenzer on that attempt.
And Beissmann tries to counter it with a takedown but Bregenzer pushes his down on his head and steps out.

That's one minute gone in the round.
Beissmann will have to do better than that with his takedown attempts.
A quick step to the side and Bregenzer tries to counter with a shot to the body but it doesn't connect.
Jessie Bregenzer has stuffed three takedown attempts in the round now. That's going to take a lot out of Tonko Beissmann.
Bregenzer fakes high and shoots in for a takedown but Beissmann avoids it really well and circles away.
Beissmann has done a lot of speed work in the buildup to this fight.
Beissmann fails with the takedown.
Bregenzer tries to counter with a takedown but Beissmann is quick to defend against it.

That's two minutes gone in the round.
There's not a lot going on here and the crowd are letting the fighters know they're not willing to tolerate a lack of action.
A telegraphed takedown attempt from Bregenzer is defended easily by Beissmann.
Beissmann is definitely looking for the counter takedowns here.
Bregenzer looks to land a combination but Beissmann avoids it well.
And Beissmann tries to counter it with a takedown but Bregenzer pushes his down on his head and steps out.

That's three minutes gone in the round.

Bregenzer clinches with his opponent.

Bregenzer has clasped his hands together around Beissmann's back... aaand, he's got a takedown into side control. Nicely done.
Beissmann is trying to get back to half guard.
Beissmann regains half guard.
Nice strikes from Bregenzer there.
Beissmann is trying to get back to full guard.
Bregenzer missing with some ground and pound from the half guard.

That's four minutes gone in the round.
Beissmann wants to sweep but Bregenzer has passed to side control!
Beissmann manages to get one leg in to regain half guard.

Beissmann is looking to sinch up a guillotine here but Bregenzer pulls his head out easily.
Bregenzer lands with a punch from half guard.
Beissmann looking to work for a kimura from the bottom.
Bregenzer trying to control the action but Beissmann is working from the bottom.
Nice strikes from Bregenzer there.
Boooooooooooooooooooo!!! God, this has been a terrible round. Come on you two, sort yourselves out!
Beissmann manages to get to full guard.
Bregenzer throws a big right hand that misses.
And thats the end of the round the fighters go back to their corners.
Jessie Bregenzer dominated that round.
That's time! Bregenzer's corner gives him a slap on the ass as he gets ready to fight.

Bregenzer fails with a rather predictable takedown attempt.
And Beissmann tries to counter it with a takedown but Bregenzer pushes his down on his head and steps out.

Beissmann closes the distance and clinches up, looking for a takedown. He shifts his weight and gets a nice trip into half guard.
Bregenzer is in a tricky position but he's been working on his transitions down at School of Hard Knocks, so we'll see if he gets out of it.
We've had a slow start to the round here - hopefully the action picks up.
Beissmann is working for submissions here but there's nothing on.
The ref warns both fighters not to hold the cage as they work up against the meshing.
Bregenzer is trying to stand up here but Beissmann is controlling him well.
That's one minute gone in the round.
Beissmann is looking for a kimura. It's going to be difficult to finish that from half guard though and Bregenzer defends it well.
Beissmann is looking for a kimura. It's going to be difficult to finish that from half guard though and Bregenzer defends it well.
Beissmann wants to free his trapped foot but Bregenzer is holding on for dear life with his legs.
Beissmann is thinking about going for an arm triangle but he can't free his leg.
Bregenzer is trying to stand.
Beissmann trying to work for an americana but Bregenzer has managed to regain full guard.
That's two minutes gone in the round.
Neither fighter has done anything of merit for a good minute or two here and the crowd are not happy about it.
Beissmann stands up and looks to throw the legs aside to pass to side control. Bregenzer swivels though and keeps the full guard.
Beissmann has gone for a leg lock! Bregenzer slips out almost immediately though and dives into Beissmann's guard.

The referee has motioned to the fighters to stand back up. He just wasn't happy with the level of activity.
Bregenzer leaves Beissmann with his face pressed against the mat as he sprawls beautifully, defending against a solid takedown attempt.
That's three minutes gone in the round.
Bregenzer shoots in looking for a single leg takedown. Beissmann is trying to defend but Bregenzer finishes it well and ends up in half guard. Let's see if he can advance position further.
Beissmann wants to sweep but Bregenzer has passed to side control!
Beissmann gets back to half guard.
Beissmann makes his way to full guard. A much better position for Beissmann.
That's four minutes gone in the round.
The crowd are hurling abuse towards the fighters... You can hardly blame them though because there isn't a lot going on in the fight.
Beissmann throwing his legs up looking for a triangle.
We get told so often about how wrestlers don't like to be on their backs. Let's see if Beissmann can do anything to dispel that myth.
Beissmann looking for a guillotine here but Bregenzer defends easily.
Beissmann looking for submissions from the bottom here. Moving his hips around, possibly looking for an armbar.
Bregenzer trying to control the position from guard on top but Beissmann is wriggling around, looking for whatever he can.
Beissmann is looking for a triangle but Bregenzer pushes his legs off easily.
Boooooooooooooooooooo!!! God, this has been a terrible round. Come on you two, sort yourselves out!
Hammerfist, elbow! yells Bregenzer's corner. There ya go! There ya go!
Beissmann has a loose triangle. He'll be looking to tighten that up but Bregenzer can see exactly what he's planning and manages to posture up and free himself.
And thats the end of the round the fighters go back to their corners.
Tonko Beissmann showed his class in that round. I'd imagine he'll take it on all the scorecards.
Well, the break between rounds is over. Let's get back to the scrappin! Let's get this one finished - here comes the final round!

Bregenzer decides to change it up a bit and drives through with a nice takedown into half guard.
Bregenzer looks towards his corner to check for any instructions. The corner give him nothing to work with, so he cracks Beissmann with a short hammerfist. I guess that's as good as any advice he could get in this position.
We've had a slow start to the round here - hopefully the action picks up.
Bregenzer slips a nice elbow through Beissmann's hands, connecting with Beissmann's forehead.
Beissmann looking for subs from the bottom but Bregenzer mounts him!
Beissmann is looking to improve his position but Bregenzer isn't that keen on the idea.
That's one minute gone in the round.
Bregenzer scoring with some good ground and pound from mount here. Will he manage to finish Beissmann?
Bregenzer fakes a shot to the body and cracks his opponent in the head. Nice ground and pound there!

Beissmann is rocked!
Beissmann really trying hard to get back to half guard here.
Beissmann is still in real trouble! Can Bregenzer finish him?
Beissmann takes a big shot to the dome and his eyes have rolled back in his head! Bregenzer's killer instinct has kicked in as he finishes the fight with more strikes. Impressive finish.
Ladies and gentlemen, after 1:39 of round 3, we have a winner by way of TKO (Strikes). Jessie Bregenzer!
|
|
|
|
|
|
|
|
|
|
|
|
|
|
|
|
|
|
|
|
|
|
|
| S |
C
A |
G |
S |
C
B |
G |
|
S |
C |
G |
|
energy
A | B |
|
hype
A | B |
|
pop
A | B |
|
mgr
A | B |
|
FIGHT
RATING
24% |
|
|
|
|
|
|
