|
|
PBP Commentary |
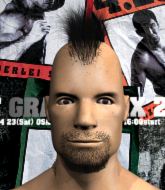
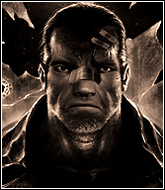
Coming up we have a heavyweight MMA rules bout between Ken Halo (ranked 0 p4p, 0 weight class) and Conway Pulford (ranked 0 p4p, 0 weight class). Conway Pulford has the power to score a knockout today if he connects clean with Ken Halo's chin.
 |
|
 |
| 192 cm
24
254 lbs
14 - 4 - 0 |
|
198 cm
23
257 lbs
13 - 3 - 0 |
Good wrestling
World class boxer
Insanely flexible |
|
Good wrestler
World class MT
Good gas tank |
|
| |
|
Ladies and gentlemen. This fight is 5 rounds, for the heavyweight championship of the world!
Introducing the champion to my left, fighting out of the red corner.
With a record of
14 - 4 - 0, fighting out of Los Angeles, Ken Halo!
And introducing the challenger to my right, fighting out of the blue corner.
With a record of
13 - 3 - 0, fighting out of Hilo, Conway Pulford!
The judges for this bout are Colin Fray, Roger Salmon and Josh West.

The bell rings for round one and we are underway!
A looping hook to the body misses from Halo. Pulford does a little dance to reset his feet.
Pulford is pinned up against the cage taking some big shots here. The referee is looking closely deciding whether he should stop the fight.
Halo throws a series of punches but Pulford moves out of range.
Pulford with the counter takedown but Halo avoids it easily.
Jab, cross, leg kick. Nice combination by Halo!

It looks like Conway Pulford has been cut.
Halo sizes up Pulford with a pawing jab and scores with a straight right down the middle.
Pulford takes a body punch but keeps moving.
Halo seems to be moving with more speed, compared to his last bout. He must have been working on that in the gym.
Pulford blocks a head kick by Halo.
Pulford moves out of range of the body kick from Halo.
Halo throws a body kick that digs right into the meat.
Halo lands a jab to the head.

That's one minute gone in the round.
Halo misses with a two punch combination.
Pulford has his head snapped back a nice jab. A little nod from Pulford there as he acknowledges the shot.
Well, he's not going to score with shots like that. A lazy body kick attempt from Halo.
Ken Halo seems to be the more aggressive standup fighter in this bout.
Pulford keeping a good distance there, avoiding the body shot.
Pulford moves out of range of the leg kick from Halo.
Halo fakes high and swings low for a body shot but Pulford manages to avoid it.
Halo throws a head kick that half lands.
Halo misses with a looping left.
Pulford with the counter takedown but Halo avoids it easily.
Halo looks to score with a jab to the body but Pulford is just out of range.
Halo pulls out of a head kick attempt.

That's two minutes gone in the round.
Halo will need to tighten up his combinations if he doesn't want to gas himself out, swinging at thin air.
Halo throws a head kick but Pulford moves out of range.
Pulford tries a counter takedown but it's more of a dummy move, and he uses it to push himself away.
Halo misses with the combination.
Halo misses with a hook. Pulford ducked under it nicely.
Halo wants to clinch.

That's three minutes gone in the round.
Halo misses with an uppercut.
Pulford checks a leg kick.
A jab from Halo finds it's way through Pulford's defenses.
Halo misses with a wild body shot.
Pulford blocks a leg kick.
Halo throws a body shot but no joy.
Pulford is definitely looking for the counter takedowns here.
Pulford avoids the clinch attempt nicely.
Pulford tries a counter takedown but it's more of a dummy move, and he uses it to push himself away.
Halo fakes a head shot and lands one to the body.
Pulford avoids the body shot from Halo.
And Pulford tries to counter it with a takedown but Halo pushes his down on his head and steps out.

That's four minutes gone in the round.
Halo lands a nice hook to Pulford's body. Pulford takes it in his stride and looks to land his own strikes.
Halo swings and misses with a hook to the body.
Pulford is definitely looking for the counter takedowns here.
Pulford swats away the attempt to clinch by Halo.
Halo misses with a hook.
Pulford's coach down at was telling us pre-fight that they have been working on Pulford's balance. Obviously they view that as a key factor in the outcome of this fight.
Pulford moves out of range of the strikes.
Pulford changes levels for a counter takedown but doesn't follow through with his attempt.
Halo throws a series of punches but Pulford moves out of range.
Pulford drops down looking to force a counter takedown but Halo defends it well.
Halo misses with a body kick.
Pulford is definitely looking for the counter takedowns here.
Pulford ducks under an overhand right and circles away with a smile on his face.
Ken Halo is looking to keep the fight on the feet at all costs.
Halo throws a body kick but he was well out of range there.
And thats the end of the round the fighters go back to their corners.
Ken Halo dominated that round.
The cut man is working on Conway Pulford's cut.
The fighters' corners scream their final instructions, as the referee calls time. Here we go, back to the action!

Halo throws an uppercut from half a mile away. Pulford sees it coming and avoids it easily.
Halo scores with a kick to the midsection.
Halo throws an overhand right that lands on Pulford's shoulder, as Pulford tries to avoid the shot.
Pulford is definitely looking for the counter takedowns here.
Halo throws a series of punches but Pulford avoids them all with ease.
Halo fails to land with a series of punches.
Pulford feints the counter takedown.
Halo throws the kick towards the body but Pulford avoids it.
Halo misses with a kick to the body

and Pulford counters with a shoot takedown into half guard.

Halo kicks Pulford off and gets back to his feet.
Wooooo! Give it up for these two warriors! They are putting on a show!
Halo misses with a body shot. Nice footwork from Pulford.
Pulford feints the counter takedown.
Ken Halo is winning the standup battle so far.
Some wild striking there from Halo.
That's one minute gone in the round.
Halo throws a hard body shot but it just misses.
Halo connects with a body shot that sends Pulford's belly button to the back.
Halo pulls out of a head kick attempt.
Pulford is definitely looking for the counter takedowns here.
Halo connects with a nice looking jab.
Halo tries a switch kick but it misses it's target.
Halo throws a body kick but he wasn't in range.
Pulford tries a counter takedown but it's more of a dummy move, and he uses it to push himself away.
Halo throws a body shot but no joy.
Pulford feints the counter takedown.
Pulford blocks a head kick by Halo.
And Pulford tries to counter it with a takedown but Halo pushes his down on his head and steps out.
That's two minutes gone in the round.
Halo just misses with a punch to the body.
Pulford showing good head movement there, avoiding the strikes from Halo.
And Pulford tries to counter it with a takedown but Halo pushes his down on his head and steps out.
Halo connects with a leg kick. He turned his hip over nicely there.
Halo throws out a powerful jab.
Ken Halo is looking to throw some combinations by the looks of things.
Halo misses with a body shot. Nice footwork from Pulford.
Pulford bobs and weaves well there to avoid the strikes.
Pulford slips under a jab.
Pulford feints the counter takedown.
That's three minutes gone in the round.
Halo throws a body punch but Pulford moves out of range.
Pulford slips under a jab from Halo.
A slow jab from Halo misses its intended target.
Halo lands a head shot.
That has opened up Conway Pulford's cut even more.
Halo misses with a leg kick.
Pulford takes one to the chin there.
Halo tries to bum rush Pulford with a series of wild strikes but Pulford uses good footwork to avoid the assault.
Halo tries to land with a swinging hook to the body but Pulford was well out of range. Poor timing from Halo.
Pulford slips under a jab from Halo.
And Pulford tries to counter it with a takedown but Halo pushes his down on his head and steps out.
A clash of legs there as Pulford blocks the low kick.
Pulford is definitely looking for the counter takedowns here.
That's four minutes gone in the round.
Nice shot lands for Halo.
Halo throws a shot to the body.
A big left from Halo misses.
Halo swings and misses with a hook to the body.
And Pulford tries to counter it with a takedown but Halo pushes his down on his head and steps out.
Halo wings a very wild body shot but it does the job and lands to the midsection.
Halo looking to land some kicks to the body here.
Halo is really dominating this fight. Is there anything that Pulford can do to turn this around?
Halo jabs at Pulford's body.
The crowd are loving this. Great action here.
Pulford on the wrong end of a nice low kick. He's acting like it's no big deal but he doesn't want to take many more of those.
And thats the end of the round the fighters go back to their corners.
Ken Halo dominated that second round.
The cut man is working on Conway Pulford's cut.
That's time! Halo's corner gives him a slap on the ass as he gets ready to fight.

Halo throws a big shot that misses.
Halo throws a leg kick but Pulford sees it coming and checks it nicely.

Halo fakes with an overhand right and moves in to clinch with Pulford, pushing him back against the cage.
Halo misses with the head strike.
Halo tries to throw a body punch but Pulford avoids it by throwing Halo back against the cage.
Halo working aggressively here.
Halo can't find room to land a body shot as Pulford controls the action.
Halo working aggressively here.
We've had a slow start to the round here - hopefully the action picks up.
Halo wants to break free but Pulford has control.
Halo misses with a body punch.

Halo's corner calls for him to break the clinch, which he does.
Halo clinches up against the cage.
That's one minute gone in the round.
Halo misses with some punches.
Halo has a couple of punches blocked by Pulford.
Halo misses with a hook to the ribs.
Halo misses with a hook from the clinch.
Halo misses with a short punch on the inside.
Halo working aggressively here.
Still in the clinch, Halo scores with a nice short uppercut.
Halo misses with a punch to the body.
Halo misses with a body punch.
Halo pushes off and circles away, back to the middle of the mat.
Halo throws a head kick but Pulford moves out of range.
Halo lands a jab followed by a nice looking cross.
That's two minutes gone in the round.
Pulford staying out of range there.
Halo tests Pulford's chin there with a solid looking shot.
Halo connects with a body shot that sends Pulford's belly button to the back.
Halo does a little shimmy and throws a leg kick. The leg kick missed by a considerable margin though, making him look a little bit silly for doing the shimmy.
Halo swings and misses with a hook to the body.
Pulford changes levels for a counter takedown but doesn't follow through with his attempt.
Pulford ducks under a wild hook from Halo.
Pulford feints the counter takedown.
Wooooo! Give it up for these two warriors! They are putting on a show!
Halo swings away with a leg kick that misses.
Pulford blocks the body kick.
Pulford changes levels for a counter takedown but doesn't follow through with his attempt.
That's three minutes gone in the round.
A telegraphed right hand from Halo misses the target.
Halo tries to land with a swinging hook to the body but Pulford was well out of range. Poor timing from Halo.
Pulford blocks the body kick.
Halo throws a leg kick but Pulford sees it coming and moves out of range.
Pulford uses decent footwork to sidestep a right hand from Halo.
Halo motions for Pulford to come forward. Halo throws a leg kick but it misses it's target.
Halo tries to land a leg kick but Pulford saw it coming and moves away.
Halo chopping away at his opponent's legs.
Halo thows a left - swing and a miss!
That's four minutes gone in the round.
Halo just misses with a punch to the body.
And Pulford tries to counter it with a takedown but Halo pushes his down on his head and steps out.
Halo misses with a body shot.
Halo fakes high and swings low for a body shot but Pulford manages to avoid it.
Halo ducks down and throws a hook to the body but Pulford moves away.
Pulford feints the counter takedown.
Halo throws a body kick that misses.
Pulford changes levels for a counter takedown but doesn't follow through with his attempt.
Halo throws a hook to the body but it doesn't connect.
The crowd thankful this round is nearly over.
Pulford ducks under a wild hook from Halo.
Pulford feints the counter takedown.
Halo ducks down and throws a hook to the body but Pulford moves away.
Halo throws a two punch combo that lands nicely.
And thats the end of the round the fighters go back to their corners.
Ken Halo clearly takes that round.
The cut man is working on Conway Pulford's cut.
The minute break is over - no more time for sponges and pep talks - back to the action!

Pulford moves out of range as Halo strikes.
Pulford uses some good footwork to avoid the body shot by Halo.
Halo looking to land some kicks to the body here.
Halo fakes high and swings low for a body shot but Pulford manages to avoid it.
A combination from Halo does no damage.
Halo jabs at Pulford's body.
We've had a slow start to the round here - hopefully the action picks up.
Pulford moves out of range of the body kick.
A chopping leg kick lands by Halo.
Halo throws out a token jab with nothing on it.
Pulford tries a counter takedown but it's more of a dummy move, and he uses it to push himself away.
That's one minute gone in the round.
Pulford's hands are dropping dangerously low here and Halo connects clean with a right hook that sends him down to one knee! Pulford scrambles back to his feet.
Halo fakes high and swings low for a body shot but Pulford manages to avoid it.
Nice straight punches there by Halo. You know Roy Jones Jr respects the hands of Halo.
Halo misses with a wild body shot.
Halo fakes a head punch and goes low to the body. Nicely done.
Pulford avoids the body shot from Halo.
Halo lets loose with a powerful body kick. Pulford will feel that in the morning.
Halo fails to land with the punch combination there - jab, cross, hook, miss, miss, miss.
Pulford is definitely looking for the counter takedowns here.
Halo misses with an uppercut. Pulford saw that one coming.
That's two minutes gone in the round.
Halo fakes high and swings low for a body shot but Pulford manages to avoid it.
Pulford displays some good footwork, moving neatly out of range as Halo throws out the jab.
Pulford with the counter takedown but Halo avoids it easily.
Halo misses with a low kick.
Pulford changes levels for a counter takedown but doesn't follow through with his attempt.
Halo tries a switch kick but it misses it's target.
Pulford drops down looking to force a counter takedown but Halo defends it well.
Pulford staying out of range there.
Pulford dodges the punch combination from Halo.
Pulford changes levels for a counter takedown but doesn't follow through with his attempt.
Halo misses with a hook. Pulford ducked under it nicely.
Pulford tries a counter takedown but it's more of a dummy move, and he uses it to push himself away.
Halo throws out a token jab with nothing on it.
That's three minutes gone in the round.
A jab from Halo misses.
This fight brought to you by 5M nutrition - it's mmmmm tasty. Nice jab by Halo.
Halo misses with a low kick as Pulford jumps back.
Pulford feints the counter takedown.
Pulford showing good head movement there, avoiding the strikes from Halo.
Halo throws a leg kick but Pulford sees it coming and moves out of range.
Halo swings away but doesn't land with a series of punches.
A looping hook to the body misses from Halo. Pulford does a little dance to reset his feet.
Pulford tries a counter takedown but it's more of a dummy move, and he uses it to push himself away.
Jab, cross, leg kick. Nice combination by Halo!
That's four minutes gone in the round.
Halo throws a jab to the body, straight down the pipe. Boom. That sent Pulford stumbling backwards but he manages to regain his composure quickly.
Pulford uses some good footwork to avoid the body shot by Halo.
Pulford feints the counter takedown.
Halo lands a beauty of a right hand that gets the crowd cheering.
Halo looks for the body kick but Pulford saw that one coming.
Pulford is definitely looking for the counter takedowns here.
Halo tries to bum rush Pulford with a series of wild strikes but Pulford uses good footwork to avoid the assault.
And Pulford tries to counter it with a takedown but Halo pushes his down on his head and steps out.
Halo looks to throw the jab but Pulford is out of range.
Pulford tries a counter takedown but it's more of a dummy move, and he uses it to push himself away.
The crowd thankful this round is nearly over.
Halo throws a series of punches but Pulford avoids them all with ease.
Pulford feints the counter takedown.
This is a great period of action - very entertaining stuff!
Halo misses with an uppercut. Pulford saw that one coming.
Pulford drops down looking to force a counter takedown but Halo defends it well.
And thats the end of the round the fighters go back to their corners.
Ken Halo had his way with Conway Pulford in that round.
The cut man is working on Conway Pulford's cut.
The referee calls time. The cornermen exit stage left and we're back to business. This is the final round!

Halo will need to tighten up his combinations if he doesn't want to gas himself out, swinging at thin air.
A clash of legs there as Pulford blocks the low kick.
Halo lands a nice shot to the body.
Pulford avoids the body shot from Halo.
Halo scores with a punch to the gut of his opponent.
We've had a slow start to the round here - hopefully the action picks up.
Halo connects with a leg kick. Pulford looked like he was expecting something else and didn't defend it.
Halo rushes forward with a series of wild hooks but Pulford moves out of range and avoids them all easily.
Pulford avoids the clinch attempt nicely.
And Pulford tries to counter it with a takedown but Halo pushes his down on his head and steps out.
That's one minute gone in the round.
Halo throws a front kick aimed at Pulford's knee but Pulford avoids it well.
Pulford tries a counter takedown but it's more of a dummy move, and he uses it to push himself away.
Halo connects with a crisp jab.
Halo goes to the watering hole and comes back with a big thumbs up from the judges as he scores a three punch combo.
Halo fakes a head punch and goes low to the body. Nicely done.
Pulford has a pretty nasty looking mouse under his right eye.
Pulford avoids the body shot from Halo.
Pulford feints the counter takedown.
Pulford avoids a kick to the body.
Pulford has a nice red mark on his side after a thudding body kick by Halo.
Pulford avoids a kick to the body.
Halo throws a body punch but Pulford moves out of range.
Pulford feints the counter takedown.
That's two minutes gone in the round.
Halo throws a hard body shot but it just misses.
Pulford feints the counter takedown.
Halo fails to land with the punch combination there - jab, cross, hook, miss, miss, miss.
Pulford takes a step back and watches a body kick go sailing past his mid section.
Pulford avoids a kick to the body.
Halo misses with a straight right.
Pulford feints the counter takedown.
That's a knee to de groin and it's over and out! Pulford crumples to the ground after an illegal strike from Halo - the referee stops the clock and Pulford gets 5 minutes to recover from that one. "I'm sorry" says Halo. Pulford manages to get back to his feet and the fight resumes.
Pulford staying out of range there.
And Pulford tries to counter it with a takedown but Halo pushes his down on his head and steps out.
Fantastic stuff here - a very entertaining period of action, which has drawn cheers from the crowd.
Halo scores with a punch to the head.
That's three minutes gone in the round.
Pulford on the wrong end of a kick to the body.
Halo misses with a wild combination.
Halo thows a left - swing and a miss!
Halo with a body punch. A glancing blow.
Halo throws out a leg kick but Pulford moves out of range and Halo only half commits.
Halo tries to land with a swinging hook to the body but Pulford was well out of range. Poor timing from Halo.
Pulford drops down looking to force a counter takedown but Halo defends it well.
Pulford slips under a jab from Halo.
That's four minutes gone in the round.
A jab from Halo misses.
Halo tries a head kick but it misses.
Halo swings and misses with a hook to the body.
Pulford is definitely looking for the counter takedowns here.
Halo lands with an overhand left.
Halo just misses with a punch to the body.
Pulford feints the counter takedown.
Halo lands with a nice low kick. That'll leave a bruise.
Halo misses with a double jab.
Pulford is definitely looking for the counter takedowns here.
The crowd thankful this round is nearly over.
Halo moves in looking to clinch but Pulford pushes him off.
Pulford feints the counter takedown.
Conway Pulford has stepped it up - he knows he needs a finish here!
Halo slips in close and lands a nice hook before moving back out of range.
And that's the end of the fight!
Ken Halo showed his dominance in that final round.
Well Halo has outscored his opponent in every aspect of the fight today. Only a scarily incompetent judge or two will keep him from a well deserved win... Over to the ring announcer for the scorecards.
Ladies and gentlemen, after 5 rounds of action, we go to the scorecards for a decision.
Judge Colin Fray scores the fight 50:40
Judge Roger Salmon scores the fight 50:40
Judge Josh West scores the fight 50:41
In favor of your winner, by unanimous decision... Ken Halo!
Ken Halo retains his heavyweight title!
A very excited looking Ken Halo made sure he remembered to thank all the fans both in the arena and on the internet. He said all the coolest people spend all day on MMA websites, which got a big reaction.
Conway Pulford spoke after the fight, saying 'They drugged me! The opponent is juicing and he had steel plates in his gloves! The ref and all the judges were paid off!!!'.
|
|
|
|
|
|
|
|
|
|
|
|
|
|
|
|
|
|
|
|
|
|
|
| S |
C
A |
G |
S |
C
B |
G |
|
S |
C |
G |
|
energy
A | B |
|
hype
A | B |
|
pop
A | B |
|
mgr
A | B |
|
FIGHT
RATING
43% |
|
|
|
|
|
|
