|
|
PBP Commentary |
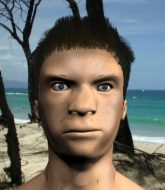
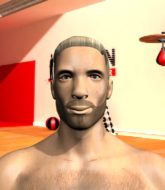
Coming up we have a middleweight MMA rules bout between Tom Dudley (ranked 0 p4p, 0 weight class) and Taylor Peyton (ranked 0 p4p, 0 weight class). Taylor Peyton will no doubt be looking to use his reach advantage to good effect.
 |
|
 |
| 185 cm
18
185 lbs
0 - 2 - 0 |
|
200 cm
23
180 lbs
0 - 1 - 0 |
BJJ White Belt
Basic striking
Big heart |
|
BJJ Purple Belt
Counter fighter
Determined |
|
| |
|
Ladies and gentlemen. This fight is 3 rounds, in the middleweight division.
Introducing the fighter to my left, fighting out of the red corner.
With a record of
0 - 2 - 0, fighting out of The Island, Tom Dudley!
And introducing the fighter to my right, fighting out of the blue corner.
With a record of
0 - 1 - 0, fighting out of The Island, Taylor Peyton!
The judges for this bout are Dirk Anderson, Michael Johnstone and Sandra Marshall.

The bell rings for round one and we are underway!
Dudley cracks Peyton with a good shot that sees him stumbling back into the cage.
Dudley jabs at Peyton's body.
Dudley fakes high and shoots in for a takedown but Peyton avoids it really well and circles away.

Dudley has taken the fight to the clinch.
Dudley lands a good knee to the midsection. Peyton won't want to take too many of those.
Peyton wants to take the fight to the mat but Dudley manages to get underhooks and keep the fight in the clinch.
We've had a slow start to the round here - hopefully the action picks up.
Peyton changes levels and goes for a takedown here. Dudley fights it off and pushes away nicely.
Dudley clinches.

That's one minute gone in the round.
Peyton is trying to work for a single leg takedown but Dudley pulls him back up using the underhooks.
Tom Dudley has stuffed three takedown attempts in the round now. That's going to take a lot out of Taylor Peyton.
Dudley with a knee to the head.
Dudley is defending well against a takedown attempt.
A knee to the head by Dudley.

It looks like Taylor Peyton has been cut.

Dudley manages to pull guard.
Peyton won't allow Dudley to sweep him here.
Peyton throwing strikes from guard but Dudley blocks nicely.
Peyton throwing elbows and punches but not connecting, as Dudley works some decent striking defense from the bottom.
Dudley is trying to stand up but he's not managed so far.
Peyton is a painfully thin specimen of a man. You do wonder whether a good body kick would snap him clean in two.

Dudley has scooted to the edge of the canvas and used the cage to get back to his feet. Peyton has stuck on his opponent and is forcing him back against the cage.
Peyton wants to take the fight to the mat but Dudley manages to get underhooks and keep the fight in the clinch.
Dudley jumps guard and drags Peyton to the mat. He's obviously going to be looking for submissions off his back.
Dudley wants to stand up but Peyton is controlling him.
Peyton slips nicely into half guard.

That's two minutes gone in the round.
Peyton throwing punches and elbows but they're not doing any damage.
The crowd are loving this. Great action here.
Peyton wants to pass to mount but Dudley is defending the position.
Dudley knows he needs to get back to his feet asap. He's simply no match for Peyton on the ground.
Dudley is looking to regain full guard. Not this time though.
Peyton working some ground and pound from close in. He's looking to maintain this position and strike for a while by the looks of things... although he'll probably advance to full mount in a minute now I've said that.
Peyton missing with some ground and pound from the half guard.
Dudley keeping his head moving to avoid the ground and pound.
Dudley tries to kick Peyton off but Peyton keeps his base steady and stays in half guard.
Peyton has freed up his trapped foot and advances to mount.
The ref warns both fighters not to hold the cage as they work up against the meshing.
Dudley is breathing heavily.
Peyton lands a couple of good shots and Dudley has given up his back, trying to escape the position!
Peyton scores with punches and elbows.
Peyton softening up his opponent with strikes here.

That's three minutes gone in the round.
Dudley trying to control the position but Peyton manages to sink in the hooks.
Dudley is trying to get back to his feet but Peyton has full control of the position and if anything, Dudley has just worked his way into a worse spot.
Peyton punches Dudley on the ear.
Peyton thows a huge left but connects with the canvas and not his opponent.
Dudley covering up well under a barage of strikes.
Peyton throwing sloppy strikes.
Peyton is working the ground and pound here and the referee is taking a close look at Dudley. He must escape soon or this one will be stopped.
Peyton is punishing Dudley with strikes - can he finish him?!
Peyton misses with punches from the back.
Peyton connects with a big shot to the side of Dudley's head.
Dudley covering up well under a barage of strikes.
I really don't envy Dudley right now.
Peyton missing with strikes.

That's four minutes gone in the round.
Peyton struggling to land strikes to the head as Dudley covers up.
Dudley might be looking to lock onto one of his opponent's long limbs for a submission, whilst we're on the ground.
Dudley covers up after that shot from Peyton.
Peyton somehow managing to miss with a strike from the back.
Peyton lands a punch that was close to the back of the head but the ref thinks it's OK.
The fighters are pressed up against the cage, both looking to find a bit of space to work.
Dudley is trying to remain composed but Peyton is hammering down strikes to the side of his head.
Peyton lands a couple of good shots to his opponent's body and a final shot to the head. Good little attack there by Peyton.
Peyton lands an elbow to the side of the head.
Peyton misses with a punch to the head.
Peyton lands a couple of good shots to his opponent's body and a final shot to the head. Good little attack there by Peyton.
We've been informed that Peyton has been working hard on his conditioning in the buildup to the fight.
Dudley tries to escape but Peyton has the hooks in and won't let him break free.
Dudley covering up well and avoiding damage.
This is a great period of action - very entertaining stuff!
Watch the back of the head! Comes the shout from the referee towards Peyton.
Even with his hooks in, Peyton manages to miss with strikes from the back.
And thats the end of the round the fighters go back to their corners.
A close round but Taylor Peyton will probably get the nod.
The cut man is working on Taylor Peyton's cut.
The minute break is over - no more time for sponges and pep talks - back to the action!

Dudley changes levels and looks for a double leg takedown. Peyton tries to avoid it but Dudley manages to keep hold of a leg and drag Peyton to the ground. Peyton escapes though and pops straight back up to his feet.
Peyton tries a counter takedown but it's more of a dummy move, and he uses it to push himself away.
Nice sprawl there from Peyton as Dudley shoots in.
Peyton stuffs the takedown.
That's three failed takedown attempts in the round for Tom Dudley. That's going to take a lot out of him.
Dudley has managed to clinch.
Peyton is working for takedown but Dudley is calmly controlling the position for now.
Dudley with the Thai clinch, lands a knee to the head.
Peyton tries for a takedown. No joy.

Dudley pushes off and circles away, back to the middle of the mat.
We've had a slow start to the round here - hopefully the action picks up.
Dudley closes the distance and pushes Peyton back into the cage.

Peyton has Dudley pressed up against the cage. He's trying to work for a single leg takedown. Peyton pulls back from the cage and twists to the side, sending Dudley tumbling to the mat - Peyton dives into Dudley's guard.
Peyton chips away with some ground and pound.
Both fighters are absolutely exhausted here.
That's one minute gone in the round.
Peyton pushing down on Dudley's thigh, trying to pass to half guard. He's managed it... Nice work.
Dudley looks like he's trying to stand up.
Peyton moves nicely into side control.
Dudley tries to improve position but can't.
Dudley is working to avoid the ground and pound but Peyton connects with a decent elbow.
Peyton scoring with punches and elbows.
Peyton misses with a strike but at least he's keeping busy, looking to cause some damage - that will still help him when it comes to the judges scorecards.
Dudley defending against the ground and pound.
Peyton in side control lands a nice looking series of punches and elbows.
Peyton works to advance to full mount. Dudley defends for a few seconds but eventually he succumbs.
Dudley tries to reverse the position but Peyton maintains control.
Dudley takes a big shot to the head but keeps on trying to improve his position.
That's two minutes gone in the round.
Peyton looking to ground and pound his opponent to a finish here.
Dudley is working to get back to half guard.
Peyton lands a big shot there that rocks Dudley but he's holding on and managing to survive for now.
The crowd growing excited in anticipation of a finish here! Right on cue, Peyton cracks his opponent with a massive right hand that draws loud cheers!
Dudley in a bad spot here, taking shots to the head.
Peyton in mount throwing good strikes here, bouncing his opponent's head off the canvas.
Dudley tries to lock up and control but Peyton gives him a forearm to the face and pushes him away.
Dudley holding onto his opponent's waist for dear life, as Peyton tries to land some strikes to get him to release his grip.
Dudley tries to lock up and control but Peyton gives him a forearm to the face and pushes him away.
Peyton punishing his opponent with strikes.
The fans in attendance giving it up for the two fighters, who have really let it all hang out in the last minute or so!
Peyton lands a couple of good shots and Dudley has given up his back, trying to escape the position!
Peyton lands a punch to the side of the head from the back.
Dudley tries to escape but Peyton has the hooks in and won't let him break free.
Peyton has been the more effective fighter overall so far.
That's three minutes gone in the round.
Peyton lands a punch that was close to the back of the head but the ref thinks it's OK.
Peyton lands a shot to the body.
Dudley has his hands over his head blocking the strikes from Peyton.
Peyton landing with strikes.
Peyton connects with a series of strikes and the referee is calling for Dudley to escape the position.
Peyton somehow managing to miss with a strike from the back.
Peyton somehow managing to miss with a strike from the back.
Dudley is trying to get back to his feet but Peyton has full control of the position and if anything, Dudley has just worked his way into a worse spot.
Watch the back of the head! Comes the shout from the referee towards Peyton.
Dudley tries to escape the position - he's now mounted. Is that better or worse? Hard to tell!
Peyton raining down hammerfists from mount.
Dudley blocking the ground and pound.
Dudley tries to hold on but Peyton postures up.
That's four minutes gone in the round.
Dudley throwing hammer fists to the chest of Peyton. What's that going to do exactly?
Peyton working away from the top, dropping strikes.
The referee warns Dudley that he has to improve his position here as he takes two more clean shots to the head.
Taylor Peyton has got the better of the ground game so far.
Peyton thuds his fist into the canvas! Oooouch!
Dudley working to try and regain half guard.
Peyton has his opponent pinned against the cage, landing some nasty ground and pound that is really making a bit of a mess out of Dudley's face.
Peyton avoids the attempt from Dudley to control.
Dudley is trying to escape but when you're mounted that's not too easy.
Dudley taking shots to the head.
And thats the end of the round the fighters go back to their corners.
Taylor Peyton showed his class in that round. I'd imagine he'll take it on all the scorecards.
The cut man is working on Taylor Peyton's cut.
The corners get their ten second warning. Both fighters stand from their stools and stare eachother down, ready to get back to the action. Let's get this one finished - here comes the final round!

Dudley throws a looping left and ducks down for a takedown. He's got his arms around Peyton's waist but Peyton gets an underhook and avoids the takedown by throwing Dudley off to one side.
Peyton drops down looking to force a counter takedown but Dudley defends it well.
Dudley shoots in but Peyton avoids the takedown attempt easily.
Peyton feints the counter takedown.
Dudley has managed to clinch.
Peyton wants a takedown but no success here.
Peyton drops down looking for an ankle pick but Dudley pulls his leg out and moves away.
Peyton blocks a jab.
Peyton drops down looking to force a counter takedown but Dudley defends it well.
We've had a slow start to the round here - hopefully the action picks up.
Dudley connects with the punch.
Dudley swings and misses with a hook to the body.
Both fighters are breathing heavily.
Dudley tries to clinch up against the cage, rushing in to close the distance. Peyton manages to break the clinch and circles back to the middle of the mat.
Peyton is definitely looking for the counter takedowns here.
That's one minute gone in the round.
Dudley shoots in for a takedown but Peyton shows good takedown defense.
That's three failed takedown attempts in the round for Tom Dudley. That's going to take a lot out of him.
Dudley changes levels and looks for a double leg takedown. Peyton tries to avoid it but Dudley manages to keep hold of a leg and drag Peyton to the ground. Peyton escapes though and pops straight back up to his feet.
Dudley wants to clinch.
Dudley wants to clinch
and Peyton counters with a single leg into guard. Dudley didn't expect that.
Dudley is looking to get back to his feet but can't, whilst Peyton is controlling him.
Peyton stands and throws Dudley's legs to the side, diving into side control.
That's two minutes gone in the round.
Peyton is chipping away with strikes.
Dudley is working to avoid the ground and pound but Peyton connects with a decent elbow.
Dudley is not in a great position here, taking some shots.
Peyton has knee on belly and now moves to full mount! Trouble for Dudley!
Peyton is landing with some decent strikes but Dudley is trying to advance his position so the referee is letting the fight continue.
Peyton looking to ground and pound his opponent to a finish here.
Peyton lands a couple of nice shots there from mount.
Peyton in mount throwing good strikes here, bouncing his opponent's head off the canvas.
Peyton fakes a shot to the body and cracks his opponent in the head. Nice ground and pound there!
We've seen a great period of action over the last minute or so - credit to both fighters for going all out!
Peyton dominating with strikes here.
BOOM! Peyton connects with a massive shot to the dome!
Peyton is still in mount, landing shots to his trapped opponent. Dudley can't stay in a position like this for much longer.
Peyton lands with some vicious ground and pound - can Dudley hang on?
That's three minutes gone in the round.
Peyton lands a big elbow.
Peyton is landing with some decent strikes but Dudley is trying to advance his position so the referee is letting the fight continue.
Peyton sends his fist crashing into the mat - the crowd let out a collective ooooooh. Let's hope he's not broken it!
Dudley wants to get back to his feet.
Peyton throwing strikes here but Dudley is writhing around nicely and avoiding any serious damage.
Dudley wants to hold on but Peyton pushes him away.
Dudley in a bad spot here, taking shots to the head.
You get the feeling that Dudley really doesn't like being in this position too much.
Peyton sends his fist crashing into the mat - the crowd let out a collective ooooooh. Let's hope he's not broken it!
Peyton thuds his fist into the canvas! Oooouch!
Dudley can't escape the position.
That's four minutes gone in the round.
Dudley is trying to escape but when you're mounted that's not too easy.
Peyton connects with a couple of good shots from mount.
Peyton with a couple of short strikes.
Dudley tries to hold on but Peyton postures up.
Peyton landing strikes from the mount.
Peyton working the ground and pound effectively.
Dudley is trying to escape the mount.
The crowd thankful this round is nearly over.
Peyton in mount throwing good strikes here, bouncing his opponent's head off the canvas.
Tom Dudley has stepped it up - he knows he needs a finish here!
Taylor Peyton is fighting for a decision - hopefully he's judged it right and he's actually winning the fight.
Peyton controlling the position easily from mount.
And that's the end of the fight!
Taylor Peyton comfortably won the final round on my scorecard.
I've got Peyton winning every round here. Surely the decision will go his way and he'll pick up a well deserved decision victory. Over to the ring announcer for the scorecards.
Ladies and gentlemen, after 3 rounds of action, we go to the scorecards for a decision.
Judge Dirk Anderson scores the fight 28:30
Judge Michael Johnstone scores the fight 27:30
Judge Sandra Marshall scores the fight 28:30
In favor of your winner, by unanimous decision... Taylor Peyton!
|
|
|
|
|
|
|
|
|
|
|
|
|
|
|
|
|
|
|
|
|
|
|
| S |
C
A |
G |
S |
C
B |
G |
|
S |
C |
G |
|
energy
A | B |
|
hype
A | B |
|
pop
A | B |
|
mgr
A | B |
|
FIGHT
RATING
44% |
|
|
|
|
|
|

