|
|
PBP Commentary |
Coming up we have a super heavyweight MMA rules bout between Cain Slyker (ranked 0 p4p, 0 weight class) and Tony Hunt (ranked 0 p4p, 0 weight class). Slyker kept the crowd waiting but all that was forgotten when his ring entrance music started. The incomparable musical genius that is It's Amazing by Kanye West. Tony Hunt told me before the fight that he's been watching a lot of DVDs so let's see if that helps him in this one! I can't wait to find out!
 |
|
 |
| 186 cm
47
215 lbs
39 - 36 - 0 |
|
200 cm
43
245 lbs
29 - 34 - 1 |
Dangerous GnP
Excellent boxer
Granite chin |
|
BJJ Purple Belt
Excellent MT
Good gas tank |
|
| |
|
Ladies and gentlemen. This fight is 3 rounds, in the super heavyweight division.
Introducing the fighter to my left, fighting out of the red corner.
With a record of
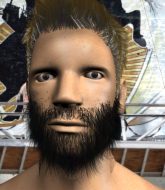
39 - 36 - 0, fighting out of St Petersburg, Cain Slyker!
And introducing the fighter to my right, fighting out of the blue corner.
With a record of
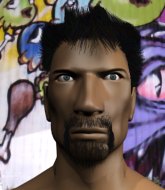
29 - 34 - 1, fighting out of St Petersburg, Tony Hunt!
The judges for this bout are Ivan Kurochkin, Aleksandr Martynov and Aleksei Zolotukhin.

The bell rings for round one and we are underway!

Slyker forces Hunt back against the cage and clinches.
I was talking to Slyker's coach per-fight and he was telling me that they'd been working on the clinch in the runup to this fight.
Slyker wants a takedown.
Slyker tries to score a body lock takedown but Hunt shows good agility there to stay on his feet.
Hunt prevents a takedown attempt there.
That's three failed takedown attempts in the round for Cain Slyker. That's going to take a lot out of him.

Slyker breaks the clinch and we're back to striking at distance.
Hunt swinging wildly here.
Slyker showing good head movement there, avoiding the strikes from Hunt.
Slyker misses with a series of wild punches.
Slyker is looking to clinch.
We've had a slow start to the round here - hopefully the action picks up.
Slyker rushes forward with a series of wild hooks but Hunt moves out of range and avoids them all easily.
Hunt swings away with a counter right hand but no contact made.
Slyker misses with a double jab
and Hunt counters with a nice uppercut.
Hunt chopping away at his opponent's legs.
Wow, both these guys are really going for it!
Hunt lands a straight punch to the body, keeping Slyker at a distance.
The fight stays on the outside here - Slyker looks like he's thinking about clinching though.

That's one minute gone in the round.
Hunt misses with an attempted mid kick.
Slyker will need to tighten up his combinations if he doesn't want to gas himself out, swinging at thin air.
Hunt shoots in for a takedown but Slyker shows good takedown defense.
Slyker gets in close and instigates a clinch.
Slyker swings away with an uppercut that misses.
Slyker is trying to pull guard but being pressed up against the cage enables Hunt to keep the fight standing.
Slyker tries to jump guard but he falls flat on his backside. Hunt smiles and moves away.
Slyker ducks right into an uppercut from Hunt.
Slyker fails with a rather predictable takedown attempt.

Slyker fakes an overhand right and shoots for a takedown. Hunt sprawls well initially but Slyker persists and gets the takedown into half guard.

Hunt has one foot on Slyker's thigh - he pushes off and manages to get back to his feet.
Wooooo! Give it up for these two warriors! They are putting on a show!
Slyker misses with a few strikes there.
Slyker fails to land with a series of punches.
Slyker shoots in for a takedown. "I don't think so" says Hunt as he avoids it easily.

That's two minutes gone in the round.
Hunt throws a body shot but no joy.
Slyker appears to be looking for a big counter.
Cain Slyker seems to be the more aggressive standup fighter in this bout.
Hunt throws a hard body shot but it just misses.
Hunt moves away from the strike by Slyker.
Hunt will have to do better than that with his takedown attempts.
Slyker shoots in for a takedown - he's clinched up with Hunt but Hunt pushes him off and we're back to square one.
Slyker with a lazy takedown attempt
and Hunt counters with a left and a right that stings Slyker.
Slyker with a lazy takedown attempt
and Hunt counters with a left to the body.
Hunt looks to score with a jab to the body but Slyker is just out of range.
Slyker throws a right and a left that both miss.
Hunt misses with a wild combination.
Slyker drops his hands momentarily and Hunt takes advantage with a crisp shot to the head.
Hunt is throwing a lot of body shots here, looking to wear down Slyker rather than just go for the knockout.
Like a baseball bat into the meat of his leg there - nice leg kick by Hunt.
Slyker darts in looking for a takedown but Hunt gets double underhooks and turns Slyker into the cage.
Slyker looks to land a combination but Hunt avoids it well.
Hunt cracks Slyker with a right hand to the side of the head.
Slyker goes for a double leg but Hunt avoids the attempt and the two fighters end up clinched against the cage as Hunt continues to drive forward.
A really sloppy takedown attempt there from Slyker.
Slyker is breathing heavily.

That's three minutes gone in the round.
Slyker misses with a series of wild punches.
Slyker shoots in for a takedown. He's persisting with it as Hunt sprawls well. Hunt wins this battle and keeps the fight standing. Slyker gets slowly back to his feet.

Hunt gets a double leg takedown into Slyker's guard.
Hunt landing with the ground and pound.
Hunt seems content to control from guard here. He's going to have to remain active though if he doesn't want to get stood back up.
Hunt makes a bit of distance and scores with some ground and pound, still in guard.
Hunt throwing elbows and punches but not connecting, as Slyker works some decent striking defense from the bottom.
Hunt working some ground and pound from guard but it's not doing any damage.

That's four minutes gone in the round.
Hunt postures up in Slyker's guard and throws a big left but Slyker blocks it.
Slyker utilising some decent striking defenses from the guard, preventing the ground and pound.
Slyker might be looking to lock onto one of his opponent's long limbs for a submission, whilst we're on the ground.
Hunt works over Slyker with some ground and pound from guard.
Hunt wants to control from the top but Slyker keeps moving.
The fighters are pressed up against the cage, both looking to find a bit of space to work.
Hunt postures up to throw the ground and pound strikes but they don't connect.
The fighters are starting to get a bit slippery now, which will make submissions a bit more difficult.
Hunt makes a bit of distance and scores with some ground and pound, still in guard.
Hunt in full guard, throwing the ground and pound. No damage this time.
Hunt postures up in Slyker's guard and throws a big left but Slyker blocks it.
Hunt throwing strikes from guard but Slyker blocks nicely.
Hunt throws a big elbow that misses.
Hunt throwing elbows and punches but not connecting, as Slyker works some decent striking defense from the bottom.
And thats the end of the round the fighters go back to their corners.
Tony Hunt dominated that round.
The cut man is working on Cain Slyker's cut.
The referee calls time. The cornermen exit stage left and we're back to business.

Slyker tries to bum rush Hunt with a series of wild strikes but Hunt uses good footwork to avoid the assault.
Slyker gets a takedown into half guard.
Hunt has managed to escape just enough to sneak back to his feet but Slyker is on him like a limpet, forcing Hunt back against the cage.
Hunt is pressed up against the cage. Slyker has hold of a leg and is looking to drag Hunt down to the mat. Hunt avoids the attempt though and has circled away. We're back to striking at a distance.
Hunt is looking to slow Slyker down with leg kicks.
A shot to the liver by Hunt. Beautiful body shot.
Jab, jab by Hunt - just one landing.

Cain Slyker's cut is getting worse.
We've seen a great period of action over the last minute or so - credit to both fighters for going all out!
Some wild striking there from Slyker.
Slyker takes a big uppercut there. He seems a bit wobbly but no, he's OK.
Hunt is using his reach advantage to land shots from outside his opponent's range.
Hunt stuffs the takedown attempt from Slyker. Slyker gets slowly back to his feet.
Slyker shoots in with a lovely double leg takedown. Hunt manages to land in full guard to minimise the damage.
Slyker lands a couple of elbows.
That's one minute gone in the round.

Hunt is working actively off his back, looking to secure an arm or perhaps work for a triangle.
Slyker is working Hunt over from the guard. He should look to pass the guard and do a little more damage with these strikes.
Hunt trying to punch from his back but it's not doing any damage.
Hunt scrambles and gets back to his feet.
Slyker shoots for a double leg takedown but Hunt sprawls well. He's pushed Slyker's face into the mat and manages to get back to his feet relatively easily.
That's three failed takedown attempts in the round for Cain Slyker. That's going to take a lot out of him.
Slyker shoots in looking for a takedown. Hunt tries to sprawl out of it but Slyker keeps driving through. The fighters are pinned against the cage. Hunt manages to get underhooks and after a bit of a struggle, circles away and we're back to standing.
Hunt throws out a counter right but Slyker avoids it with no problem.
Both fighters are absolutely exhausted here.
Hunt scores with a nice right hand.
Hunt misses with a jab, cross combination.
Slyker defending well as Hunt loads up on a big left hand.
Slyker closes this distance looking for a takedown but Hunt circles away.
Hunt tries to bum rush Slyker with a series of wild strikes but Slyker uses good footwork to avoid the assault.
Slyker tries to clinch up against the cage, rushing in to close the distance. Hunt manages to break the clinch and circles back to the middle of the mat.
That's two minutes gone in the round.
Hunt jabbing away but nothing is landing.
Slyker defending well as Hunt loads up on a big left hand.
Slyker throws a right and a left that both miss.
A combination from Slyker does no damage.
We've seen a great period of action over the last minute or so - credit to both fighters for going all out!
Slyker shoots in and drives through. Hunt sprawls well.
A really sloppy takedown attempt there from Slyker.
Slyker takes one on the chin but keeps coming.
Hunt misses with a head kick.
Hunt just misses with a punch to the body.
A punch combination from Slyker misses.
Slyker changes levels and looks for a double leg takedown. Hunt tries to avoid it but Slyker manages to keep hold of a leg and drag Hunt to the ground. Hunt escapes though and pops straight back up to his feet.
Slyker throws a nice looking combination but Hunt bobs and weaves to avoid any damage.
Hunt getting the better of the striking in that exchange.
Slyker doesn't succeed with the takedown
enabling Hunt to counter with a crisp jab.

Slyker is rocked!
Hunt ducks down and throws a big overhand right - it lands flush on the jaw, knocking Slyker out cold! The fight is over!
Ladies and gentlemen, after 2:58 of round 2, we have a winner by way of KO (Punch). Tony Hunt!
Tony Hunt made sure to mention his sponsor, Machiavelli Boutique in his post fight interview.
|
|
|
|
|
|
|
|
|
|
|
|
|
|
|
|
|
|
|
|
|
|
|
| S |
C
A |
G |
S |
C
B |
G |
|
S |
C |
G |
|
energy
A | B |
|
hype
A | B |
|
pop
A | B |
|
mgr
A | B |
|
FIGHT
RATING
64% |
|
|
|
|
|
|

