|
|
PBP Commentary |
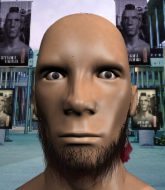
Coming up we have a lightweight MMA rules bout between Peyton Sahara (ranked 0 p4p, 0 weight class) and Llama Whittaker (ranked 0 p4p, 0 weight class). Sahara comes into the arena with Bones - Young Guns blaring out of the sound system. Llama Whittaker is the more experienced fighter, so let's see if that makes a difference tonight.
 |
|
 |
| 180 cm
25
155 lbs
0 - 0 - 0 |
|
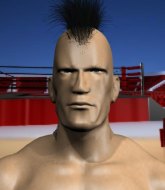
170 cm
19
155 lbs
2 - 0 - 0 |
BJJ White Belt
Solid Muay Thai
Cuts easily |
|
BJJ Blue Belt
Brawler
Intelligent |
|
| |
|
Ladies and gentlemen. This fight is 3 rounds, in the lightweight division.
Introducing the fighter to my left, fighting out of the red corner.
With a record of
0 - 0 - 0, fighting out of New York, Peyton Sahara!
And introducing the fighter to my right, fighting out of the blue corner.
With a record of
2 - 0 - 0, fighting out of New York, Llama Whittaker!
The judges for this bout are Lou da Vinci, Chad Campbell and Dean Styles.

The bell rings for round one and we are underway!

Sahara rushes Whittaker and presses him up against the cage.
Sahara misses with a body punch.
Sahara has dropped down and is looking to force the takedown but it's defended by Whittaker after a bit of a struggle.
Whittaker is looking to break free of the clinch but Sahara has double underhooks.
Sahara working hard to break the clinch.
Sahara blocks an uppercut.
Sahara landing knees to the body. They look like they could hurt.
Sahara lands a shoulder strike that jolts his opponent's head backwards.
Sahara tries to break the clinch but Whittaker is controlling the position.
Sahara crunches a lovely knee into Whittaker's ribcage.

Sahara breaks from the clinch.

Whittaker closes the distance and presses his opponent up against the cage.
We can't be sure of the tactics at this early stage but we have heard that Whittaker has been working on his takedowns a lot in the buildup to the fight and we can only assume he's going to look to take this to the mat.
Whittaker is trying to force a seperation but Sahara has the dominant position.
We've had a slow start to the round here - hopefully the action picks up.
Sahara wants to break the clinch but can't.
Sahara lands a body shot in the clinch.
Sahara gets through Whittaker's defenses to land a nice punch to the side of the head.
Sahara keeps control of Whittaker as he tries to wriggle out of the double underhooks.
Sahara breaks the clinch.
Peyton Sahara seems to be the more aggressive standup fighter in this bout.
Sahara shoots in for a double leg but Whittaker sprawls well. That's going to sap some energy.

That's one minute gone in the round.
Sahara with a body punch. A glancing blow.
Sahara looks frustrated there after his takedown attempt is stuffed easily.
That's three failed takedown attempts in the round for Peyton Sahara. That's going to take a lot out of him.
Sahara moves into the clinch successfully.
Whittaker scores with a nice hook to the head.
Sahara is trying to break the clinch but Whittaker has him pressed against the cage.
Sahara landing knees to the body. They look like they could hurt.
Whittaker misses with an elbow strike.
Sahara keeps the fight in the clinch, despite Whittaker's efforts to push away.
Sahara blocks a knee to the body. He'll have a nicely bruised forearm in the morning.
Sahara has had enough of the clinch but Whittaker keeps him there for the moment.
Whittaker can't break the clinch.
Whittaker swings away with an uppercut that misses.

Whittaker is working on a single leg takedown against the cage. Sahara can't fight it off and eventually Whittaker manages to take the fight to the floor. Sahara looks annoyed but at least he's managed to land in guard.

Sahara pushes Whittaker off and scrambles back to his feet.

That's two minutes gone in the round.
Fantastic stuff here - a very entertaining period of action, which has drawn cheers from the crowd.
Sahara tries to clinch up but Whittaker circles away and keeps his distance.
Whittaker throws a head kick that misses.
Sahara throws a big counter combination but Whittaker scrambles out of danger and avoids any damage.
Whittaker tries for a takedown but Sahara sees it coming a mile off and avoids it easily.
Whittaker misses with a lunging right hand
and Sahara counters with a good right hand that lands right on the jaw.
Sahara tries to clinch up.
Whittaker thinks about the counter body kick.
Sahara throws a looping left and ducks down for a takedown. He's got his arms around Whittaker's waist but Whittaker gets an underhook and avoids the takedown by throwing Sahara off to one side.
Whittaker darts in and clinches Sahara up against the cage.
Whittaker prevents the takedown attempt.
Sahara tries to jump guard but he falls flat on his backside. Whittaker smiles and moves away.
Whittaker darts in and clinches Sahara up against the cage.

That's three minutes gone in the round.
Whittaker wants to break the clinch but can't.
Sahara tries to circle away but Whittaker has him pinned against the cage.
Whittaker stalling against the cage.
Sahara lands a short shot on the inside that snaps the head of Whittaker backwards.
Sahara lands a knee to the head there! That was nasty!
Sahara putting his Muay Thai to good use. He has Whittaker in a tight clinch and is doing some damage with knees to the body.
Whittaker goes for a takedown attempt but Sahara pushes him away and we're back to fighting at a distance.
Sahara is looking to take this fight into the clinch.
Sahara throws a head kick that Whittaker semi-blocks.
Sahara leaves Whittaker with his face pressed against the mat as he sprawls beautifully, defending against a solid takedown attempt.
Whittaker closes the distance and clinches up with Sahara, looking for a takedown. Whittaker pushes Sahara against the cage but Sahara circles to the side and manages to break the clinch.
Sahara plants his feet and lands a nice head kick!

That's four minutes gone in the round.
Whittaker clinches up against the cage.
Sahara gets through Whittaker's defenses to land a nice punch to the side of the head.
Sahara tries to pull guard but can't drag his opponent to the mat. Whittaker just stands there and leans against the cage.
The crowd cheering loudly, showing their appreciation for the quality fight we're seeing here.
Whittaker gets a trip takedown into half guard.
Sahara has managed to escape just enough to sneak back to his feet but Whittaker is on him like a limpet, forcing Sahara back against the cage.
Sahara is breathing heavily.
Whittaker goes for a takedown attempt but Sahara pushes him away and we're back to fighting at a distance.
Sahara dives in and grabs Whittaker's left leg, looking for a takedown. Whittaker pushes down on Sahara's head and hops out.
Whittaker stuffs a takedown. It's all about dictating where the fight takes place and Whittaker wants it to stay on the feet.
Whittaker throws a series of punches but Sahara avoids them all with ease.
A little feinted left hand from Sahara on the counter but he doesn't commit to it.
Whittaker drives through and clinches with Sahara against the cage.
Whittaker is trying to force a seperation but Sahara has the dominant position.
Sahara lands an elbow inside that Whittaker shrugs off.
Whittaker jumps guard but his hands slip and he falls flat on his back. Well, he's made himself look a right mug there, as Sahara walks away with a smile on his face. Whittaker gets slowly back to his feet and shakes his head.
Whittaker misses with a wild combination.
And thats the end of the round the fighters go back to their corners.
Peyton Sahara dominated that round.
The fighters get back to their feet, the hooter sounds and we're back to the action!

Whittaker throws a body kick but he wasn't in range.
Whittaker fails with a takedown attempt from distance.
Whittaker clinches up with Sahara and pushes him back against the cage.
Sahara's corner are urging him to control the action in the clinch for a moment, rather than mount any serious offense. I'm sure the crowd appreciate those instructions... not.
Whittaker tries to pull guard but Sahara holds him up against the cage and eventually Whittaker drops back down to his feet.

Sahara jumps into guard, dragging Whittaker to the mat.
The fighters are starting to get a bit slippery now, which will make submissions a bit more difficult.
Whittaker won't allow Sahara to get back to his feet.
We've had a slow start to the round here - hopefully the action picks up.
Whittaker wants to control from the top but Sahara keeps moving.
Sahara is trying to control the position but Whittaker postures up.
The fighters are pressed up against the cage, both looking to find a bit of space to work.
That's one minute gone in the round.
Whittaker lands a couple of elbows.
Whittaker scoring with some ground and pound.
Whittaker passes Sahara's right leg, so he's now in half guard.
Sahara is trying to stand up here but Whittaker is controlling him well.
Sahara knows he needs to get back to his feet asap. He's simply no match for Whittaker on the ground.
Whittaker throwing punches and elbows but they're not doing any damage.
The referee walks around the fighters to get a better view of the action. Whittaker lands a nice short elbow.
Sahara is staying active underneath Whittaker, who seems content to just control the action from this position.

Whittaker is looking for a kimura but Sahara is holding onto that half guard position, so it's hard for Whittaker to get the leverage.
Peyton Sahara overall seems to be getting the better of the ground position in the fight so far.
Sahara is staying active underneath Whittaker, who seems content to just control the action from this position.
That's two minutes gone in the round.
Whittaker controlling the action here.
Whittaker lands with an elbow from half guard - that looked like it hurt.
Whittaker seems to be looking for submissions.
Whittaker thumps the canvas. Not on purpose obviously - he just missed Sahara's head.
Whittaker wants to work for an arm triangle but Sahara is really keeping half guard well and defending the submission attempt.
The ref warns both fighters not to hold the cage as they work up against the meshing.
That's three minutes gone in the round.
Ground and pound from Whittaker.
Whittaker is trying to control the action in half guard but Sahara is working away on the bottom, looking perhaps to get back to full guard.
Sahara keeping his head moving to avoid the ground and pound.
Whittaker missing with some ground and pound from the half guard.
Whittaker throwing shots but Sahara is blocking nicely.
Nice strikes from Whittaker there.
Both fighters are absolutely exhausted here.
Whittaker wants to control but Sahara is keeping him busy.
Whittaker is pressing down on Sahara's thigh, looking to free his foot. Sahara is holding on for now.
Whittaker prevents Sahara from standing back up.
That's four minutes gone in the round.
Whittaker sitting in half guard, looking to land shots. Sahara defending well though.
Whittaker is keen to just control but Sahara is a slippery customer.
We may be looking at a referee standup if the pace doesn't pick up soon.
Whittaker passes the half guard and he's now in mount! Big trouble for Sahara!
Whittaker is working close to his opponent, looking to work a submission by the looks of things. Oh, he's managed to get a guillotine from mount as his opponent reached up! That looks tiiiiight! Will he tap? YES, he's tapped! Impressive submission by Whittaker!
Ladies and gentlemen, after 4:39 of round 2, we have a winner by way of Submission (Guillotine). Llama Whittaker!
|
|
|
|
|
|
|
|
|
|
|
|
|
|
|
|
|
|
|
|
|
|
|
| S |
C
A |
G |
S |
C
B |
G |
|
S |
C |
G |
|
energy
A | B |
|
hype
A | B |
|
pop
A | B |
|
mgr
A | B |
|
FIGHT
RATING
52% |
|
|
|
|
|
|
