|
|
PBP Commentary |
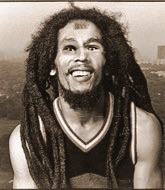
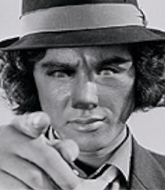
Coming up we have a heavyweight MMA rules bout between Mellow Mood (ranked 0 p4p, 0 weight class) and Kuzan Aokiji (ranked 0 p4p, 0 weight class). Kuzan Aokiji told me before the fight that he's been watching a lot of DVDs so let's see if that helps him in this one! I can't wait to find out!
 |
|
 |
| 216 cm
28
278 lbs
20 - 8 - 0 |
|
187 cm
25
245 lbs
11 - 4 - 0 |
Good wrestling
World class boxer
Insanely flexible |
|
Good wrestler
World class MT
Good gas tank |
|
| |
|
Ladies and gentlemen. This fight is 3 rounds, in the heavyweight division.
Introducing the fighter to my left, fighting out of the red corner.
With a record of
20 - 8 - 0, fighting out of Amsterdam, Mellow Mood!
And introducing the fighter to my right, fighting out of the blue corner.
With a record of
11 - 4 - 0, fighting out of London, Kuzan Aokiji!
The judges for this bout are Colin Fotheringham, Phil Schofield and William Gold.

The bell rings for round one and we are underway!
Aokiji on the wrong end of a vicious looking body shot.
Aokiji swings away with a leg kick that misses.
Aokiji paws at his opponent with the jab and then lunges in with a straight, right on the button.
Mood has been working on his boxing with his coaches at Brutal Force Training in the buildup to the fight.
Mood with a nice looking leg kick. You could hear that one land in a back row.
Mood works the jab nicely.

It looks like Kuzan Aokiji has been cut.
Mood misses with a hook. Aokiji ducked under it nicely.
A jab from Mood misses.
Mood connects with a slap. Keep your fist closed son.
Mood jabs Aokiji right on the nose. Aokiji blinks but takes it well.
Mood throws a head kick that misses and slips in the process. He scrambles back to his feet and the fighters circle.
Mood misses with the body kick
and Aokiji counters with a good low kick that Mood was not able to check.
Mood jabs at Aokiji's body.
Wooooo! Give it up for these two warriors! They are putting on a show!
Aokiji fakes with the hands and throws a leg kick but Mood is out of range.
Mood was looking to counter that move with a punch but didn't quite pull the trigger.
Mood misses with a head kick.
We've been informed that Aokiji has been sparring a lot of Muay Thai in the buildup to this fight so let's see if that has an impact on the result.
Aokiji blocks a head kick by Mood.
It seemed like Aokiji was going to counter with the hook but didn't fully commit to it.
Mellow Mood seems to be the more aggressive standup fighter in this bout.
Aokiji scores with a jab to the jaw of his opponent.
Aokiji on the wrong end of an overhand right that came out of nowhere.
Aokiji pivots as if he's going to throw a leg kick but stops half way.
Mood scores with a sloppy punch to the body. Not much technique there but it did the business.

That's one minute gone in the round.
Mood tries to land a front kick but Aokiji steps back. That was a bit too telegraphed.
Aokiji tries to clinch but Mood is having none of it.
Aokiji misses with a half-hearted attempt at a head kick.
A chopping leg kick lands by Mood.
Mood digs a good hook to Aokiji's body.
Aokiji lands a leg kick and bounces back out of range.
Mood lands a lovely overhand right.
Nice body kick from Mood.
Mood misses with a leg kick.
Aokiji fakes high and swings low for a body shot but Mood manages to avoid it.
Mood stuns Aokiji with a nice body shot, before stepping back out of range.
Aokiji waving his hands out in front of him, looking to distract Mood.
A chopping leg kick lands by Mood.
Aokiji slips a straight right by Mood.
Mood thuds a mid kick into his opponent's body. That will wear on Aokiji if he has to take too many more of those.
This is a great period of action - very entertaining stuff!
Mood ducks down and throws a hook to the body but Aokiji moves away.
Aokiji tries to land a leg kick but Mood saw it coming and moves away.

That's two minutes gone in the round.
Mood throws a body kick but he was well out of range there.
Mood cracks Aokiji with a right hand to the side of the head.
A head kick misses from Mood.
Mood avoids the body shot from Aokiji.
Aokiji tries to close the distance and clinch but Mood swats him to one side with an open hand palm strike and circles away.
Mood throws a hook to the side of Aokiji's head but Aokiji sees it coming and ducks under it beautifully.
Mood is using his reach advantage well here, landing the more effective single shots from range.
Mood swings widly with a right hand
letting Aokiji counter with a right hand.
Aokiji throws a low kick, looking for Mood's leg but Mood calmly moves out of range.
Mood lands a high kick!
Mood throws a hard body shot but it just misses.
Mood misses with a low kick.
Mood lands a nice leg kick that just misses Aokiji's sensitive parts.
Aokiji swings widly with a right hand
and Aokiji takes a counter punch right on the button for his troubles.
Mood misses with a body shot.
Mood blocks a low kick nicely.
Mood takes a body kick right on the floating rib. Ouchie.
Aokiji displays some good footwork, moving neatly out of range as Mood throws out the jab.
Aokiji is clearly looking to counter with head kicks.

That's three minutes gone in the round.
That kick from Aokiji tenderised Mood's leg. Mood is trying to keep his angry face on.
Mood lands the left hand.
Aokiji throws a leg kick but Mood sees it coming and checks it nicely.
Aokiji uses some good footwork to avoid the body shot by Mood.
Mood stuns Aokiji with a nice body shot, before stepping back out of range.
Mood has his front leg slapped to the side - a nice low kick landing there from Aokiji.
Aokiji with a nice cross.
Mood swings wildly with a right hand that was never going to find it's target.
A looping hook to the body misses from Mood. Aokiji does a little dance to reset his feet.
Mood throws a leg kick but Aokiji moved away.
Aokiji swings away with a counter right hand but no contact made.
Aokiji walks forward and throws out a flicking leg kick. Mood checks it nicely though, as he moves to the side.
Mood checks a leg kick.
Mood was looking to counter that move with a punch but didn't quite pull the trigger.
Mood looks to score with a jab to the body but Aokiji is just out of range.
Mood chopping away at his opponent's legs.
Mood thuds his shin into the meat of Aokiji's side.
Mood connects nicely with a jab. Noted by the judges no doubt.

That's four minutes gone in the round.
The crowd are loving this. Great action here.
Mood moves out of range of the leg kick from Aokiji.
The sound of bone on bone echoes around the arena as Aokiji checks a leg kick.
Aokiji tries a quick counter leg kick but Mood is wise to it.
Aokiji throws a leg kick which misses Mood's front leg but catches the back leg as Mood tries to avoid it.
Mood fakes low and throws an overhand right that catches Aokiji on the side of the head.
Mood jabs Aokiji right on the nose. Aokiji blinks but takes it well.
Aokiji throws a body kick that misses.
Mood will need to close the distance a bit before he attacks - that leg kick was thrown from too far away.
Mood keeps Aokiji at a distance using the push kick.
Mood fakes high and swings low for a body shot but Aokiji manages to avoid it.
Mood is using his height advantage well here, landing a good percentage of his punches.
Mood lands with a hook. Aokiji tried to avoid it but it clipped the top of his head.
A bone on bone clash there as Mood blocks the leg kick.
Aokiji throws a leg kick but Mood sees it coming and moves out of range.
The crowd applaud the fighters' efforts here as the round comes to an end.
Aokiji fakes a couple of low kicks, before throwing one on the third attempt. It connects and Mood has to reset his feet before getting ready to engage.
Mood checks a low kick from Aokiji.
Mood fakes a head shot and lands one to the body.
A solid leg kick lands there for Mood.
And thats the end of the round the fighters go back to their corners.
Mellow Mood dominated that round.
The cut man is working on Kuzan Aokiji's cut.
That's time! Back to the action!

Mood scores with a jab.
Aokiji throws a right hand that misses

and Mood counters with a nice right hand that sends Aokiji toppling to the canvas! Aokiji scrambles and gets back to his feet - can Mood finish him?!

Aokiji is rocked!
Mood circles away from the clinch attempt.
Aokiji is still on wobbly legs! Can Mood finish him?
BOOM! Mood lands a beautiful left hook that drops Aokiji. Aokiji tries to recover but Mood is having none of it, landing more punishing shots from mount. One final crushing shot and Aokiji lies motionless on the canvas. The fight is over!
Ladies and gentlemen, after 0:15 of round 2, we have a winner by way of TKO (Strikes). Mellow Mood!
After winning the bout, Mellow Mood thanked all his fans and promised he'd do even better in his next fight. The crowd seemed to love his humility.
|
|
|
|
|
|
|
|
|
|
|
|
|
|
|
|
|
|
|
|
|
|
|
| S |
C
A |
G |
S |
C
B |
G |
|
S |
C |
G |
|
energy
A | B |
|
hype
A | B |
|
pop
A | B |
|
mgr
A | B |
|
FIGHT
RATING
70% |
|
|
|
|
|
|