|
|
PBP Commentary |
Coming up we have a lightweight MMA rules bout between James Ward (ranked 0 p4p, 0 weight class) and Ross Pearce (ranked 0 p4p, 0 weight class). On his way into the cage it seems that James Ward has been attacked by a crazed fan! It looks like it might have been the just bleed guy! Luckily James Ward seems to be OK! I thought that lunatic was in prison!?
 |
|
 |
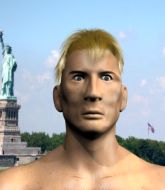
| 188 cm
19
163 lbs
0 - 0 - 0 |
|
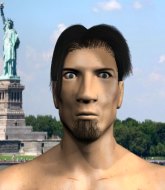
180 cm
18
155 lbs
0 - 1 - 0 |
BJJ Purple Belt
Counter striker
KO power |
|
BJJ White Belt
Decent boxing
Tends to cut |
|
| |
|
Ladies and gentlemen. This fight is 3 rounds, in the lightweight division.
Introducing the fighter to my left, fighting out of the red corner.
With a record of
0 - 0 - 0, fighting out of London, James Ward!
And introducing the fighter to my right, fighting out of the blue corner.
With a record of
0 - 1 - 0, fighting out of London, Ross Pearce!
The judges for this bout are Richard Clark, Sam Margolis and Steven Brown.

The bell rings for round one and we are underway!

Pearce gets caught flat footed, as Ward shoots in with a quick takedown into guard.
Pearce really doesn't want to stay on the ground with Ward. If he can't get it back to his feet, it's only a matter of time before he'll be tapping out.
Ward content to stall in guard here.
Pearce wants to stand and escape but Ward is having none of it.
Ward passes Pearce's right leg, so he's now in half guard.
Ward is looking to take a break and control but Pearce is keeping him honest, looking to work from the bottom.
Ward trying to mount his opponent but Pearce defends it.
Ward sitting in half guard, looking to land shots. Pearce defending well though.
Pearce is looking for a sweep. Ward is wise to his cunning plan and keeps the top position.
Ward missing with the ground and pound from half guard.
Pearce punching from the bottom.

The referee decides to stand the fighters back up.
Ward shoots in and bounces Pearce off the cage to secure the takedown into guard.
Ward really does look like a pencil wearing a pair of gloves. Let's hope he has a gameplan to suit that ridiculous body shape.
Pearce is trying to stand up but he's not managed so far.
Ward content to stall in guard here.

That's one minute gone in the round.
Pearce working a defensive guard here.
Pearce keeping moving, preventing Ward from controlling successfully.
We get told so often about how wrestlers don't like to be on their backs. Let's see if Pearce can do anything to dispel that myth.
Pearce is trying to control the position but Ward postures up.
Ward stops Pearce from standing up.
Ward is pushing down on Pearce's leg trying to pass to half guard. Pearce is fighting to maintain full guard but Ward has managed to sneak the leg through.
Ward controlling the pace.
Pearce won't allow Ward to pass to mount.

That's two minutes gone in the round.
Well. There's a bit of a lull in the action here and the crowd are starting to get restless.
Pearce blocking the ground and pound attempt from Ward.
Pearce wants to get back to his feet.
The ref warns both fighters not to hold the cage as they work up against the meshing.
Pearce is refusing to be controlled, as Ward sits in half guard.
Pearce is trying to stand back up but Ward is controlling him
Pearce looks gassed!
Ward wants to lay and pray for a moment but Pearce keeps working.
The referee has ruled that neither fighter is active enough on the ground and has stood them back up.
Pearce works over Ward's head and body with a nice combination.
Pearce misses with a double jab.
Ross Pearce seems to be the more aggressive standup fighter in this bout.
Pearce misses with a double jab.
Pearce bobbing and weaving, closes the distance and lands a hook to the side of Ward's head.
Pearce looking to land some kicks to the body here.

That's three minutes gone in the round.
A combination from Pearce does no damage.
Pearce fails in his attempt to clinch.
Pearce tries for a takedown but Ward circles away easily
and Ward counters with a stiff right hand.
Ward shoots in for a takedown. "Ole!" shouts Pearce as he jumps to the side.
No luck for Ward with that takedown attempt.
Pearce doesn't succeed with the takedown

and Ward counters by clinching up.
Ward is trying to work for a single leg takedown but Pearce pulls him back up using the underhooks.
That's three failed takedown attempts in the round for James Ward. That's going to take a lot out of him.
Ward goes for a takedown in the clinch but Pearce prevents it.
Ward tries to pull guard but Pearce won't allow it.
Pearce fails to pull the fight into his guard.

That's four minutes gone in the round.
Pearce is trying to break free.
Ward tries to pull guard but Pearce holds him up against the cage and eventually Ward drops back down to his feet.
Pearce is trying to work out of this bad position, with his back against the cage.
Pearce wants to break the clinch but can't.
Pearce is looking to break free of the clinch but Ward has double underhooks.
Pearce is pressed up against the cage. Ward has hold of a leg and is looking to drag Pearce down to the mat. Pearce avoids the attempt though and has circled away. We're back to striking at a distance.
Pearce looks to land a combination. Ward sees it coming but can only parry a couple of the shots.
Pearce connects with a jab.
Pearce misses with a takedown
and Ward decides to take the opportunity to score a takedown. He's landed in Pearce's guard.
Pearce keeping moving, preventing Ward from controlling successfully.
There's a bit of a scramble here and now Pearce is on top in guard.
The fighters are pressed up against the cage, both looking to find a bit of space to work.
The crowd are loving this. Great action here.
Pearce postures up and lands a big shot to Ward's brow.
And thats the end of the round the fighters go back to their corners.
James Ward dominated that round.
That's the end of the round. The referee orders the cornermen out of the cage so we can get back down to business.

Pearce fails miserably with a takedown attempt.
Pearce swings away but doesn't land with a series of punches.
Ward fails with an attempt to clinch.
Ward looks for a takedown. He's got it. We're now in half guard.
Ward is tying to control. Pearce wants to improve his position but can't escape this time.
Ward looks over to his corner - he wants some instructions but his corner are not responding.
Ward winds up and cracks Pearce with a swinging punch to the side of the head.
Ward prevents Pearce from standing back up.
Both fighters are absolutely exhausted here.
Ward trying to control the action but Pearce is working from the bottom.
Ward looking to pass the half guard. Not this time.
That's one minute gone in the round.
The referee has ruled that neither fighter is active enough on the ground and has stood them back up.
Pearce throws a sloppy head kick and Ward moves out of range easily.
Pearce shoots in for a takedown. "Ole!" shouts Ward as he jumps to the side.
Ward looks frustrated there after his takedown attempt is stuffed easily.
Pearce lands a jab-cross combination.
Ward fakes an overhand right and shoots for a takedown. Pearce sprawls well initially but Ward persists and gets the takedown into half guard.
Ward prevents Pearce from standing back up.
That's two minutes gone in the round.
Ward moves into full mount! Pearce won't be happy about that!
Pearce taking shots to the head.
Ward working the ground and pound effectively.
Ward wants to control the pace but Pearce is squirming around nicely.
Ward landing strikes, looking to finish!
Pearce is trying to escape but when you're mounted that's not too easy.
Pearce taking shots to the head.
Ward is in the full mount, landing strikes.
Pearce is in all sorts of trouble here.
That's three minutes gone in the round.
Ward trying to control but Pearce is having none of it.
Pearce is trying desperately to improve position.

Ward is thinking about an arm triangle here, looking to tighten it up before moving to side control. Pearce can see it coming though and defends well with a couple of strikes to the head and some good arm positioning.
Ward tries to control but Pearce wriggling away.
Pearce is looking to get to half guard.
Ward wants to control the pace but Pearce is squirming around nicely.
That's four minutes gone in the round.
There's not a lot going on here and the crowd are letting the fighters know they're not willing to tolerate a lack of action.
The crowd growing excited in anticipation of a finish here! Right on cue, Ward cracks his opponent with a massive right hand that draws loud cheers!
Ward misses with a head shot.
Pearce really trying hard to get back to half guard here.
Ward has control of Pearce's right arm, working for a kimura. It's a bit of a token attempt though and Pearce regains control of the situation pretty easily.
Pearce tries to buck Ward off but he can't manage it.
The crowd thankful this round is nearly over.
Ward sitting in mount, just looking to control for the moment.
Ward looking for an armbar but decides to keep the dominant position instead.
And thats the end of the round the fighters go back to their corners.
James Ward dominated that second round.
That's time! Back to the action! This is the final round!

A nice combination there by Pearce.
Pearce tries to clinch
and Ward counters with a single leg into guard. Pearce didn't expect that.
Ward postures up as if he's going to throw some strikes but drops back for an ankle! Pearce is in big trouble! He looks ready to tap! But no, he's escaped and dives on top of Ward, into his guard.
Pearce is just sitting in guard, looking to avoid any submissions.
Ward is trying to control the position but Pearce postures up.
Both fighters are breathing heavily.
Ward keeping moving, preventing Pearce from controlling successfully.
Ward looking to hit a scissor sweep but Pearce is one step ahead there.
That's one minute gone in the round.
Pearce wants to control from the top but Ward keeps moving.
Pearce postures up and lands a big shot to Ward's brow.
Pearce pressing down on his opponent's thigh, looking to pass guard. Ward is keeping the position for now.
Well, the referee has seen enough. Neither fighter is active enough on the ground so he's stood them back up.
Pearce dips down and scores with a jab to the body.
Ward fails with the takedown.
Ward stuffs the takedown.
Ward misses with the combination.
That's two minutes gone in the round.
A lull in the action here being met with boos from the crowd.
Pearce tries to close the distance and clinch but Ward swats him to one side with an open hand palm strike and circles away.
Pearce changes levels and looks for a double leg takedown. Ward tries to avoid it but Pearce manages to keep hold of a leg and drag Ward to the ground. Ward escapes though and pops straight back up to his feet.
Ward tries to clinch but is not successful on this occasion.
Pearce wants to clinch but Ward slips to the side
and Ward counters with a nice body kick.
Pearce rushes forward with a series of wild hooks but Ward moves out of range and avoids them all easily.
Pearce closes the distance and looks for a trip takedown... aaaand he's got it - Pearce lands in his opponent's guard.
Pearce is taking a break and basically stalling. The referee will not allow him to do that for long.
Ward has a loose triangle. He'll be looking to tighten that up but Pearce can see exactly what he's planning and manages to posture up and free himself.
That's three minutes gone in the round.
Ward is trying to control the position but Pearce postures up.
James Ward is fighting for a decision here - he's started to take the cautious approach.
Pearce has decided he wants to stand but the closed guard of Ward is proving hard to escape from.
Ward manages to land a sweep and now he's in mount on top!
Pearce is squirming around, avoiding Ward's attempts to control the action.
Pearce is wriggling around trying to escape.
Ward tries to control but Pearce wriggling away.
The referee warns Pearce that he has to improve his position here as he takes two more clean shots to the head.
That's four minutes gone in the round.
There's not a lot going on here and the crowd are letting the fighters know they're not willing to tolerate a lack of action.
Pearce keeping his composure momentarily, calmly looking to get back to half guard.
Ward content just to control the position here.
Pearce wants to control but Ward is having none of it.
Ward with shots to the head and body - Pearce looks very uncomfortable down there.
Pearce squirming around on the bottom, looking to escape.
Ward looking to control but Pearce is working nicely, looking to advance position himself.
The crowd growing excited in anticipation of a finish here! Right on cue, Ward cracks his opponent with a massive right hand that draws loud cheers!
Pearce is squirming around, avoiding Ward's attempts to control the action.
Ross Pearce has stepped it up - he knows he needs a finish here!
Ward controlling the position easily from mount.
And that's the end of the fight!
James Ward showed his dominance in that final round.
Well I reckon that's a shut out for Ward, winning every round. Will the judges agree? They are the ones who matter, even if they are often depressingly incompetent. Over to the ring announcer for the scorecards.
Ladies and gentlemen, after 3 rounds of action, we go to the scorecards for a decision.
Judge Richard Clark scores the fight 30:27
Judge Sam Margolis scores the fight 30:27
Judge Steven Brown scores the fight 30:27
In favor of your winner, by unanimous decision... James Ward!
|
|
|
|
|
|
|
|
|
|
|
|
|
|
|
|
|
|
|
|
|
|
|
| S |
C
A |
G |
S |
C
B |
G |
|
S |
C |
G |
|
energy
A | B |
|
hype
A | B |
|
pop
A | B |
|
mgr
A | B |
|
FIGHT
RATING
43% |
|
|
|
|
|
|

