|
|
PBP Commentary |
Coming up we have a super heavyweight MMA rules bout between Mophaf Bungradidoa (ranked 0 p4p, 0 weight class) and Katsuya Yasumi (ranked 0 p4p, 0 weight class). Yasumi has chosen Lunchmoney Lewis-Real Thing as his entrance music. Katsuya Yasumi told me before the fight that he's been watching a lot of DVDs so let's see if that helps him in this one! I can't wait to find out!
 |
|
 |
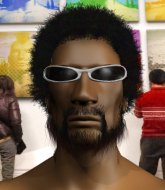
| 178 cm
28
250 lbs
14 - 16 - 0 |
|
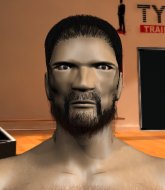
188 cm
25
250 lbs
9 - 1 - 0 |
Good wrestling
Excellent boxer
Cardio machine |
|
Good wrestler
Dangerous knees
Heavy handed |
|
| |
|
Ladies and gentlemen. This fight is 5 rounds, in the super heavyweight division.
Introducing the fighter to my left, fighting out of the red corner.
With a record of
14 - 16 - 0, fighting out of Tokyo, Mophaf Bungradidoa!
And introducing the fighter to my right, fighting out of the blue corner.
With a record of
9 - 1 - 0, fighting out of Tokyo, Katsuya Yasumi!
The judges for this bout are Sosuke Kotani, Kenichi Hosakawa and Shigeki Fujiwara.

The bell rings for round one and we are underway!
Bungradidoa throws a sloppy head kick and Yasumi moves out of range easily.
Bungradidoa lands with a nice body punch.

Bungradidoa shoots in and gets a takedown into half guard. Bungradidoa showed some decent athleticism there.
Bungradidoa is looking to take a break and control but Yasumi is keeping him honest, looking to work from the bottom.
Bungradidoa definitely looks more muscular than last time we saw him fight.
Bungradidoa performing his best blanket impression for a moment.
Yasumi is looking to regain full guard. Not this time though.
We've had a slow start to the round here - hopefully the action picks up.
Bungradidoa seems content to maintain position for now, rather than mounting any offense.
Bungradidoa trying to control from half guard but Yasumi is working away.
The fighters are trapped in the ropes so we're going to have a reposition here. The ref calls for a break and repositions the fighters in the center of the ring.

That's one minute gone in the round.
Yasumi trying to hold on to Bungradidoa's head to control him but Bungradidoa postures up.
Yasumi is trying to get back to full guard.
Yasumi pushes Bungradidoa off looking to stand but Bungradidoa dives back in and keeps control.
Yasumi wants to improve his position but Bungradidoa is controlling well.
Yasumi is trying to stand back up but Bungradidoa is controlling him
The referee calls for the fighters to work.
Bungradidoa wants to free his trapped foot but Yasumi is holding on for dear life with his legs.
Bungradidoa is thwarting Yasumi's attempts to control the position.
Bungradidoa stalling.

The ref stands the fighters back up due to a lack of activity.
Bungradidoa throws a head kick that misses.
Yasumi changes levels for a counter takedown but doesn't follow through with his attempt.

That's two minutes gone in the round.
The crowd are hurling abuse towards the fighters... You can hardly blame them though because there isn't a lot going on in the fight.
A shot to the body from Bungradidoa misses
and Yasumi counters with a lovely straight right hand!
Bungradidoa swings for the body but Yasumi moves out of range.
Yasumi drops down looking to force a counter takedown but Bungradidoa defends it well.
Yasumi keeping a good distance there, avoiding the body shot.
Bungradidoa fails to land the takedown.
Bungradidoa throws a head kick that misses and slips in the process. He scrambles back to his feet and the fighters circle.
Bungradidoa tries a switch kick but it misses it's target.
Yasumi tries a counter takedown but it's more of a dummy move, and he uses it to push himself away.
Bungradidoa misses with a combination
and Yasumi counters with a quick right hand to the jaw.
Bungradidoa lands a straight punch to the body, keeping Yasumi at a distance.
Bungradidoa lands a nice looking body shot.
Yasumi avoids the body shot from Bungradidoa.
Bungradidoa shoots in and scores a nice double leg takedown into half guard.

That's three minutes gone in the round.
Yasumi wants to get back to full guard.
The referee calls for the fighters to work.
Yasumi is looking to improve his position.
Yasumi trying to control from the bottom.
Yasumi has a hand on Bungradidoa's thigh, trying to get back to full guard. Bungradidoa takes advantage of the position though and mounts him!
Yasumi is writhing around trying to get back to his feet.

That's four minutes gone in the round.
Yasumi is squirming around, avoiding Bungradidoa's attempts to control the action.
Yasumi really trying hard to get back to half guard here.
Yasumi tries to hold on but Bungradidoa postures up.
Bungradidoa controlling from the full mount.
Yasumi can't escape the position.
The crowd thankful this round is nearly over.
Yasumi is writhing around trying to get back to his feet.
Yasumi keeping his composure momentarily, calmly looking to get back to half guard.
And thats the end of the round the fighters go back to their corners.
Mophaf Bungradidoa dominated that round.
That's the end of the interval. I'm sure that seemed a lot quicker than a minute for our two fighters! Back to the action.

Bungradidoa swinging wildly here.
Bungradidoa fails with the takedown.
Bungradidoa fails with the takedown
and Yasumi counters with a nice body shot.
Bungradidoa tries to clinch up
enabling Yasumi to counter with a crisp jab.
Mophaf Bungradidoa is looking to throw some combinations by the looks of things.
We've had a slow start to the round here - hopefully the action picks up.
Bungradidoa throws a body punch but Yasumi moves out of range.
And Yasumi tries to counter it with a takedown but Bungradidoa pushes his down on his head and steps out.
A head kick misses from Bungradidoa.
Yasumi changes levels for a counter takedown but doesn't follow through with his attempt.
Bungradidoa is really dominating this fight. Is there anything that Yasumi can do to turn this around?
Yasumi avoids the clinch attempt nicely.
Bungradidoa stuns Yasumi with a nice body shot, before stepping back out of range.
Bungradidoa fakes high and swings low for a body shot but Yasumi manages to avoid it.
Yasumi feints the counter takedown.
That's one minute gone in the round.
Yasumi avoids the body shot from Bungradidoa.
Bungradidoa feints and then dives in with a takedown. That was a long way out but the feint bought him enough time to close the distance and complete the takedown. Now we'll play guard for a bit and see who can get the better of that position.
Yasumi is looking to get back to his feet but can't, whilst Bungradidoa is controlling him.
Bungradidoa pressing down on his opponent's thigh, looking to pass guard. Yasumi is keeping the position for now.
Yasumi bucks up whilst keeping hold of a body lock, managing to reverse the position. Now he's in top in Bungradidoa's guard.

Yasumi stops Bungradidoa from standing up.

Bungradidoa pushes Yasumi off and scrambles back to his feet.
Bungradidoa swings and misses with a shot to the body
and Yasumi counters with a nice uppercut.
Bungradidoa works Yasumi's body with a nice hook.
Bungradidoa closes the distance and scores a nice trip takedown into half guard. Yasumi did well to prevent Bungradidoa getting side control.
The crowd cheering loudly, showing their appreciation for the quality fight we're seeing here.
Still in half guard, Bungradidoa seems content to control.
Bungradidoa is trying to control. Yasumi wants to improve his position but can't escape this time.
That's two minutes gone in the round.
Bungradidoa content to control rather than advance.
Yasumi is looking to control Bungradidoa's leg but it's slowly edging free. Can Yasumi avoid being mounted?
Yasumi wants to get back to his feet.
The fighters are tangled up in the ropes here. We might need a restart if the fighters can't break free themselves.
Bungradidoa moves nicely into side control.
Yasumi tries to improve position but can't.
Yasumi is persisting with the attempt to improve his position.
Bungradidoa working away.
That's three minutes gone in the round.
Yasumi is looking to work his way out of this bad position but Bungradidoa is controlling him well.
Bungradidoa wants to control but Yasumi is keeping him busy.
Bungradidoa is moving around in side control but his primary objective seems to be to maintain the position.
Yasumi tries to work a leg under to get back to half guard but Bungradidoa wriggles his own leg back out and remains in side control.
Yasumi is still trying to improve position.
Yasumi can't do much from the bottom here.
Bungradidoa wants to control but Yasumi is keeping him busy.
We must be close to a standup if these guys don't pick up the pace.
Yasumi tries to work a leg under to get back to half guard but Bungradidoa wriggles his own leg back out and remains in side control.
That's four minutes gone in the round.
Well. There's a bit of a lull in the action here and the crowd are starting to get restless.
Yasumi is working hard to escape and get back to his feet. After a battle for position, Bungradidoa asserts his dominance and retains side control.
The referee has decided to stand the fighters back up, so we'll restart on the feet.
Bungradidoa tries a head kick but it misses.
Yasumi tries a counter takedown but it's more of a dummy move, and he uses it to push himself away.
Bungradidoa swings away with a body shot that misses
and Yasumi counters with a nice body shot.
Bungradidoa throws a head kick that misses

and Yasumi counters with a shoot takedown. Bungradidoa fights it but they end up in guard.
Bungradidoa is looking to stand back up but Yasumi counters by passing into half guard. Oops... bit sloppy there by Bungradidoa.

Bungradidoa is trying to stand back up but Yasumi is controlling him
Yasumi throwing punches and elbows but they're not doing any damage.
Yasumi is keen to just control but Bungradidoa is a slippery customer.
Yasumi stops Bungradidoa from getting back to his feet.
Yasumi is trying to control the action in half guard but Bungradidoa is working away on the bottom, looking perhaps to get back to full guard.
And thats the end of the round the fighters go back to their corners.
That was a close second round but I would say that Mophaf Bungradidoa will probably get the nod.
Well, the break between rounds is over. Let's get back to the scrappin!

A head kick by Bungradidoa misses
and Yasumi counters with a kick to the head that grazes his opponent. Bungradidoa is lucky that one didn't land flush.
Bungradidoa is trying hard to land a takedown here. Yasumi sprawls well and keeps this one on the feet.
And Yasumi tries to counter it with a takedown but Bungradidoa pushes his down on his head and steps out.
Bungradidoa throws a hook to the body but it doesn't connect.
Yasumi steps in looking to counter with the mid kick but it doesn't connect.
Bungradidoa tries a head kick but it misses.
Bungradidoa tries to grapple but his opponent circles
and Yasumi counters with a takedown into side control! That could mean trouble for Bungradidoa!
Yasumi wants to lay and pray for a moment but Bungradidoa keeps working.
We've had a slow start to the round here - hopefully the action picks up.
Bungradidoa wants to get back to his feet but Yasumi drags him back down.
Yasumi looks up at the clock and then as Bungradidoa takes his cue and looks up at the clock too, Yasumi smacks him right in the chops with a big elbow! How rude!

Yasumi tries for an arm triangle. That looks pretty tight to me. Is this one over!?! Possibly, maybe, no Yasumi has let go of the choke. Obviously it wasn't as tight as we thought!
Yasumi tries to land with some ground and pound but misses.
That's one minute gone in the round.
Bungradidoa is looking to work his way out of this bad position but Yasumi is controlling him well.
Yasumi wants to lay and pray for a moment but Bungradidoa keeps working.
Bungradidoa is trying to buck Yasumi off.
Yasumi is chipping away with strikes.
Bungradidoa wants to get back to his feet.
Yasumi wants to control but Bungradidoa is keeping him busy.
That's two minutes gone in the round.
My god... these two guys really need to pick up the pace or everyone will leave to go get a beer.
Yasumi controls the position.
Bungradidoa wants to get back to his feet but Yasumi drags him back down.
The referee has stepped in and called for a break in the action. We'll restart on the feet.
Bungradidoa lands with a head kick! That's gotta hurt.
Bungradidoa gets his takedown attempt stuffed easily
and Yasumi counters with a nice jab to the body that keeps Bungradidoa thinking.
Both fighters are breathing heavily.
Bungradidoa closes the distance looking to clinch
and Yasumi counters with a nice double leg into side control. Bungradidoa won't be happy with that.
Bungradidoa is trying to escape the position but Yasumi is controlling the position.
That's three minutes gone in the round.
Bungradidoa is working hard to escape and get back to his feet. After a battle for position, Yasumi asserts his dominance and retains side control.
Yasumi wants to control but Bungradidoa is keeping him busy.
Bungradidoa wants to get back to his feet but Yasumi drags him back down.
Yasumi is looking for a kimura. He might have it! No, Bungradidoa has escaped the position, nice work there.
Yasumi is looking for a kimura. He might have it! No, Bungradidoa has escaped the position, nice work there.
Bungradidoa tries to escape but Yasumi is in control.

Yasumi stands up and we're back to a striking position.
Bungradidoa is looking to wear down Yasumi with body shots, infact he's throwing more body shots than head shots at the moment.
Bungradidoa takes a swing at Yasumi's ribcage but misses.
Bungradidoa tries to land with a swinging hook to the body but Yasumi was well out of range. Poor timing from Bungradidoa.
That's four minutes gone in the round.
The crowd are starting to boo a lack of action.
Bungradidoa tries a switch kick but it misses it's target.
A countering left hand to the body from Yasumi misses.
Bungradidoa misses with a body shot. Nice footwork from Yasumi.
Yasumi doesn't fully commit to the body shot counter.
Bungradidoa throws a sloppy head kick and Yasumi moves out of range easily.
Bungradidoa tries a switch kick but it misses it's target.
Bungradidoa swings and misses with a shot to the body

and Yasumi counters with a head kick that drops Bungradidoa to the mat! Bungradidoa scrambles across the canvas and gets back to his feet, still wobbly!
Bungradidoa just misses with a punch to the body.
Yasumi appears to be waiting to throw a counter punch to the body.
Bungradidoa tries for a takedown but Yasumi sees it coming a mile off and avoids it easily.
Yasumi tries a counter takedown but it's more of a dummy move, and he uses it to push himself away.
That's three failed takedown attempts in the round for Mophaf Bungradidoa. That's going to take a lot out of him.
Bungradidoa lands a nice looking body shot.
Bungradidoa misses with a hook to the body
and Yasumi counters with a driving takedown into guard. Nice work there by Yasumi.
Yasumi trying to control but Bungradidoa is working from the bottom.
Yasumi showing good wrestling skills to control the position.
And thats the end of the round the fighters go back to their corners.
Katsuya Yasumi really dominated that round.
That's time! Back to the action!

Yasumi avoids the body shot from Bungradidoa.
Bungradidoa misses with a body shot.
Bungradidoa misses with a body shot. Nice footwork from Yasumi.
Bungradidoa fakes high and swings low for a body shot but Yasumi manages to avoid it.
Yasumi is clearly trying to counter these attacks from Bungradidoa with a body shot.
Bungradidoa misses the body punch
enabling Yasumi to counter with a crisp jab.
Bungradidoa lands a head kick!
Bungradidoa scores with a body shot.
Bungradidoa misses with a body shot.
Yasumi tries a counter takedown but it's more of a dummy move, and he uses it to push himself away.
We've had a slow start to the round here - hopefully the action picks up.
Bungradidoa tries to shoot in for a takedown. He's got hold of a leg but Yasumi swivels and escapes.
Yasumi drops down looking to force a counter takedown but Bungradidoa defends it well.
Bungradidoa fails with a takedown attempt from distance.
Yasumi throws out a counter right but Bungradidoa avoids it with no problem.
Bungradidoa throws a head kick that misses
and Bungradidoa takes a counter punch right on the button for his troubles.
It's got to the stage where if one of these guys blows hard enough, the other might fall over.
Bungradidoa closes this distance looking for a takedown but Yasumi circles away.
That's three failed takedown attempts in the round for Mophaf Bungradidoa. That's going to take a lot out of him.
That's one minute gone in the round.
Bungradidoa misses with a half-hearted attempt at a head kick.
Bungradidoa with a lazy takedown attempt
and Yasumi counters with a good, hard body kick but Bungradidoa shrugs it off.
Bungradidoa tries to drive through with a takedown attempt but Yasumi defends well and Bungradidoa ends up having to push Yasumi into the ropes where they will battle it out in the clinch.
Bungradidoa shoots for a double leg takedown but Yasumi sprawls well. He's pushed Bungradidoa's face into the mat and manages to get back to his feet relatively easily.
Yasumi drops down looking to force a counter takedown but Bungradidoa defends it well.
Bungradidoa throws a wild combination but nothing lands.
Yasumi tries a counter takedown but it's more of a dummy move, and he uses it to push himself away.
Bungradidoa misses with a body shot.
Bungradidoa throws a head kick that misses and slips in the process. He scrambles back to his feet and the fighters circle.
Yasumi changes levels for a counter takedown but doesn't follow through with his attempt.
Bungradidoa throws a hard body shot but it just misses.
Bungradidoa shoots in for a double leg but Yasumi sprawls well. That's going to sap some energy.
Bungradidoa swings away with a body shot that misses
and Bungradidoa takes a counter punch right on the button for his troubles.
A punch combination from Bungradidoa misses.
Yasumi changes levels for a counter takedown but doesn't follow through with his attempt.
Bungradidoa throws a sloppy head kick and Yasumi moves out of range easily.
That's two minutes gone in the round.
A head kick misses from Bungradidoa.
Yasumi is definitely looking for the counter takedowns here.
Bungradidoa is looking to take this fight into the clinch.
Bungradidoa fails with a takedown attempt.
Bungradidoa misses with a jab to the body
and Yasumi counters with a lovely straight right hand!
Yasumi has used his reach advantage pretty well so far tonight.
Bungradidoa doesn't succeed with the takedown
and Yasumi counters with a straight right hand.
The fans in attendance giving it up for the two fighters, who have really let it all hang out in the last minute or so!
Yasumi stuffs a takedown. It's all about dictating where the fight takes place and Yasumi wants it to stay on the feet.
Bungradidoa misses with a series of wild punches.
Bungradidoa misses the shot to the body.
Yasumi raises up his leg as if looking to counter with a high kick.
That's three minutes gone in the round.
A head kick by Bungradidoa misses
and Yasumi counters with a crisp hook to the side of the head.
Bungradidoa fails with a takedown attempt.
Yasumi blocks a head kick by Bungradidoa.
And Yasumi tries to counter it with a takedown but Bungradidoa pushes his down on his head and steps out.
Bungradidoa throws a hard body shot but it just misses.
Yasumi feints the counter takedown.
Bungradidoa just misses with a punch to the body.
Yasumi avoids the body shot from Bungradidoa.
And Yasumi tries to counter it with a takedown but Bungradidoa pushes his down on his head and steps out.
Bungradidoa throws a sloppy head kick
letting Yasumi counter with a right hand.
Bungradidoa shoots in and gets a takedown into Yasumi's guard.

Yasumi has his feet on Bungradidoa's hips. He pushes off and gets to his feet. Nice work.
The crowd cheering loudly, showing their appreciation for the quality fight we're seeing here.
A head kick misses from Bungradidoa.
Yasumi feints the counter takedown.
That's four minutes gone in the round.
A head kick misses from Bungradidoa.
Yasumi appeared to try and counter that last move with a leg kick.
Bungradidoa throws a jab, cross combination which is slipped
and Yasumi counters with a head kick that drops Bungradidoa to the mat! Bungradidoa scrambles across the canvas and gets back to his feet, still wobbly!

Bungradidoa is rocked!
Mophaf Bungradidoa seems to be the more aggressive standup fighter in this bout.
Bungradidoa throws a head kick that misses
and Yasumi rattles Bungradidoa with a well-timed uppercut counter. - Bungradidoa tries to back away and recover but his hands are down low and he gets tagged again, sending him stumbling down to the canvas. Yasumi dives in after him and quickly finishes the job with a trio of brutal punches, leaving Bungradidoa stiff and motionless on the mat!
Ladies and gentlemen, after 4:18 of round 4, we have a winner by way of KO (Strikes). Katsuya Yasumi!
Jumping up and down and very excited, Katsuya Yasumi waved his t-shirt featuring Sun-Tzu's logo in front of the cameras.
|
|
|
|
|
|
|
|
|
|
|
|
|
|
|
|
|
|
|
|
|
|
|
| S |
C
A |
G |
S |
C
B |
G |
|
S |
C |
G |
|
energy
A | B |
|
hype
A | B |
|
pop
A | B |
|
mgr
A | B |
|
FIGHT
RATING
52% |
|
|
|
|
|
|

