|
|
PBP Commentary |
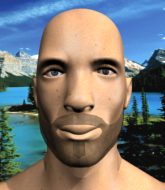
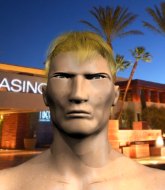
Coming up we have a heavyweight MMA rules bout between Harry Sack (ranked 0 p4p, 0 weight class) and Nigel McGuiness (ranked 0 p4p, 0 weight class). Both fighters look fresh as a daisy as they make their way towards the cage.
 |
|
 |
| 195 cm
22
275 lbs
0 - 0 - 0 |
|
200 cm
22
265 lbs
3 - 1 - 0 |
BJJ Blue Belt
Brawler
Cuts easily |
|
BJJ White Belt
Decent boxing
Tends to cut |
|
| |
|
Ladies and gentlemen. This fight is 3 rounds, in the heavyweight division.
Introducing the fighter to my left, fighting out of the red corner.
With a record of
0 - 0 - 0, fighting out of Montreal, Harry Sack!
And introducing the fighter to my right, fighting out of the blue corner.
With a record of
3 - 1 - 0, fighting out of Montreal, Nigel McGuiness!
The judges for this bout are Yves DeLean, Robert Douchet and Gregory Folan.

The bell rings for round one and we are underway!
McGuiness tries to clinch but Sack moves out of range.
Sack looks for a takedown but McGuiness sprawls well.
Sack shoots in for a takedown - he's clinched up with McGuiness but McGuiness pushes him off and we're back to square one.
Sack shoots in for a takedown - he's clinched up with McGuiness but McGuiness pushes him off and we're back to square one.
That's three failed takedown attempts in the round for Harry Sack. That's going to take a lot out of him.
Sack shoots for a double leg takedown but McGuiness sprawls well. He's pushed Sack's face into the mat and manages to get back to his feet relatively easily.
Sack moves out of range of the body kick.
McGuiness misses with a takedown attempt

and Sack counters with a driving takedown into guard. Nice work there by Sack.
Sack won't allow McGuiness to get back to his feet.
McGuiness keeping moving, preventing Sack from controlling successfully.
Sack postures up in McGuiness's guard and throws a big left but McGuiness blocks it.
Sack postures up to throw the ground and pound strikes but they don't connect.
Sack loading up with the ground and pound but he's missing more than he's landing in this flurry.
McGuiness keeping moving, preventing Sack from controlling successfully.
Sack is breathing heavily.

That's one minute gone in the round.
Sack would like to get this fight back to the feet but can't get free from the closed guard.

It looks like we're going to have a standup here. Neither fighter is doing enough on the ground.
McGuiness is looking to take this fight into the clinch.
McGuiness motions for Sack to come forward. McGuiness throws a leg kick but it misses it's target.
McGuiness tries to clinch up.
Sack shoots in for a takedown - he's clinched up with McGuiness but McGuiness pushes him off and we're back to square one.
McGuiness shapes like he's going to throw a leg kick but settles back down.
McGuiness is looking to clinch but Sack is avoiding it.

McGuiness fakes with an overhand right and moves in to clinch with Sack, pushing him back against the cage.
Sack goes for a takedown in the clinch but McGuiness prevents it.
McGuiness has had enough of the clinch but Sack keeps him there for the moment.
Sack is working for takedown but McGuiness is calmly controlling the position for now.
McGuiness wants to get back to striking at distance but Sack won't allow it.
Sack has hold of a leg and is looking for a trip takedown. McGuiness avoids it nicely though and we remain in the clinch.

That's two minutes gone in the round.
A lull in the action here being met with boos from the crowd.
Some stalling of biblical proportions here from McGuiness.
Good body shot from McGuiness.
McGuiness has Sack pushed against the cage.
McGuiness lands a body punch.
McGuiness wants to get back to striking at distance but Sack won't allow it.
McGuiness has Sack pressed against the cage.

McGuiness breaks from the clinch.
McGuiness lands with a two punch combination before moving back out of range.

It looks like Harry Sack has been cut.
Sack gets taken down but at least he's managed to land in guard.
McGuiness must be cautious of submissions here, given that his opponent has the superior Jiu Jitsu.
McGuiness showing good wrestling skills to control the position.
McGuiness really doesn't want to stay on the ground with Sack. If he can't get it back to his feet, it's only a matter of time before he'll be tapping out.
Sack looking to control but McGuiness passes into half guard.

That's three minutes gone in the round.
Sack throws a strike from the bottom that misses.
McGuiness seems content to maintain position for now, rather than mounting any offense.
Sack is looking for a sweep. McGuiness is wise to his cunning plan and keeps the top position.
Sack has been looking to land a fair amount of strikes on the ground. He might be looking to soften his opponent up in order to work for a submission.
Sack wants to get back to full guard but McGuiness has mounted him!
McGuiness controlling the position easily from mount.
Sack is working to get back to half guard.

That's four minutes gone in the round.
The crowd are getting on the fighters' backs, as the pace has dropped off in the last minute or so.
McGuiness controlling from mount.
McGuiness prevents Sack from getting the reversal.
McGuiness avoids the attempt from Sack to control.
The crowd applaud the fighters efforts here as the round comes to an end.
Sack working to try and regain half guard.
And thats the end of the round the fighters go back to their corners.
Nigel McGuiness dominated that round.
The cut man is working on Harry Sack's cut.
The fighters' corners scream their final instructions, as the referee calls time. Here we go, back to the action!

McGuiness misses with a jab and misses with a cross straight after too.
Sack fails with a takedown attempt.
McGuiness throws a low kick but it's checked well by Sack.
Harry Sack is looking to throw some combinations by the looks of things.
McGuiness instigates a clinch.
Sack is trying to drag McGuiness to the mat but McGuiness just about manages to keep his footing. He used the cage to his advantage there.
Sack jumps guard but McGuiness stands there with Sack around his waist. Sack gives up and drops back to his feet. We remain in the clinch.
That's three failed takedown attempts in the round for Harry Sack. That's going to take a lot out of him.
Sack wants to break free. God knows he wants to breaaaak freeee.
Sack wants the takedown. McGuiness is fighting it off but Sack persists and manages to bring the fight to the ground, ending up in McGuiness's guard against the cage.
Sack is looking to work some ground and pound but McGuiness has wrist control.
McGuiness managing to control the position.
McGuiness utilising some decent striking defenses from the guard, preventing the ground and pound.
Both fighters are absolutely exhausted here.
That's one minute gone in the round.
Sack stopping the sweep attempt from McGuiness.
McGuiness wants to stand and escape but Sack is having none of it.
Sack throws a big right hand that misses.
The fighters are pressed up against the cage, both looking to find a bit of space to work.
Sack tries to free his leg and advance position but McGuiness is retaining full guard.
McGuiness is trying to control the position but Sack postures up.
Neither fighter is doing enough for the referee's liking and he's decided to stand them back up.
McGuiness is looking to clinch but Sack is avoiding it.
Sack gets cracked with a nice right hand there by McGuiness.
McGuiness closes the distance and clinches.
McGuiness can't break the clinch.
That's two minutes gone in the round.
The is referee keeping an eye on McGuiness - much more stalling and he will separate the fighters.
McGuiness trying to land knees to the body.
McGuiness prevents the takedown attempt.
McGuiness lands a shot to the body.
McGuiness is trying to break free.
Sack drops to a knee looking for a takedown but McGuiness gets the underhooks and prevents it.
McGuiness can't break the clinch.
McGuiness wants to get back to striking at distance but Sack won't allow it.
McGuiness pushes Sack back against the cage and lands a hook to the side of the head.
McGuiness is trying to break the clinch but Sack has him pressed against the cage.
Sack looking for a takedown.
McGuiness drops down for a takedown but doesn't get it.
McGuiness wants to strike at distance but he can't break free of the clinch.
That's three minutes gone in the round.
Sack's head jolts backwards as he takes an uppercut right on the button!
McGuiness lands a body shot in the clinch.
McGuiness gets double underhooks to prevent a takedown attempt from Sack.
McGuiness is looking for a takedown up against the cage. Sack gets underhooks though and prevents the takedown attempt.
McGuiness misses with an elbow strike.
McGuiness prevents the takedown attempt.
McGuiness lands a body punch.
Sack goes for a takedown in the clinch but McGuiness prevents it.
Sack managing to block the knees to the body from McGuiness.
A short right hand to the side of the head by McGuiness.
McGuiness wants to push off and get back to the center of the mat but Sack has him pressed against the cage.
McGuiness gets double underhooks to prevent a takedown attempt from Sack.
McGuiness lands with a left to the head.
That's four minutes gone in the round.
A lull in the action here being met with boos from the crowd.
McGuiness lands a left hand.
McGuiness gets underhooks to prevent Sack's takedown attempt.
McGuiness tries to land knees in the clinch but Sack avoids the damage to the body.
Sack could do with loosing a few pounds - he looks very soft around the mid section, to put it politely.
McGuiness has hold of a leg and is looking for a trip takedown. Sack avoids it nicely though and we remain in the clinch.
McGuiness pushes off and circles away, back to the middle of the mat.
Sack tries to bum rush McGuiness with a series of wild strikes but McGuiness uses good footwork to avoid the assault.
McGuiness lands an uppercut out of nowhere! Sack falls backwards - clearly groggy! McGuiness dives in and finishes the fight with more strikes for a TKO finish!
Ladies and gentlemen, after 4:28 of round 2, we have a winner by way of TKO (Strikes). Nigel McGuiness!
|
|
|
|
|
|
|
|
|
|
|
|
|
|
|
|
|
|
|
|
|
|
|
| S |
C
A |
G |
S |
C
B |
G |
|
S |
C |
G |
|
energy
A | B |
|
hype
A | B |
|
pop
A | B |
|
mgr
A | B |
|
FIGHT
RATING
46% |
|
|
|
|
|
|
