|
|
PBP Commentary |
Coming up we have a middleweight MMA rules bout between Gunji Koizumi (ranked 0 p4p, 0 weight class) and Roderick Solo (ranked 0 p4p, 0 weight class). Over to our ring announcer for the fighter introductions!
 |
|
 |
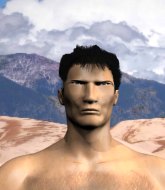
| 176 cm
28
193 lbs
7 - 2 - 0 |
|
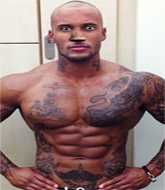
185 cm
19
198 lbs
9 - 0 - 0 |
Good wrestling
Solid boxing
Very quick |
|
Good wrestler
Excellent boxer
Good gas tank |
|
| |
|
Ladies and gentlemen. This fight is 5 rounds, for the middleweight championship of the world!
Introducing the champion to my left, fighting out of the red corner.
With a record of
7 - 2 - 0, fighting out of New York, Gunji Koizumi!
And introducing the challenger to my right, fighting out of the blue corner.
With a record of
9 - 0 - 0, fighting out of New York, Roderick Solo!
The judges for this bout are James Glass, Sam Margolis and James Atkins.

The bell rings for round one and we are underway!
Solo takes a thudding leg kick, right into the meat of the thigh.
Koizumi tries to clinch but is not successful on this occasion.
Koizumi fails with a takedown attempt.
Koizumi throws a low kick but Solo avoids it.
Solo flicks out a counter leg kick but Koizumi steps away.
Koizumi walks forward and throws out a flicking leg kick. Solo checks it nicely though, as he moves to the side.
Solo throws an uppercut from half a mile away. Koizumi sees it coming and avoids it easily.
Solo leaves Koizumi with his face pressed against the mat as he sprawls beautifully, defending against a solid takedown attempt.
We've had a slow start to the round here - hopefully the action picks up.
Koizumi misses with a head kick.
It seemed like Solo was going to counter with the hook but didn't fully commit to it.
Koizumi goes for a double leg but Solo avoids the attempt and the two fighters end up clinched against the cage as Solo continues to drive forward.
That's three failed takedown attempts in the round for Gunji Koizumi. That's going to take a lot out of him.

That's one minute gone in the round.
Koizumi feints and then cracks Solo's leading leg with a nice low kick. He's obviously looking to slow Solo down.
Koizumi fakes with a right hand and throws a good leg kick, right into the thigh. That had to hurt Solo.
Koizumi looks to have improved his striking defense since last time we saw him fight.
An inside leg kick lands from Koizumi.
Solo blocks a head kick by Koizumi.
Solo tries a quick counter leg kick but Koizumi is wise to it.
Solo moves out of range of the body kick from Koizumi.
Solo let fly with a counter punch to the body but it didn't land.
Solo keeping a good distance there, avoiding the body shot.

Koizumi gets to the clinch - let's see what his plan is here.
Solo lands with a left to the head.
Koizumi is looking to score with knees to the body. Maybe he'll change it up and go body then head. Solo is defending well for now.
A head punch blocked on the inside by Koizumi.
Nice body punch from Solo.
Solo misses with a short punch on the inside.

Koizumi gets a nice trip takedown into half guard.
This has been an exciting period of action!
Koizumi stops Solo from getting back to his feet.

That's two minutes gone in the round.
Solo is looking to regain full guard. Not this time though.
Koizumi works his way into full mount!
Solo really doesn't want to stay on the ground with Koizumi. If he can't get it back to his feet, it's only a matter of time before he'll be tapping out.
Solo is working to get back to half guard.
Solo wants to try and get back to his feet.
We get told so often about how wrestlers don't like to be on their backs. Let's see if Solo can do anything to dispel that myth.
Both fighters have adopted an aggressive gameplan on the ground!

Koizumi is working on an americana here. Ooh, that looks pretty nasty! Nope, Solo has managed to escape the submission attempt.

That's three minutes gone in the round.
Solo is trying to get to the cage to help him get back to his feet.
Solo looks more muscular than last time we saw him. He must have been on the weights.
Koizumi sitting in mount, just looking to control for the moment.
Koizumi seems to have a rather negative gameplan on the ground. He seems keen to just score the takedown and hold down Solo for as long as he can get away with.
Solo tries to buck Koizumi off but Koizumi takes his back!
Solo wants to get back to his feet.
Solo is being controlled on the ground here - he must escape this position otherwise surely the end is near.
Koizumi lands a shot to the body.

That's four minutes gone in the round.
Solo is trying to get back to his feet but Koizumi has full control of the position and if anything, Solo has just worked his way into a worse spot.
Koizumi is landing with strikes from the back.
Solo is trying to stand back up.
The fighters are pressed up against the cage, both looking to find a bit of space to work.
Koizumi is working on the RNC. He looks like he's got it but Solo won't tap... Oh, he's out! The ref rips Koizumi off his unconscious opponent!
Ladies and gentlemen, after 4:43 of round 1, we have a winner by way of Submission (RNC). Gunji Koizumi!
Gunji Koizumi retains his middleweight title!
|
|
|
|
|
|
|
|
|
|
|
|
|
|
|
|
|
|
|
|
|
|
|
| S |
C
A |
G |
S |
C
B |
G |
|
S |
C |
G |
|
energy
A | B |
|
hype
A | B |
|
pop
A | B |
|
mgr
A | B |
|
FIGHT
RATING
32% |
|
|
|
|
|
|
