|
|
PBP Commentary |
Coming up we have a lightweight MMA rules bout between Charlie Hill (ranked 0 p4p, 0 weight class) and Noah Burn (ranked 0 p4p, 0 weight class). I can't wait for this one - let's get the fighter introductions out of the way and get this one started!
 |
|
 |
| 182 cm
18
163 lbs
0 - 1 - 0 |
|
159 cm
22
162 lbs
3 - 1 - 0 |
BJJ Brown Belt
Basic striking
Intelligent |
|
BJJ Purple Belt
Brawler
Solid chin |
|
| |
|
Ladies and gentlemen. This fight is 3 rounds, in the lightweight division.
Introducing the fighter to my left, fighting out of the red corner.
With a record of
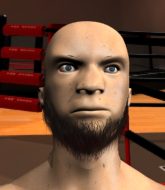
0 - 1 - 0, fighting out of Las Vegas, Charlie Hill!
And introducing the fighter to my right, fighting out of the blue corner.
With a record of
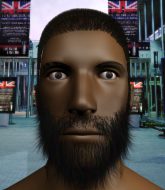
3 - 1 - 0, fighting out of Las Vegas, Noah Burn!
The judges for this bout are Stewart Dunkirk, Chris Downing and Tiny Johnson.

The bell rings for round one and we are underway!
Burn fails in his attempt to clinch.
Burn dodges the punch combination from Hill.
Charlie Hill seems to be the more aggressive standup fighter in this bout.
Hill wants to clinch up but Burn keeps it at a distance.
Burn moves away from the strike by Hill.
Burn fails with a rather predictable takedown attempt.
Hill throws a combination but it was largely blocked by Burn.
Burn tries to bum rush Hill with a series of wild strikes but Hill uses good footwork to avoid the assault.
Hill fails to land the takedown.
Burn fails with a takedown attempt.
Burn moves in looking to clinch but Hill pushes him off.
Hill shoots in for a takedown. "Ole!" shouts Burn as he jumps to the side.
Hill throws a looping overhand right but Burn ducks down to avoid it.
We've had a slow start to the round here - hopefully the action picks up.
Hill keeps the fight on the outside.

Burn drops down and drives through with a powerful takedown into guard.

Burn avoids a guillotine attempt easily.
Hill wants to sweep but no luck.

That's one minute gone in the round.
Burn thinks about going for a leg but decides against it, in order to maintain the position.
Burn trying to pass the guard but can't manage it just yet.
Burn avoids a guillotine attempt easily.
Burn trying to control the position from guard on top but Hill is wriggling around, looking for whatever he can.
Burn postures up.
Burn thows a big elbow that misses.
Burn drops back looking for a heel hook - he quickly realises he's not going to get it but Hill manages to dive on top of him before he can escape and now Burn has Hill in his guard.
Hill passes Burn's right leg, so he's now in half guard.
Hill is trying a forearm choke
I don't think that's going to do much at this level of the game.
The ref warns both fighters not to hold the cage as they work up against the meshing.
Hill is thwarting Burn's attempts to control the position.
Hill will need to keep those long limbs tucked in whilst he's on the ground, to prevent any submissions.

That's two minutes gone in the round.
Hill prevents Burn from improving his position.
Hill is pressing down on Burn's thigh, looking to free his foot. Burn is holding on for now.
Hill sitting in half guard, looking to land shots. Burn defending well though.
Hill is breathing heavily.
Hill prevents Burn from improving his position.
Both fighters really going for it on the ground here!

The referee decides to stand the fighters back up.
Horrible takedown by Burn or perhaps it was just good defense by Hill which made him look bad.
Charlie Hill has stuffed three takedown attempts in the round now. That's going to take a lot out of Noah Burn.
Burn fails miserably with a takedown attempt.
A big left from Hill misses.

That's three minutes gone in the round.
Hill thows a left - swing and a miss!
Hill throws a monster uppercut resembling something out of street fighter but it doesn't land.
Hill throws a body punch but Burn moves out of range.
Burn fails to land the takedown.
Burn looks for a takedown here. Will he get it? Hill is fending him off so far but Burn persists. Nope, Hill circles away and we're back to standing.
Hill misses with a straight left.
Hill looks to land a right hand but Burn moved out of range.
The fighters circling - Hill throws out the jab but it was never going to land.
Burn misses with a takedown attempt
and Burn takes a counter punch right on the button for his troubles.
Hill thows a left - swing and a miss!
Hill thuds a left hand into Burn's body.
Burn shoots in but no luck this time.
Burn takes a really solid shot there but just smiles back and shrugs his shoulders.
Hill connects with a good right hand that stumbles Burn. Burn circles away out of range and recomposes himself.
Burn with a lazy takedown attempt
enabling Hill to counter with a crisp jab.
Burn uses good footwork to avoid the strikes from Hill.
Hill throws a shot from downtown. Burn moves away and avoids it.
Hill fails to land with the punch combination there - jab, cross, hook, miss, miss, miss.

That's four minutes gone in the round.
My god... these two guys really need to pick up the pace or everyone will leave to go get a beer.
Hill misses with a hook. Burn ducked under it nicely.
Burn misses with a kick to the body.
Hill looking to shoot here. He's gone for it and he's landed a takedown into mount! Oh, that's bad for Burn!
Burn really trying hard to get back to half guard here.
Hill tries to stand up but he's trapped just for the moment.
Hill goes for an armbar but he's fallen flat on his backside there and now Burn is on top in guard.
Burn sneaks a leg through and gets to half guard. That was like a knife through butter how easily he passed Hill's guard.
Burn controlling the action here.
Hill looking for submissions off his back.
And thats the end of the round the fighters go back to their corners.
That was a close round but I would say that Charlie Hill will probably get the nod.
That's time! Hill's corner gives him a slap on the ass as he gets ready to fight.

Burn shoots for a double leg takedown but Hill sprawls well. He's pushed Burn's face into the mat and manages to get back to his feet relatively easily.
Hill throws a hook to the side of Burn's head but Burn sees it coming and ducks under it beautifully.
A combination from Burn does no damage.
Burn misses with a double jab.
Burn looks for a takedown here. Will he get it? Hill is fending him off so far but Burn persists. Nope, Hill circles away and we're back to standing.
Burn fails with a rather predictable takedown attempt.
Charlie Hill has stuffed three takedown attempts in the round now. That's going to take a lot out of Noah Burn.
Hill throws out a token jab with nothing on it.
Nice takedown defense from Burn. No joy for Hill on that attempt.
Burn misses with a takedown
and Hill counters with a quick right hand to the jaw.
Noah Burn is looking to throw some combinations by the looks of things.
We've had a slow start to the round here - hopefully the action picks up.
Hill throws a series of punches but Burn moves out of range.
Hill misses with an uppercut. Burn saw that one coming.
Both fighters are absolutely exhausted here.
Burn ducks under a wild hook from Hill.
Hill tries to clinch up but Burn circles away and keeps his distance.
No luck for Burn with that takedown attempt.
Burn slips under a jab.
That's one minute gone in the round.
Hill throws a shot from downtown. Burn moves away and avoids it.
Burn on the wrong end of a decent looking cross there.
Hill looks to land a left hand but Burn moved out of range nicely.
Burn shoots in for a takedown but doesn't get it.
Hill is really head hunting here, hardly looking to strike to the body at all.
Burn slips a straight right by Hill.
Hill looks to land a left hand but Burn moved out of range nicely.
Hill throws a wild combination but nothing lands.
Burn uses good head movement to avoid the hook from Hill.
Hill is using his reach advantage well here, landing the more effective single shots from range.
Hill waving his hands out infront of him, looking to distract Burn.
Burn blocks a jab.
Hill misses with a hook. Burn ducked under it nicely.
Hill looking to shoot here. He's gone for it and he's landed a takedown into mount! Oh, that's bad for Burn!
Burn can't escape the position.
Burn holding onto his opponent's waist for dear life, as Hill tries to land some strikes to get him to release his grip.
The fighters are pressed up against the cage, both looking to find a bit of space to work.
That's two minutes gone in the round.
Burn slips a leg in and gets back to half guard.
Burn gets full guard.
Burn keeping moving, preventing Hill from controlling successfully.
Burn is working an open guard here, looking to improve his position. No doubt that will leave him open to counters but at least he's being more offensive.
Burn looking for submissions from the bottom here. Moving his hips around, possibly looking for an armbar.
Burn working from the bottom, still in full guard. He's managed to get a loose triangle. Hill doesn't seem to be doing much to defend here, obviously he feels comfortable in the position. Hill manages to throw the legs off his shoulder and he's back into guard - no problem.
Hill pushes down on Burn's leg and manages to get into half guard.
That's three minutes gone in the round.
Burn gets back to full guard.
Hill takes a decent strike to the side of the head.
Burn looking for submissions off his back, moving his hips, looking for an opening.
Hill stands and throws Burn's legs to the side, diving into side control.
Burn gets one leg under and gets the fight to half guard.
Hill wants to pass the guard but Burn is defending well.
Hill trying to control the action but Burn is working from the bottom.
Burn looking to work for a kimura from the bottom.
That's four minutes gone in the round.
Burn looking for submissions off his back.
Burn tries to roll over but Hill keeps him under control.
Burn slips a foot under and gets full guard. Nice work.
Burn looking for a sweep. Not yet Burn, not yet.
Hill tries to free his leg and advance position but Burn is retaining full guard.
The crowd thankful this round is nearly over.
Well, the referee has seen enough. Neither fighter is active enough on the ground so he's stood them back up.
Burn shoots in but Hill avoids the takedown attempt easily.
Burn misses with a takedown attempt
and Hill counters with a straight right hand.
Hill keeps the fight standing with a nice sprawl.
Burn looks frustrated there after his takedown attempt is stuffed easily.
And thats the end of the round the fighters go back to their corners.
That was a close second round but I would say that Charlie Hill will probably get the nod.
That's time! Back to the action! This is the final round!

Hill is looking to clinch.
Burn shoots in for a double leg but Hill sprawls well. That's going to sap some energy.
Burn ducks under a wild hook from Hill.
Hill throws out a loose jab but Burn uses good head movement to avoid it.
The fighters circling - Hill throws out the jab but it was never going to land.
Hill throws out a loose jab but Burn uses good head movement to avoid it.
Burn tries to clinch there but Hill circles away.
Burn shoots in for a takedown. "Ole!" shouts Hill as he jumps to the side.
Hill throws a hook to the side of Burn's head but Burn sees it coming and ducks under it beautifully.
A big left from Hill misses.
We've had a slow start to the round here - hopefully the action picks up.
Burn fails with a rather predictable takedown attempt.
Charlie Hill has stuffed three takedown attempts in the round now. That's going to take a lot out of Noah Burn.
Both fighters are breathing heavily.
Hill throws an uppercut from half a mile away. Burn sees it coming and avoids it easily.
Hill lands with a cross to side of his opponent's head.
Hill looks to land a right hand but Burn moved out of range.
Hill looks to throw the jab but Burn is out of range.
Burn will have to do better than that with his takedown attempts.
That's one minute gone in the round.
Burn moves out of range as Hill strikes.
Hill misses the jab.
Hill throws the left hand but Burn avoids the punch easily.
Burn is looking to take this fight into the clinch.
Hill thows a left - swing and a miss!
Hill keeps his opponent at a distance with a nice jab.
Burn staying out of range there.
Burn fails with a rather predictable takedown attempt.
Hill changes levels and looks for a double leg takedown. Burn tries to avoid it but Hill manages to keep hold of a leg and drag Burn to the ground. Burn escapes though and pops straight back up to his feet.
Burn shoots for a double leg takedown but Hill sprawls well. He's pushed Burn's face into the mat and manages to get back to his feet relatively easily.
Nice straight punches there by Hill. You know Roy Jones Jr respects the hands of Hill.
Hill fails with a rather predictable takedown attempt.
Burn fails to land the takedown.
Burn defending well as Hill loads up on a big left hand.
That's two minutes gone in the round.
The crowd are showing their displeasure at the lack of action as loud boos ring out around the arena.
Burn moves away from the strike by Hill.
Hill dips down and scores with a jab to the body.
Burn shoots for a double leg takedown but Hill sprawls well. He's pushed Burn's face into the mat and manages to get back to his feet relatively easily.
Hill misses with a hook. Burn ducked under it nicely.

Hill moves into the clinch.
Burn is working for takedown but Hill is calmly controlling the position for now.
An uppercut on the inside fails to land for Hill.
Burn wants to break free. God knows he wants to breaaaak freeee.
Hill looking for a takedown.

Burn escapes the clinch and we're back to striking.
Burn is looking to take this fight into the clinch.
Burn is looking to clinch.
The fighters circle momentarily. Hill darts into range and connects with a nice straight punch.
Burn looks frustrated there after his takedown attempt is stuffed easily.
That's three minutes gone in the round.
Burn looks for the body kick but Hill saw that one coming.
Burn ducks under a wild hook from Hill.
Horrible takedown by Burn or perhaps it was just good defense by Hill which made him look bad.
Burn defending well as Hill loads up on a big left hand.
Burn takes a shot to the eye socket. That's gotta hurt.
Hill scores a trip takedown into side control. Nice.
Burn manages to land a sweep and he's now on top! Lovely Jiu Jitsu!
Hill is looking to sinch up a gullotine here but Burn pulls his head out easily.
Burn is just sitting in half guard, waiting for something to happen.
Hill is looking to sinch up a gullotine here but Burn pulls his head out easily.
Burn works his way into full mount!
That's four minutes gone in the round.
Hill tries to reverse the position but Burn maintains control.
Burn has control of Hill's right arm, working for a kimura. It's a bit of a token attempt though and Hill regains control of the situation pretty easily.
Hill is wriggling around trying to escape.
Burn is in full mount, looking to secure a guillotine but Hill is surviving well by controlling Burn's body position as best he can.
Hill wants to hold on but Burn pushes him away.
Hill is in all sorts of trouble here.
Burn looking to secure an arm triangle but Hill defends it well.
Noah Burn has stepped it up - he knows he needs a finish here!
Charlie Hill is fighting for a decision here - he's started to take the cautious approach.
Burn unloads with some shots from mount but Hill bucks and avoids them well.
And that's the end of the fight!
I would just about give that final round to Noah Burn.
I think Hill has won this one but let's see what the judges have to say. Over to the ring announcer for the scorecards.
Ladies and gentlemen, after 3 rounds of action, we go to the scorecards for a decision.
Judge Stewart Dunkirk scores the fight 30:28
Judge Chris Downing scores the fight 30:27
Judge Tiny Johnson scores the fight 29:28
In favor of your winner, by unanimous decision... Charlie Hill!
|
|
|
|
|
|
|
|
|
|
|
|
|
|
|
|
|
|
|
|
|
|
|
| S |
C
A |
G |
S |
C
B |
G |
|
S |
C |
G |
|
energy
A | B |
|
hype
A | B |
|
pop
A | B |
|
mgr
A | B |
|
FIGHT
RATING
42% |
|
|
|
|
|
|
