|
|
PBP Commentary |
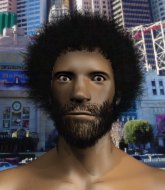
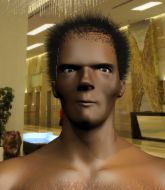
Coming up we have a featherweight MMA rules bout between Kelvin Stark (ranked 0 p4p, 0 weight class) and Dre Burnside (ranked 0 p4p, 0 weight class). Both fighters really staring each other down here, as Dre Burnside enters the cage!
 |
|
 |
| 191 cm
19
151 lbs
0 - 1 - 0 |
|
200 cm
18
150 lbs
0 - 0 - 0 |
BJJ Blue Belt
Counter fighter
Cuts easily |
|
BJJ Blue Belt
Brawler
Likes musicals |
|
| |
|
Ladies and gentlemen. This fight is 3 rounds, in the featherweight division.
Introducing the fighter to my left, fighting out of the red corner.
With a record of
0 - 1 - 0, fighting out of Las Vegas, Kelvin Stark!
And introducing the fighter to my right, fighting out of the blue corner.
With a record of
0 - 0 - 0, fighting out of Las Vegas, Dre Burnside!
The judges for this bout are Daniel Franklin, Wesley Smith and Gwen Towbar.

The bell rings for round one and we are underway!
Burnside shoots in for a takedown but Stark shows good takedown defense there and keeps this one on the feet.
Stark seem to be loading up, looking for a big counter.

Burnside has Stark up against the cage in a clinch.
A frustrated look appears on Stark's face as he tries to break the clinch.

Burnside has Stark pressed up against the cage. He's trying to work for a single leg takedown. Burnside pulls back from the cage and twists to the side, sending Stark tumbling to the mat - Burnside dives into Stark's guard.
Stark really does look like a pencil wearing a pair of gloves. Let's hope he has a gameplan to suit that ridiculous body shape.

Burnside got a little sloppy there for a moment and Stark has worked his way into a loose triangle - can he finish it?! No, Burnside has managed to get both his arms back between Stark's legs - danger averted.
Stark is trying to keep Burnside in close.
We've had a slow start to the round here - hopefully the action picks up.
Burnside trying to control but Stark is working from the bottom.

That's one minute gone in the round.
Stark controls Burnside momentarily but Burnside frees himself.
Stark wants to stand but Burnside is controlling the position.
There's a bit of a scramble here and now Stark is on top in guard.

There's a bit of a scramble here and now Burnside is on top in guard.

Stark tries to land a sweep but no joy.
Burnside works over Stark with some ground and pound from guard.

That's two minutes gone in the round.
Burnside stands up and looks to throw the legs aside to pass to side control. Stark swivels though and keeps the full guard.
Burnside trying to land body shots but he keeps hitting the mat.
Burnside controls the pace of the fight for a moment.
The ref warns both fighters not to hold the cage as they work up against the meshing.
Burnside avoids a guillotine attempt easily.
Burnside stands up and looks to throw the legs aside to pass to side control. Stark swivels though and keeps the full guard.

Burnside postures up as if he's going to throw some strikes but drops back for an ankle! Stark is in big trouble! He looks ready to tap! But no, he's escaped and dives on top of Burnside, into his guard.

That's three minutes gone in the round.
Burnside looking for a sweep. Not yet Burnside, not yet.
There's a bit of a scramble here and now Burnside is on top in guard.
Stark working from the bottom, still in full guard. He's managed to get a loose triangle. Burnside doesn't seem to be doing much to defend here, obviously he feels comfortable in the position. Burnside manages to throw the legs off his shoulder and he's back into guard - no problem.
Burnside engaging in some classic timewasting tactics.
The fighters are pressed up against the cage, both looking to find a bit of space to work.

That's four minutes gone in the round.
Neither fighter has done anything of merit for a good minute or two here and the crowd are not happy about it.
Burnside throws a big right hand that misses.
Boooooooooooooooooooo!!! God, this has been a terrible round. Come on you two, sort yourselves out!

Burnside stands up from guard. Let's bang!
And thats the end of the round the fighters go back to their corners.
Dre Burnside dominated that round.
The minute break is over - no more time for sponges and pep talks - back to the action!

Burnside throws a nice looking combination but Stark bobs and weaves to avoid any damage.
Stark swung with a counter punch to the body but it didn't connect.
Burnside with a lazy takedown attempt
and Stark counters with a lovely shot to the body.
Burnside darts in and clinches Stark up against the cage.
Both guys are working to get underhooks.
Burnside misses with a knee strike.

Stark manages to pull guard. Let's see whether he can land a sub off his back.
Burnside in full guard, throwing the ground and pound. No damage this time.
Stark is working an open guard so Burnside takes the opportunity to get back to his feet.
We've had a slow start to the round here - hopefully the action picks up.
Burnside displays good takedown defense there as he swats away a double leg from Stark.
Burnside pushes Stark up against the cage in a clinch.
That's one minute gone in the round.
Stark jumps guard but Burnside turns him against the cage and keeps the fight standing.
Burnside can't break the clinch.
Stark is looking to score with knees to the body. Maybe he'll change it up and go body then head. Burnside is defending well for now.
Stark drops down looking for an ankle pick but Burnside pulls his leg out and moves away.
That's three failed takedown attempts in the round for Kelvin Stark. That's going to take a lot out of him.
Both fighters are absolutely exhausted here.
Burnside moves into the clinch successfully.
Burnside has had enough of the clinch and is looking to separate.
Stark will no doubt start fighting again in a minute but for now he's just having a little rest, leaning Burnside up against the cage.
Burnside wants a takedown but no success here.
That's two minutes gone in the round.
The crowd are getting on the fighters' backs, as the pace has dropped off in the last minute or so.
Burnside misses the knee to the body. Nice hip positioning from Stark.
Stark is trying to break the clinch but Burnside has him pressed against the cage.
Burnside wants to break the clinch but can't.
Stark misses with a body punch.
Burnside stalling.
Burnside tries for a takedown but Stark manages to get underhooks.
Stark trying to land knees to the body.
Burnside is trying to pull guard but being pressed up against the cage enables Stark to keep the fight standing.
Burnside goes for a takedown attempt but Stark pushes him away and we're back to fighting at a distance.
Dre Burnside seems to be the more aggressive standup fighter in this bout.
Burnside shoots for a double leg takedown but Stark sprawls well. He's pushed Burnside's face into the mat and manages to get back to his feet relatively easily.
Burnside fails with a takedown attempt.
Stark appears to be looking for a big counter.
That's three minutes gone in the round.
Stark throws a leg kick
letting Burnside counter with a right hand.
Burnside shoots and misses
and Stark counters with a three punch combo that has Burnside backing up. Burnside nods at Stark to acknowledge the strikes.
Stark misses with a wild combination.
Stark stuffs a takedown. It's all about dictating where the fight takes place and Stark wants it to stay on the feet.
Burnside shoots for a takedown but Stark saw that one coming a mile off and avoided it easily.
Stark moves into range and lands a nice leg kick.
Stark misses with a few strikes there.
That's four minutes gone in the round.
Burnside has managed to clinch.
Stark taking a breather.

Stark breaks the clinch and we're back to striking at distance.
Burnside has managed to clinch.
Burnside has Stark pressed up against the cage and is working for takedown. Stark manages to improve position though and keeps the fight standing.
Burnside tries to pull guard but Stark holds him up against the cage and eventually Burnside drops back down to his feet.
Stark has Burnside pushed against the cage.
The crowd thankful this round is nearly over.
Burnside takes an elbow to the temple.
And thats the end of the round the fighters go back to their corners.
Kelvin Stark dominated that second round.
That's the end of the interval. I'm sure that seemed a lot quicker than a minute for our two fighters! Back to the action. This is the final round!

Stark scores to the head and body with a nice combination!
Stark tries to keep at a distance but Burnside has taken the fight into the clinch.
Burnside is trying to work out of this bad position, with his back against the cage.
Stark misses with an elbow over the top.
Burnside jumps guard but his hands slip and he falls flat on his back. Well, he's made himself look a right mug there, as Stark walks away with a smile on his face. Burnside gets slowly back to his feet and shakes his head.
Stark misses with a jab, cross combination.
Stark stuffs the takedown.
A little feinted left hand from Stark on the counter but he doesn't commit to it.
We've had a slow start to the round here - hopefully the action picks up.
Burnside scores with a straight right hand, right through his opponent's guard.
Burnside looks for a takedown here. Will he get it? Stark is fending him off so far but Burnside persists. Nope, Stark circles away and we're back to standing.
Stark appears to be looking for a big counter.
Kelvin Stark has stuffed three takedown attempts in the round now. That's going to take a lot out of Dre Burnside.
Some wild striking there from Stark.
That's one minute gone in the round.
Stark changes levels and drives through with a really nice takedown into side control. Burnside looks really pissed at himself for not defending that better.
Burnside takes a big intake of breath there - he's definitely tired.
Burnside holds on to Stark's head and controls the position momentarily.
Stark postures up a little and throws a couple of hammerfists but they don't connect properly.
You can see the frustration on Burnside's face, being in this tough position on the bottom.

Stark stands up and we're back to a striking position.
Burnside shoots in for a takedown. He's persisting with it as Stark sprawls well. Stark wins this battle and keeps the fight standing. Burnside gets slowly back to his feet.
That's two minutes gone in the round.
Burnside fails with a takedown attempt from distance.
Stark changes levels and drives through with a really nice takedown into side control. Burnside looks really pissed at himself for not defending that better.
Stark tries for an arm triangle. That looks pretty tight to me. Is this one over!?! Possibly, maybe, no Stark has let go of the choke. Obviously it wasn't as tight as we thought!
This has been an exciting period of action!
Stark thinks about going for a far side armbar but bails out and retains the dominant position instead.
Stark thinks about going for a far side armbar but bails out and retains the dominant position instead.
Burnside sneaks a leg under to get back to half guard.
That's three minutes gone in the round.
Burnside is trying to maintain the position but Stark is very close to passing his half guard.
Burnside is trying to stand.
Burnside makes his way to full guard. A much better position for Burnside.
Stark has to be careful here, sitting in the guard of a superior BJJ player.
Stark wants to stand and escape but instead Burnside has hit a sweep and he's now on top in guard.
Burnside trying to pass the guard but can't manage it just yet.
That's four minutes gone in the round.
The crowd are starting to boo a lack of action.
Stark is trying to control the position from the bottom.
Burnside throwing shots from guard but he's hitting more mat than opponent.
Burnside engaging in some classic timewasting tactics.
Burnside stands up and waves to Stark to follow him.
The crowd thankful this round is nearly over.
Burnside tries a switch kick but it misses it's target.
Burnside has taken the fight to the clinch.
And that's the end of the fight!
That was a close round. You could make an argument for either fighter but I would give it to Kelvin Stark.
I think Stark has won this one but let's see what the judges have to say. Over to the ring announcer for the scorecards.
Ladies and gentlemen, after 3 rounds of action, we go to the scorecards for a decision.
Judge Daniel Franklin scores the fight 29:28
Judge Wesley Smith scores the fight 29:28
Judge Gwen Towbar scores the fight 29:28
In favor of your winner, by unanimous decision... Kelvin Stark!
|
|
|
|
|
|
|
|
|
|
|
|
|
|
|
|
|
|
|
|
|
|
|
| S |
C
A |
G |
S |
C
B |
G |
|
S |
C |
G |
|
energy
A | B |
|
hype
A | B |
|
pop
A | B |
|
mgr
A | B |
|
FIGHT
RATING
30% |
|
|
|
|
|
|

