|
|
PBP Commentary |
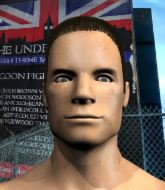
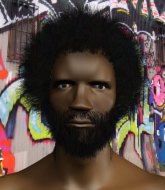
Coming up we have a lightweight MMA rules bout between Shelby Hamilton (ranked 0 p4p, 0 weight class) and Richard White (ranked 0 p4p, 0 weight class). These two fighters really are very evenly matched on the feet - it will be fascinating to see who can assert themselves in that aspect of the fight.
 |
|
 |
| 192 cm
18
161 lbs
0 - 2 - 0 |
|
165 cm
25
168 lbs
0 - 0 - 0 |
BJJ Blue Belt
Counter fighter
Cuts easily |
|
BJJ Brown Belt
Brawler
Tends to cut |
|
| |
|
Ladies and gentlemen. This fight is 3 rounds, in the lightweight division.
Introducing the fighter to my left, fighting out of the red corner.
With a record of
0 - 2 - 0, fighting out of Hilo, Shelby Hamilton!
And introducing the fighter to my right, fighting out of the blue corner.
With a record of
0 - 0 - 0, fighting out of Hilo, Richard White!
The judges for this bout are Roger Salmon, Chris Saunders and Josh West.

The bell rings for round one and we are underway!
White shoots in but no luck this time.
White checks a leg kick.

White drives through with a really nice takedown into side control.

Hamilton throws his opponent off and manages to get back to his feet! Nicely done!
White fails in his attempt to clinch.
White closes this distance looking for a takedown but Hamilton circles away.
White on the wrong end of a nice low kick. He's acting like it's no big deal but he doesn't want to take many more of those.
Hamilton defends well against a solid takedown attempt from White.
Shelby Hamilton has stuffed three takedown attempts in the round now. That's going to take a lot out of Richard White.
This is a great period of action - very entertaining stuff!
White fails with the takedown.
White shoots in for a takedown. He's persisting with it as Hamilton sprawls well. Hamilton wins this battle and keeps the fight standing. White gets slowly back to his feet.

That's one minute gone in the round.
White shoots in but Hamilton avoids the takedown attempt easily.
Nice straight punches there by Hamilton. You know Roy Jones Jr respects the hands of Hamilton.
White with a poor takedown
and Hamilton makes the exchange count by landing a cracking kick to the body. White really felt that one!
White shoots in but doesn't get the takedown
and Hamilton counters with a crisp hook to the side of the head.

Hamilton shoots in and gets a takedown into White's guard.

White has butterfly guard. He's looking to stand up here. He pushes Hamilton off him and springs to his feet nicely. The crowd applauds.
White takes a jab on the nose. He smiles like he loves it and keeps coming.
Wooooo! Give it up for these two warriors! They are putting on a show!
White fakes an overhand right and shoots for a takedown. Hamilton sprawls well initially but White persists and gets the takedown into half guard.
White looks winded!

That's two minutes gone in the round.
Hamilton keeps control of the position for the meantime.
Hamilton blocking the ground and pound attempt from White.

White is looking for a kimura here.
White is working for submissions here but there's nothing on.
Hamilton is controlling White's trapped leg to prevent White from advancing to side control.
White is trying a forearm choke
I don't think that's going to do much at this level of the game.

That's three minutes gone in the round.
Hamilton trying to control from the bottom.
White should think about turning a few of those tyres round his middle into muscle if he wants people to take him seriously as an athlete.
The referee walks around the fighters to get a better view of the action. White lands a nice short elbow.
White is trying to work for a kimura. This could be trouble! No, Hamilton has managed to free his arm - good work.
Ground and pound from White.
White is trying to work for a kimura but Hamilton is defending well.

That's four minutes gone in the round.
White is looking for a kimura. It's going to be difficult to finish that from half guard though and Hamilton defends it well.
White is looking to take a break and control but Hamilton is keeping him honest, looking to work from the bottom.
Hamilton really does look like a pencil wearing a pair of gloves. Let's hope he has a gameplan to suit that ridiculous body shape.
White is trying to work for a kimura. This could be trouble! No, Hamilton has managed to free his arm - good work.
White seems to be working for a kimura but Hamilton defends the submission attempt.
White trying to control the action but Hamilton is working from the bottom.
And thats the end of the round the fighters go back to their corners.
A close round but Richard White will probably get the nod.
OK. That's time! The bell goes and we're back to the action.

White will have to do better than that with his takedown attempts.
White has a takedown stuffed.
Hamilton keeps the fight standing with a nice sprawl.
Hamilton swung with a counter right hand that didn't connect.
Shelby Hamilton has stuffed three takedown attempts in the round now. That's going to take a lot out of Richard White.

The fight moves into the clinch position.
The two fighters are working to gain dominance in the clinch.
We've had a slow start to the round here - hopefully the action picks up.
White is trying to drag Hamilton to the mat but Hamilton just about manages to keep his footing. He used the cage to his advantage there.
Hamilton fails to pull guard.
White wants a takedown but no success here.
That's one minute gone in the round.
White drags the fight down to the ground.
White trying to control the position.
White tries to land a sweep but no joy.
Hamilton has decided he wants to stand but the closed guard of White is proving hard to escape from.
White lands a beautiful sweep and he's now moved into his opponent's guard.

White trying to control but Hamilton is working from the bottom.
That's two minutes gone in the round.

White decides to stand up and beckons his opponent to follow.
Hamilton throws out a loose jab but White uses good head movement to avoid it.
White is loading up here, looking for a big counter of his own.
White fails with a rather predictable takedown attempt.
Hamilton swung with a counter right hand that didn't connect.
White shoots and misses
and Hamilton counters with a quick right hand to the jaw.
White tries for a takedown but Hamilton circles away easily
and Hamilton counters with a straight right hand.
Shelby Hamilton is winning the standup battle so far.
White is breathing heavily.
White shoots in for a takedown - he's clinched up with Hamilton but Hamilton pushes him off and we're back to square one.

White rushes Hamilton and pushes him back against the cage in a clinch.
That's three minutes gone in the round.
Hamilton successfully pulls guard.
Hamilton is trying to keep White in close.
White trying to control the position from guard on top but Hamilton is wriggling around, looking for whatever he can.
White drops back for a leg! It's a sloppy attempt though and White jumps back into guard quickly, to retain the dominant position.
White drops back for a leg! It's a sloppy attempt though and White jumps back into guard quickly, to retain the dominant position.
White is trying to work a guillotine from the top, or something like that? Don't know how he thinks he's going to get a finish from there.
That's four minutes gone in the round.
Hamilton keeping moving, preventing White from controlling successfully.
The fighters are pressed up against the cage, both looking to find a bit of space to work.
Hamilton throwing some rather feeble looking strikes off his back.
White postures up and lands some nice ground and pound.
White looking to pass the guard.
Richard White has got the better of the ground game so far.
White looking to sit in guard and control but Hamilton gets the butterfly guard and sweeps. He's now in the guard on the top.

Boooooooooooooooooooo!!! God, this has been a terrible round. Come on you two, sort yourselves out!
Hamilton stopping the sweep attempt from White.
And thats the end of the round the fighters go back to their corners.
Shelby Hamilton dominated that second round.
The minute break is over - no more time for sponges and pep talks - back to the action! This is the final round!

White closes the distance and clinches up with Hamilton, looking for a takedown. White pushes Hamilton against the cage but Hamilton circles to the side and manages to break the clinch.
Richard White seems to be the more aggressive standup fighter in this bout.
Hamilton lands with a head kick! That's gotta hurt.
White shoots in but doesn't get the takedown
and Hamilton counters with a straight right hand.
Hamilton tries to clinch but White is having none of it.
White shoots in for a double leg but Hamilton sprawls well. That's going to sap some energy.
Shelby Hamilton has stuffed three takedown attempts in the round now. That's going to take a lot out of Richard White.
White has his takedown stuffed
and Hamilton counters with a lovely straight right hand!
We've had a slow start to the round here - hopefully the action picks up.
White gets his takedown attempt stuffed easily
and Hamilton connects with a straight left hand counter down the middle.
Hamilton lands a nice looking body kick.
White takes a big intake of breath there - he's definitely tired.
White shoots in for a double leg but Hamilton sprawls well. That's going to sap some energy.
As White backs away, Hamilton returns fire with a leg kick that just misses.
That's one minute gone in the round.
The fighters circle momentarily. Hamilton darts into range and connects with a nice straight punch.
White fails with the takedown.
Hamilton swung with a counter right hand that didn't connect.
Hamilton moves into the clinch.
White has hold of a leg and is looking for a trip takedown. Hamilton avoids it nicely though and we remain in the clinch.
Hamilton blocks a knee to the body. He'll have a nicely bruised forearm in the morning.
White pulls guard.
Hamilton scoring with some ground and pound.
Hamilton with a flurry of punches that miss.
White avoiding any damage from the ground and pound.
White looking to hit a scissor sweep but Hamilton is one step ahead there.
That's two minutes gone in the round.
White is trying to stand up but he's not managed so far.
Hamilton working some strikes from top position.
White is trying to control the position from the bottom.
Hamilton stopping the sweep attempt from White.
White wants to stand but Hamilton is controlling the position.
White is trying to control the position but Hamilton postures up.
The referee is pacing around the two fighters - he looks like he's thinking about a standup.
Hamilton lands a nice shot whilst sitting in his opponent's guard.
That's three minutes gone in the round.
Hamilton working some ground and pound from guard but it's not doing any damage.
White looking to sweep here. No luck so far.
Hamilton throwing elbows and punches but not connecting, as White works some decent striking defense from the bottom.

The referee has motioned to the fighters to stand back up. He just wasn't happy with the level of activity.
White dives in for a single leg takedown but Hamilton sprawls and the fighters end up clinched against the cage.
White tries for a takedown but Hamilton sees it coming a mile off and avoids it easily.
Hamilton is using his height advantage well here, landing a good percentage of his punches.
Hamilton connects with a good right hand that stumbles White. White circles away out of range and recomposes himself.
Hamilton lands with a kick to the ribs.
Hamilton is using his reach advantage well here, landing the more effective single shots from range.
White tries to clinch but Hamilton moves out of range.
White closes the distance and pushes Hamilton back into the cage.
Hamilton is really dominating this fight. Is there anything that White can do to turn this around?
Hamilton avoiding damage as White throws knees to the body.
Hamilton tries to jump guard but he falls flat on his backside. White smiles and moves away.
White tries to clinch
letting Hamilton counter with a right hand.
That's four minutes gone in the round.
A lazy left from Hamilton finds it's target.
Hamilton clinches up with White and pushes him back against the cage.
A bit of stalling here from Hamilton.
White has a body lock and is looking for a takedown. Hamilton is bouncing around trying to prevent the takedown and somehow he has indeed managed to stay on his feet.
Hamilton tries to take the fight to the ground by pulling guard but can't manage it.
White has a body lock and is looking for a takedown. Hamilton is bouncing around trying to prevent the takedown and somehow he has indeed managed to stay on his feet.
White working Hamilton over with knees to the body.
We've seen a great period of action over the last minute or so - credit to both fighters for going all out!
White tightens his grip and picks Hamilton up, before dumping him to the ground. Hamilton manages to land in guard.
White trying to move into half guard but instead Hamilton has managed to sweep!
Hamilton throwing elbows and punches but not connecting, as White works some decent striking defense from the bottom.
White wants to sweep but no luck.
And that's the end of the fight!
Shelby Hamilton showed his dominance in that final round.
I think Hamilton has won this one but let's see what the judges have to say. Over to the ring announcer for the scorecards.
Ladies and gentlemen, after 3 rounds of action, we go to the scorecards for a decision.
Judge Roger Salmon scores the fight 29:28
Judge Chris Saunders scores the fight 29:28
Judge Josh West scores the fight 29:28
In favor of your winner, by unanimous decision... Shelby Hamilton!
|
|
|
|
|
|
|
|
|
|
|
|
|
|
|
|
|
|
|
|
|
|
|
| S |
C
A |
G |
S |
C
B |
G |
|
S |
C |
G |
|
energy
A | B |
|
hype
A | B |
|
pop
A | B |
|
mgr
A | B |
|
FIGHT
RATING
41% |
|
|
|
|
|
|

