|
|
PBP Commentary |
Coming up we have a heavyweight MMA rules bout between Buzz Sawyer (ranked 0 p4p, 0 weight class) and Perry Cox (ranked 0 p4p, 0 weight class). Sawyer's ring entrance music is that housewives' favourite, I Gotta Get Paid. Cox comes into a darkened arena with his song building. Solitaire Unraveling kicks in, the lights come on and the crowd goes wild! What a showman! Well, the cameraman is lingering on a pretty young lady for a bit too long there. Keep your eyes on the fighters buddy or you'll miss the fighter intros!
 |
|
 |
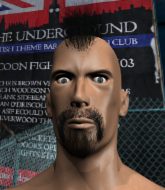
| 193 cm
23
283 lbs
7 - 2 - 0 |
|
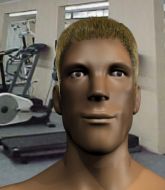
190 cm
20
255 lbs
7 - 2 - 1 |
Powerful takedowns
Basic striking
Cardio machine |
|
BJJ Purple Belt
Decent boxing
Determined |
|
| |
|
Ladies and gentlemen. This fight is 3 rounds, in the heavyweight division.
Introducing the fighter to my left, fighting out of the red corner.
With a record of
7 - 2 - 0, fighting out of New York, Buzz Sawyer!
And introducing the fighter to my right, fighting out of the blue corner.
With a record of
7 - 2 - 1, fighting out of Los Angeles, Perry Cox!
The judges for this bout are Jack Bonds, Frank Antenori and Timothy Bukovac.

The bell rings for round one and we are underway!
Sawyer throws a body punch but Cox moves out of range.
Cox lands a right hook to the body.
Sawyer displays some good footwork, moving neatly out of range as Cox throws out the jab.
Cox looks to throw the jab but Sawyer is out of range.
Sawyer tries to land with a swinging hook to the body but Cox was well out of range. Poor timing from Sawyer.
Sawyer swings and misses with a shot to the body
and Cox cracks him with a counter punch right on the button.

It looks like Buzz Sawyer has been cut.
This has been an exciting period of action!
Cox throws a combination but it was largely blocked by Sawyer.

Sawyer drives through with a really nice takedown into side control.

Sawyer wants to work for a kimura but he's foiled early by Cox, who protects the arm well.
Sawyer is putting a hurting on Cox here, landing some big shots from side control.
Cox tries to get back to half guard but can't.
Sloppy strikes there by Sawyer.
Cox wants to get back to his feet.

That's one minute gone in the round.
Sawyer is chipping away with strikes.
Sawyer has been looking to land a fair amount of strikes on the ground. He might be looking to soften his opponent up in order to work for a submission.
Sawyer is trying to get an arm triangle but Cox is defending well.
Sawyer is trying to get an arm triangle but Cox is defending well.
Cox is trying to buck Sawyer off.
Cox wants to control but Sawyer postures up.
Sawyer is looking for a kimura. He might have it! No, Cox has escaped the position, nice work there.
Sawyer is trying to get an arm triangle but Cox is defending well.

That's two minutes gone in the round.
Sawyer tries for a kimura but Cox is defending well.
Sawyer is breathing heavily.
Sawyer working away.
Sawyer cracks Cox with a big right hand but Cox just smiles back at him and invites him to have another go.
Cox manages to get one leg in to regain half guard.
Sawyer scoring with strikes to the body and head.
Wooooo! Give it up for these two warriors! They are putting on a show!
Sawyer trying to pass the guard but Cox defending well.
Sawyer is looking for a kimura but Cox is holding onto that half guard position, so it's hard for Sawyer to get the leverage.

That's three minutes gone in the round.
Cox trying to control but Sawyer postures up.
Sawyer is working for a kimura but Cox is defending it quite comfortably.
Cox gets full guard.
Sawyer stops Cox from standing up.

Cox scrambles and gets back to his feet.
Sawyer is the aggressor but that punch slipped nicely by Cox.
Sawyer misses the body punch
and Cox counters nicely by changing levels and landing a hook to the body.

That's four minutes gone in the round.
Nice body punch from Cox.
Cox will have to do better than that with his takedown attempts.
Cox looks to score with a jab to the body but Sawyer is just out of range.
Cox connects with a crisp jab.
The crowd cheering loudly, showing their appreciation for the quality fight we're seeing here.
Sawyer misses the shot to the body.
Sawyer looking to shoot here. He's gone for it and he's landed a takedown into mount! Oh, that's bad for Cox!
Sawyer won't let Cox get back to his feet... He wants to keep the fight where it is for now.
Cox sneaks a leg under to get to half guard.
Cox is defending against the submission attempts here by Sawyer.
The crowd are going absolutely nuts as the round comes to an end - what a fantastic round of action!
Sawyer missing with the ground and pound from half guard.
And thats the end of the round the fighters go back to their corners.
Perry Cox dominated that round.
The cut man is working on Buzz Sawyer's cut.
That's the end of the round. The referee orders the cornermen out of the cage so we can get back down to business.

Cox throws a body punch but Sawyer moves out of range.
The step up in weight doesn't seem to be a problem for Cox. He's performing admirably here against the bigger man.
Sawyer gets his takedown attempt stuffed easily
and Cox counters with a lovely straight right hand!
Cox throws a right and a left that Sawyer avoids nicely.
Cox bobs and weaves well there to avoid the strikes.
Buzz Sawyer seems to be the more aggressive standup fighter in this bout.
Sawyer misses with a takedown attempt - Cox sprawls well and throws a nice strike on the way out which just misses.
Sawyer swings for the body but Cox moves out of range.
Cox throws a shot to the body.
Perry Cox is looking to throw some combinations by the looks of things.
Sawyer keeping his hands up high there, blocking the jab from Cox.
Sawyer tries for a takedown but Cox circles away easily
and Cox counters with a good right hand that lands right on the jaw.
That's three failed takedown attempts in the round for Buzz Sawyer. That's going to take a lot out of him.
This has been an exciting period of action!
Cox drops Sawyer with a nice combination! Cox dives into Sawyer's guard, looking to finish!

Sawyer is rocked!
Cox trying to control the position from guard on top but Sawyer is wriggling around, looking for whatever he can.
Cox gets to his feet. Sawyer looking to butt scoot but the ref puts an end to that. On your feet son!
Both fighters are absolutely exhausted here.
That's one minute gone in the round.
Cox jabbing away but nothing is landing.
Sawyer on the wrong end of a nice hook.
Sawyer gets cracked with a nice right hand there by Cox.
Oh Sawyer is still all over the place! His legs are completely gone! Will he be able to recover?!!
Cox misses with an uppercut.
Sawyer seems to have got his legs back now.
Cox misses with a straight right.
Cox takes a swing at Sawyer's ribcage but misses.
Sawyer feints and as Cox raises his hands in defense, Sawyer changes levels and drives through with a takedown into guard.
Buzz Sawyer overall seems to be getting the better of the ground position in the fight so far.
Sawyer wants to pass the guard but Cox is keeping the position.
Cox looking to control.
Sawyer looking to pass the guard.
Cox uses the cage to get back to his feet.
That's two minutes gone in the round.
Sawyer slips under a jab from Cox.
A big left from Cox misses.
Cox misses with a straight left.
Cox lunges in with swinging rights and lefts but Sawyer circles away quickly and effectively.
Perry Cox seems to be getting the better of the standup.
Some wild striking there from Cox.
Sawyer keeping a good distance there, avoiding the body shot.
Sawyer has his takedown stuffed
and Sawyer takes a counter punch right on the button for his troubles.
The crowd are loving this. Great action here.
Cox throws a jab but it's blocked by Sawyer.
Sawyer lands a jab to Cox's midsection.
Cox will need to tighten up his combinations if he doesn't want to gas himself out, swinging at thin air.
That's three minutes gone in the round.
A really sloppy takedown attempt there from Sawyer.
Sawyer bobs and weaves into range and then changes levels and scores with a nice takedown into side control.
Sawyer throws a knee to the body but it doesn't do much damage.
Cox wants to get back to his feet.
Sawyer scores with a couple of short elbows.
Cox is pushing Sawyer's head away, looking to escape. Sawyer manages to hold on to the position though.
Sawyer is looking for a kimura. He might have it! No, Cox has escaped the position, nice work there.
Sawyer working hard here to secure a kimura but he's not really in the right position for it.
That's four minutes gone in the round.
The ground and pound from Sawyer seems to be hitting the mat more than his opponent.
Sawyer wants to work for a kimura but he's foiled early by Cox, who protects the arm well.
Sawyer thinks about going for a far side armbar but bails out and retains the dominant position instead.
The crowd are going absolutely nuts as the round comes to an end - what a fantastic round of action!
Cox is sneaking out the side here. He's bucked Sawyer off and has taken his back!
And thats the end of the round the fighters go back to their corners.
Perry Cox showed his class in that round. I'd imagine he'll take it on all the scorecards.
The cut man is working on Buzz Sawyer's cut.
That's the end of the round. The referee orders the cornermen out of the cage so we can get back down to business. Ladies and gentlemen, this is the final round!

Sawyer misses with a looping right.
The fighters circling - Cox throws out the jab but it was never going to land.
Sawyer uses some good footwork to avoid the body shot by Cox.
Cox lands a jab, followed by a cross and another cross, as Sawyer backs up against the cage.
No luck for Cox with that takedown attempt.
Sawyer swings and misses with a hook to the body.
A combination from Cox does no damage.
Sawyer lands a really nice looking cross but Cox seems unphased.
Sawyer shoots in and gets a takedown into half guard. Sawyer showed some decent athleticism there.
Sawyer prevents Cox from standing back up.
Sawyer is looking to pass the guard... He's managed it - he's now in full mount!
Cox takes a big intake of breath there - he's definitely tired.
That's one minute gone in the round.
Cox is trying to stand.
Cox takes a big shot to the head but keeps on trying to improve his position.
Sawyer landing strikes, looking to finish!
The ref warns both fighters not to hold the cage as they work up against the meshing.
Cox has given up his back. Will we see Sawyer going for some submissions?
Sawyer tightening his grip on Cox, looking for the choke.
Fantastic stuff here - a very entertaining period of action, which has drawn cheers from the crowd.
Cox defending nicely against the rear naked choke attempt.
That's two minutes gone in the round.
Sawyer missing with punches from the back.
Cox controlling the position well but he knows he's in a bad position.
Sawyer working for the rear naked choke here. He's got one arm under but Cox is defending well. A couple of punches soften him up though and Sawyer has tightened the hold! This one could be all over! It is! Cox taps out!
Ladies and gentlemen, after 2:50 of round 3, we have a winner by way of Submission (RNC). Buzz Sawyer!
|
|
|
|
|
|
|
|
|
|
|
|
|
|
|
|
|
|
|
|
|
|
|
| S |
C
A |
G |
S |
C
B |
G |
|
S |
C |
G |
|
energy
A | B |
|
hype
A | B |
|
pop
A | B |
|
mgr
A | B |
|
FIGHT
RATING
100% |
|
|
|
|
|
|

