|
|
PBP Commentary |
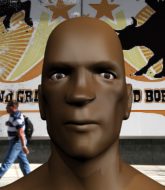
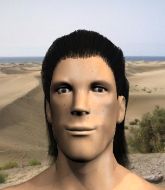
Coming up we have a lightweight MMA rules bout between Shinya Aoki (ranked 0 p4p, 0 weight class) and Bone Crash (ranked 0 p4p, 0 weight class). These two fighters really are very evenly matched on the feet - it will be fascinating to see who can assert themselves in that aspect of the fight.
 |
|
 |
| 176 cm
34
158 lbs
13 - 16 - 0 |
|
178 cm
34
157 lbs
13 - 12 - 0 |
Abu Dhabi Champ
Excellent boxer
Cardio machine |
|
Good wrestler
Great elbows
Good gas tank |
|
| |
|
Ladies and gentlemen. This fight is 2 rounds, in the lightweight division.
Introducing the fighter to my left, fighting out of the red corner.
With a record of
13 - 16 - 0, fighting out of Sydney, Shinya Aoki !
And introducing the fighter to my right, fighting out of the blue corner.
With a record of
13 - 12 - 0, fighting out of New York, Bone Crash!
The judges for this bout are Chris Dean, Donatello Bradman and Ben Hemmingworth.

The bell rings for round one and we are underway!
Aoki avoids a kick to the body.
Crash lands with a kick to the temple. Aoki shrugs as if to say "is that all you've got?"
Crash misses with a head kick.

Aoki clinches with his opponent.
Crash working aggressively here.
Crash stalling in the clinch but Aoki improves position.
Aoki blocks an elbow strike from Crash.
Crash struggles to land a body shot inside as Aoki controls his hands.

Crash manages to break the clinch.
Aoki shoots in looking for a takedown but Crash manages to keep the fight standing, pushing Aoki 's face into the canvas for good measure before circling away.

Aoki closes the distance and scores a nice trip takedown into half guard. Crash did well to prevent Aoki getting side control.
Aoki works his foot free and advances to mount.
We've seen a great period of action over the last minute or so - credit to both fighters for going all out!

Aoki get's back to his feet.

That's one minute gone in the round.
Aoki throws a looping left and ducks down for a takedown. He's got his arms around Crash's waist but Crash gets an underhook and avoids the takedown by throwing Aoki off to one side.
Crash throws a head kick that misses.
Aoki checks the leg kick nicely there.
Aoki attempts a counter takedown but Crash avoids it well and moves away.
Bone Crash is looking to keep the fight on the feet at all costs.
Nice sprawl there from Crash as Aoki shoots in.
Crash unleashes a big counter combination but Aoki bobs and weaves and avoids any damage.
That's three failed takedown attempts in the round for Shinya Aoki . That's going to take a lot out of him.
Crash throws a body kick but he was well out of range there.
A really sloppy takedown attempt there from Aoki .
Crash flicks out a counter leg kick but Aoki steps away.
Crash lands a head kick. Aoki smiles back at him and beckons him forward.
Aoki misses with a takedown attempt - Crash sprawls well and throws a nice strike on the way out which just misses.
Aoki looks to land a combination but Crash avoids it well.
Crash throws an uppercut from half a mile away. Aoki sees it coming and avoids it easily.
Crash tries a head kick but it misses.
Aoki throws a sloppy body shot
and Crash counters with a series of strikes. Aoki will be more careful next time no doubt.
Aoki has a takedown stuffed.
Crash lands with a kick to the ribs.

That's two minutes gone in the round.
Wooooo! Give it up for these two warriors! They are putting on a show!
Aoki keeping a good distance there, avoiding the body shot.
Crash's corner calls for a 1, 2 combination and Crash duly obliges.
Crash bobs and weaves and throws out a fast jab that snaps Aoki 's head backwards.
Crash tries to sprawl but Aoki drives through with a takedown into half guard.
Crash makes his way to full guard. A much better position for Crash.
Crash wants to control here, rather than go for any submissions from the bottom. At least for now.
Aoki tries to free his leg and advance position but Crash is retaining full guard.
The fighters are tangled up in the ropes here. We might need a restart if the fighters can't break free themselves.
Crash looking for a sweep. Not yet Crash, not yet.
Crash bucks up whilst keeping hold of a body lock, managing to reverse the position. Now he's in top in Aoki 's guard.

Aoki is working an open guard here, looking to improve his position. No doubt that will leave him open to counters but at least he's being more offensive.

That's three minutes gone in the round.
Crash postures up and lands some nice ground and pound.
Crash must be cautious of submissions here, given that his opponent has the superior Jiu Jitsu.
Crash sitting in guard here, content to control.
Aoki trying to control the position.
Aoki wants to get back to his feet but he's too absorbed in his own little project and Crash manages to pass to side control.
Aoki is trying to maintain the position but Crash is very close to passing his half guard.

That's four minutes gone in the round.
The crowd are getting on the fighters' backs, as the pace has dropped off in the last minute or so.
Aoki is working for an escape here. He's hooked one of Crash's legs and he's managed to sneak out and take Crash's back!

Aoki is working for the rear naked choke. He has one arm under the chin but Crash has hold of the other arm. A bit of a stalemate here.
Crash trying to control the hands but Aoki breaks the grip.
The fighters are trapped in the ropes so we're going to have a reposition here. The ref calls for a break and repositions the fighters in the center of the ring.
Aoki is working really hard to secure the rear naked choke. Crash defends successfully for a significant amount of time. Both fighters are looking very determined.
Aoki avoiding Crash 's attempts to control his hands.
Crash is keeping busy.

That's five minutes gone in the round.
Aoki is staying calm and holding on to the back position, whilst working on a rear naked choke. Crash is defending well though. Aoki let's go of the attempt for now.
Aoki trying to control.
Crash trying to control but not successfully.
Aoki misses with an elbow to the head.
Aoki scores with some strikes to the side of the head there. Good, points scoring shots.
Crash covering up well under a barage of strikes.

That's six minutes gone in the round.
Aoki is looking to finish the fight by rear naked choke. Crash knows exactly what he's got planned though, so he's defending well. Maybe a few strikes would soften Crash for a finish.
Aoki working for a choke but Crash reverses nicely into Aoki 's guard.
Aoki is working an open guard here, looking to improve his position. No doubt that will leave him open to counters but at least he's being more offensive.
Aoki keeping moving, preventing Crash from controlling successfully.

That's seven minutes gone in the round.
Aoki controls Crash momentarily but Crash frees himself.
Aoki wants to sweep here but Crash controlling him for the moment.
Crash looking to sit in guard and control but Aoki gets the butterfly guard and sweeps. He's now in the guard on the top.

Aoki being controlled here momentarily.
Crash wants to improve his position but instead Aoki has moved into half guard.

That's eight minutes gone in the round.
Crash is trying to get back to full guard.
Crash trying to hold on to Aoki 's head to control him but Aoki postures up.
Aoki is looking to stall here but Crash recovers full guard.
Aoki keeps in close for a moment and lands a decent shot to the side of Crash's head.
Crash seems keen to control rather than go for a submission, at least for now.
Crash looking for a sweep. Not yet Crash, not yet.

That's nine minutes gone in the round.
Aoki gets to his feet - Crash follows without any prompting.
Aoki showing good head movement there, avoiding the strikes from Crash.
Crash throws a body kick but he was well out of range there.
Crash slaps away a takedown attempt from Aoki , before circling back to the center of the mat.
Aoki goes for a high kick. It partially lands.
Aoki misses with a wild combination.
Crash connects with an inside leg kick.
Crash misses with a half-hearted attempt at a head kick.
Aoki shoots in and drives through. Crash sprawls well.
Crash moves out of range of the leg kick from Aoki .
Aoki closes the distance and clinches up, looking for a takedown. He shifts his weight and gets a nice trip into half guard.
And thats the end of the round the fighters go back to their corners.
A close round but Bone Crash will probably get the nod.
The fighters get back to their feet, the hooter sounds and we're back to the action! Let's hear some noise people - this is the final round!

Jab, cross, leg kick. Nice combination by Crash!
Aoki changes levels and drives through with a really nice takedown into side control. Crash looks really pissed at himself for not defending that better.
Aoki stands up and we're back to a striking position.
Aoki shoots in from a long way out. He's driving through with the takedown attempt and he eventually gets it, landing in Crash's guard.
Crash is trying to control the position but Aoki postures up.
Aoki throwing shots from guard but he's hitting more mat than opponent.
Aoki trying to control the position from guard on top but Crash is wriggling around, looking for whatever he can.
Aoki pressing down on his opponent's thigh, looking to pass guard. Crash is keeping the position for now.
Aoki is working hard here to advance position.
Aoki being controlled here momentarily.
That's one minute gone in the round.
Aoki loading up with the ground and pound but he's missing more than he's landing in this flurry.
Aoki throwing elbows and punches but not connecting, as Crash works some decent striking defense from the bottom.
Aoki looking to sit in guard and control but Crash gets the butterfly guard and sweeps. He's now in the guard on the top.
Aoki is working an open guard here, looking to improve his position. No doubt that will leave him open to counters but at least he's being more offensive.
Aoki has an active guard here but Crash has managed to pass into half guard.
That's two minutes gone in the round.
Aoki is trying to control but can't.
Aoki slips a foot under and gets full guard. Nice work.
Shinya Aoki overall seems to be getting the better of the ground position in the fight so far.
Aoki wants to sweep here but Crash controlling him for the moment.
Crash trying to control but Aoki is working from the bottom.
Aoki seems keen to control rather than go for a submission, at least for now.
That's three minutes gone in the round.

The referee has motioned to the fighters to stand back up. He just wasn't happy with the level of activity.
Well, he's not going to score with shots like that. A lazy body kick attempt from Crash.
Crash scores with a jab to the jaw of his opponent.
Crash misses with a half-hearted attempt at a head kick.
Crash pulls out of a head kick attempt.
Aoki looking to shoot here. He's gone for it and he's landed a takedown into side control! Oh, that's bad for Crash!
Aoki stands up and we're back to a striking position.
Aoki has his head slapped from side to side by a 3 punch combination. That must have hurt him.
That's four minutes gone in the round.
Crash connects with a high kick.
Aoki swings for the body but Crash moves out of range.
Crash is loading up here, looking for a big counter of his own.
Aoki stumbles momentarily as he takes a strong leg kick from Crash.
We've seen a great period of action over the last minute or so - credit to both fighters for going all out!
Crash throws a leg kick but Aoki checks it.
Aoki looks for a takedown here. Will he get it? Crash is fending him off so far but Aoki persists. Nope, Crash circles away and we're back to standing.
Aoki fails with a takedown attempt from distance.
Aoki throws a hook to the body but it doesn't connect.
Aoki shoots in and scores a nice double leg takedown into half guard.
Both fighters are absolutely exhausted here.
Crash is trying to maintain the position but Aoki is very close to passing his half guard.
Aoki stalling away here and it's allowed Crash to slip out his trapped foot and regain full guard.
That's five minutes gone in the round.
Aoki drops back looking for a heel hook - he quickly realises he's not going to get it but Crash manages to dive on top of him before he can escape and now Aoki has Crash in his guard.
Crash preventing the sweep.
Crash slips nicely into half guard, despite the strikes coming from Aoki .

Aoki makes some distance and scrambles quickly back to his feet. Nice work!
That's six minutes gone in the round.
Aoki dives in and scores a takedown into Crash's guard.

The fighters are working up against the ropes. Crash manages to wriggle his way back to his feet, so the fighters are now clinched against the ropes.
I was talking to Aoki 's coach per-fight and he was telling me that they'd been working on the clinch in the runup to this fight.
Aoki jumps guard but Crash turns him against the ropes and keeps the fight standing.
That's three failed takedown attempts in the round for Shinya Aoki . That's going to take a lot out of him.
Crash lands an elbow inside that Aoki shrugs off.
Wooooo! Give it up for these two warriors! They are putting on a show!
Crash misses with a hook to the ribs.
Crash comes over the top with an elbow. That landed flush.
Crash scores with a shoulder strike.
Crash wants to stall.
Aoki blocks a body shot from Crash.
With the fighters up against the ropes, Crash throws an elbow but misses.
Crash breaks the clinch and we return to the middle of the mat.
That's seven minutes gone in the round.
Aoki misses with a takedown attempt. He shot from a bit too far out.
Wow, both these guys are really going for it!
Crash throws a head kick that misses.
Well,Aoki is on his way to losing a decision here. Can he use his experience to pull something off in the closing minutes?
Crash lands with a nice combination. Aoki backs away looking to recover.
Aoki shoots in for a takedown - he's clinched up with Crash but Crash pushes him off and we're back to square one.
Aoki moves out of range of the body kick from Crash.
Crash's corner calls for a 1-2. Crash obliges with the 1 part as he scores the single shot and moves back out of range.
Bone Crash seems to be getting the better of the standup.
Crash throws a left and a right that both miss
so Aoki counters with a double leg into guard. Good agility.
Aoki wants to pass the guard but Crash is keeping the position.
Aoki postures up.
Aoki stands up and waves to Crash to follow him.
Shinya Aoki has stepped it up - he knows he needs a finish here!
That's eight minutes gone in the round.
Crash throws a right hand that Aoki ducks under and follows up with a left that Aoki also avoids with ease.
A head kick misses from Crash.
Fantastic stuff here - a very entertaining period of action, which has drawn cheers from the crowd.
Aoki swings and misses with a hook to the body.
Shinya Aoki is looking to throw some combinations by the looks of things.
Crash scores with a punch to the head.
Aoki will have to do better than that with his takedown attempts.
Aoki misses with a takedown attempt. He shot from a bit too far out.
Aoki with a poor takedown
and Crash counters with a left and a right that stings Aoki .
Aoki doesn't succeed with the takedown
and Crash counters with a nice leg kick.
Aoki takes a thudding leg kick, right into the meat of the thigh.
That's a knee to de groin and it's over and out! Aoki crumples to the ground after an illegal strike from Crash - the referee stops the clock and Aoki gets 5 minutes to recover from that one. "I'm sorry" says Crash. Aoki manages to get back to his feet and the fight resumes.
Crash misses with a head kick.
Nice uppercut there from Crash.
Crash lands a nice looking kick to the body. Aoki takes a step back to recover.
Crash throws a head kick that misses.
That's nine minutes gone in the round.
Crash throws a head kick that misses and slips in the process. He scrambles back to his feet and the fighters circle.
Aoki thuds a left hand into Crash's body.
Bone Crash is fighting for a decision here - he's started to take the cautious approach.
Aoki fails miserably with a takedown attempt.
Crash has been the more effective fighter overall so far.
Aoki misses with a head kick.
Crash throws a leg kick which misses Aoki 's front leg but catches the back leg as Aoki tries to avoid it.
Aoki looks frustrated there after his takedown attempt is stuffed easily.
Aoki throws a wild combination but nothing lands.
Crash stuffs the takedown attempt from Aoki . Aoki gets slowly back to his feet.
Aoki tries to check a leg kick but that clearly hurt him.
Crash throws a nice hook to the body that draws an oooh from the crowd.
Aoki connects with a hook to the side of his opponent's head.
And that's the end of the fight!
Bone Crash comfortably won the final round on my scorecard.
I think Crash has won this one but let's see whether the judges agree with me. Over to the ring announcer for the scorecards.
Ladies and gentlemen, after 2 rounds of action, we go to the scorecards for a decision.
Judge Chris Dean scores the fight for Bone Crash!
Judge Donatello Bradman scores the fight for Bone Crash!
Judge Ben Hemmingworth scores the fight for Bone Crash!
Bone Crash wins by unanimous decision!
|
|
|
|
|
|
|
|
|
|
|
|
|
|
|
|
|
|
|
|
|
|
|
| S |
C
A |
G |
S |
C
B |
G |
|
S |
C |
G |
|
energy
A | B |
|
hype
A | B |
|
pop
A | B |
|
mgr
A | B |
|
FIGHT
RATING
50% |
|
|
|
|
|
|
